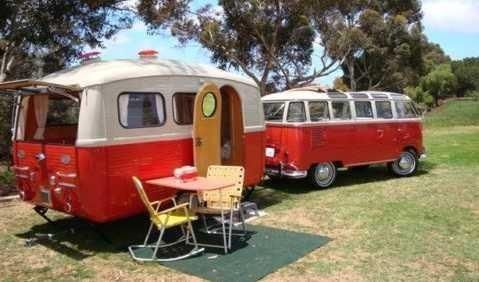
If you’re up for a glimpse into the tangled workings of my mind, I thought I’d share the convoluted way I got to my final design for Naj Haus. It all started last summer at a music festival. Camping next to a woman who had a fiberglass “egg” trailer similar to the one above, I found myself obsessed with the idea of getting one. At first it was just for camping and tootling around, but I was also looking ahead to splitting my time between Oregon and California and the idea of living in one started to grow. Turns out if you get one that is about 17′ they come with a tiny kitchen and bathroom. My first serious thoughts of tiny living started to sprout.
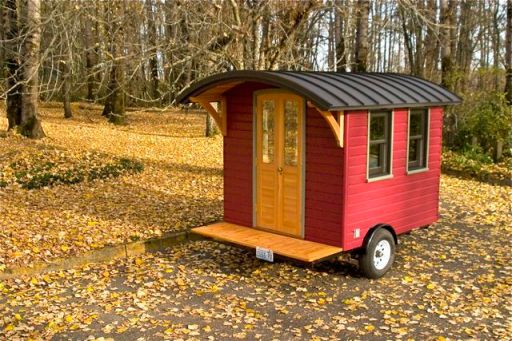
It was while learning everything I could about fiberglass trailers that I stumbled upon the video of Dee Williams talking about her tiny house. That led me to Portland Alternative Dwellings where I was completely charmed by PAD’s Don Vardo.
Designed by Dee and built by Katy Anderson, it’s 8 feet of beautiful woodworking; a short but sweet nod to the traditional rustic vardo but with a modern twist. The curved rafters totally got to me.
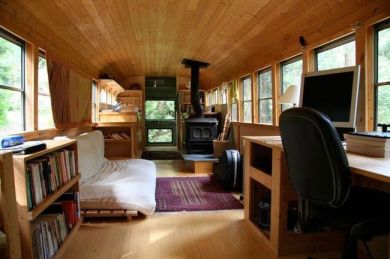
About the same time I came across this interior of a renovated school bus. I loved the rows of windows and again, the curved wood ceiling.
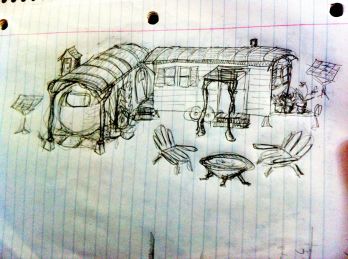
I started to play with the idea of a split-dwelling compound, trying to get the best of both worlds. I could have the trailer with its built-in kitchen and bathroom, but have a small vardo for my living room and art studio. I could choose to sleep in either. When I wanted to spend time in another location, I could just hook up the trailer and hit the road, everything already packed.
The 8′ Don Vardo seemed pretty small so I bought the 12′ Don Vardo plans. I started working with SketchUp, a free 3D modeling program that lets you design something and move around inside it. Even though I was only going to have a seating area and an art space, even 12′ seemed small at the time. I had yet to start my own evolution into designing sparefully. 16′ seemed about right for what is essentially half of my life.
As I researched more about living in trailers, I began to get a niggling feeling. While it can be done, they’re not really made for full-time use. The systems break down and they’re not well insulated. You can renovate them to suit your needs, but I was also having second thoughts about the materials used in them and starting to read up on more green options.
I was also pursuing the whole tiny house movement and the more I learned, the more it appealed to me. I realized how important a “stick-built” house was to me, to be surrounded by wood instead of plastic. I liked the challenge of being able to design and build my own house from scratch, using safe, high-quality materials and knowing every detail about its construction. I abandoned the split-dwelling compound idea and decided to focus solely on a tiny house (though I still see building a teardrop trailer in my future!).
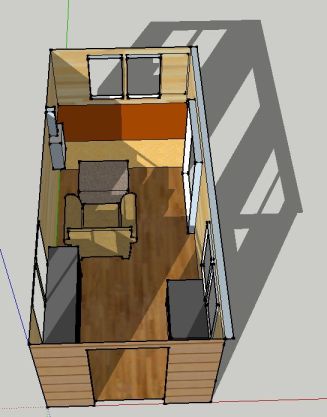
Still hooked on the vardo idea, but now thinking that it would need to be expanded to include a kitchen and bathroom, I made the classic newbie tiny houser move of thinking it had to be really big. Going back to SketchUp, I came up with a plan for 24′ vardo. Since it looked like a giant salami sandwich, I added a cross transect to separate the kitchen/entry way from the living room. Though probably tricky to build, I rather liked the way the arched ceilings crossed inside, and having semi-circular windows in the transect would add nice lighting.
I hung with this idea for awhile, but the niggling feeling was back. I just wasn’t sure I could live with having my sleeping area be in my living room (see my post on roofs and beds in tiny houses). It also still felt like a salami sandwich despite my attempts to break it up. I’d avoided the idea of a loft because of both future aging concerns and worried I’d feel like I was trapped in a coffin, but I did make one feeble attempt of adding one to the vardo. Yeah, that didn’t work. Now I’d be known as the woman who lived in a shoe.
So what to do? About this time, PAD offered a design workshop so I jumped on it (note: they’re offering it again this month and in April, see here for more information). That turned out to be a huge turning point in my tiny house growth. Not only did I learn a lot at the workshop, I got to know all the the fab people at PAD and that led to an overnight stay in a tiny house, a tour of tiny houses in Portland, and a tiny houser potluck. It was great to tap into a whole community with a similar passion, and it shaped my future plans for what I want in a parking/living situation.
In terms of the evolution of my design, two important things happened on that trip. In the workshop, Dee made the comment that vardos tend to feel more mobile, like travel trailers, while the gable roof-style tiny houses tend to represent most people’s idea of home. That was it!! I realized that this was the root of my niggling feeling about my vardo design. Despite starting off with the idea of trailer living, I realized I needed something that was more in line with my idea of home.
The other significant thing was having a chance to not only step inside my first tiny house, but to spend the night in one. I was able to rent Gina’s 16′ tiny house, another designed and built by PAD. Every budding tiny houser should stay in a tiny house if they can. That tiny space and I looked each other right in the eye and I thought, I can so totally live in this.
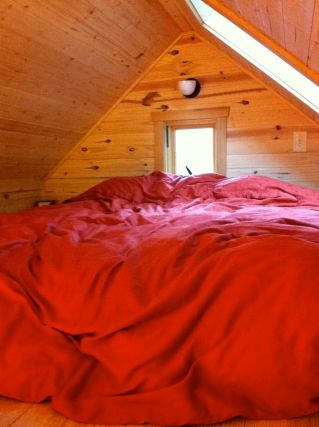
Besides experiencing the overall size, it gave me a chance to try out the loft. Not claustrophobic at all! The skylight definitely helped but there were a couple other design innovations that made it seem very roomy. [Warning: tiny house geek speak ahead…]
Unlike many tiny houses that stick to the 8.5′ road width limitation, this one is 10′ wide (at the eaves). It requires a special permit to move it but it’s not difficult to get. In addition to the extra width, it has 10:12 pitched roof as opposed to the steeper 12:12 pitch roof many use. This means you can have taller walls. If you look closely, you can see that where the ceiling joins the wall is about 8 inches off the loft floor. Typically with a 12:12 pitch the ceiling would go all the way down to the loft floor. The added wall height and less steep roof really open up the space.
We are now starting to close in on my final design. After looking at other roof styles, I made the leap to a gable roof with a loft. In thinking about layout, I had two requirements. I wanted the couch to be across one end rather than along the side wall, and I didn’t want any kind of hallway. Problem is, many of the designs out there have the bathroom across from the kitchen, creating a narrow area in between. I want a much more open space, which pretty much means having the bathroom along one end. With both ends taken up, that leaves the kitchen and the entrance door along the side walls.
I couldn’t find any examples of tiny houses that I liked with this kind of floor plan until I discovered the Gold Thread Tiny House. Aldo’s little gem he built last year was just what I had been thinking about.

Gold Thread Tiny House: bathroom along end wall, loft above with dormer windows (during construction).
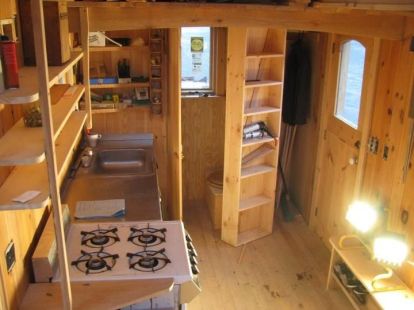
Gold Thread Tiny House (nearing end of construction): kitchen along side wall, bathroom and closet along end wall (showing open closet door with built-in shelves).
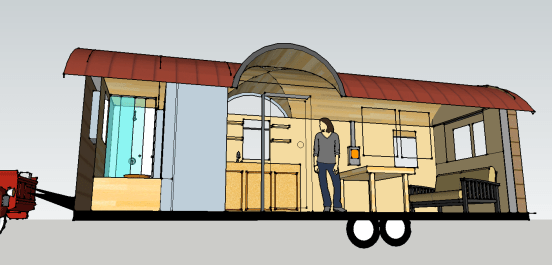
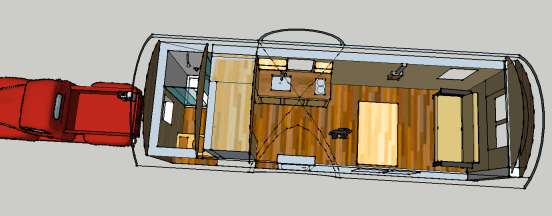
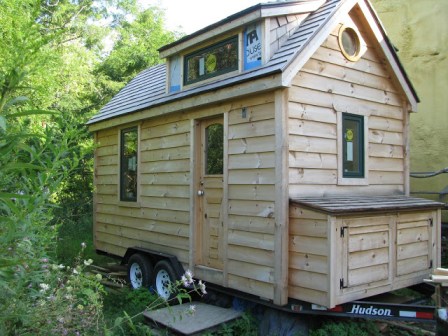
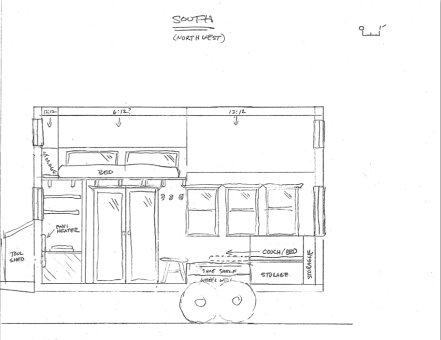
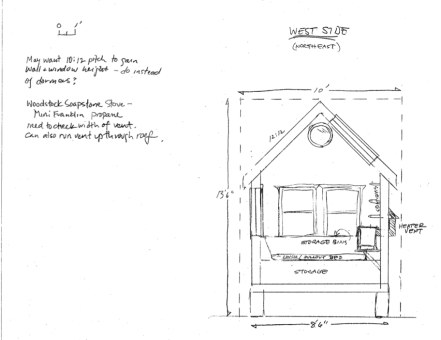
Aldo was wonderful about answering questions I had about his design. I was now inspired to go back to the drawing board. I’ve made a few minor changes but the conceptual designs below are pretty similar to Gold Thread (including blatantly stealing the sweet tiny round window idea!).
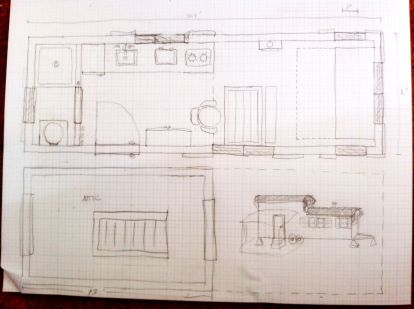
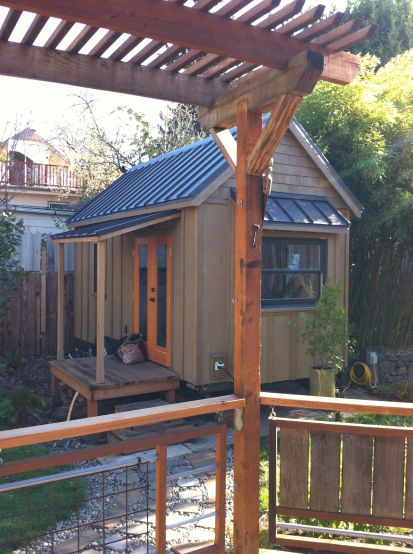
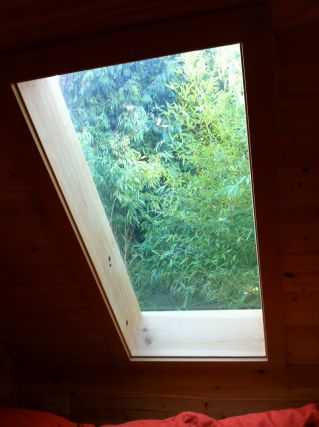
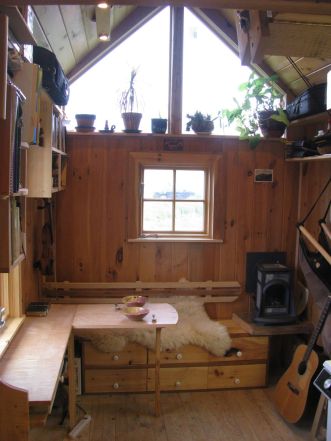
I’m still working on the final drawings but these are pretty close. They are for an 18′ house but, due to yet one more niggling feeling, I’ve since decided to shrink it down to 16′ (the same size I thought could only hold half my life earlier!). I cut 2′ out right through the middle and will probably need to replace the french doors with a regular door. Pretty sure I will stick with the dormers in the loft but I did put a skylight above the couch, which will also convert to a pullout bed.
So there you have it. Not an easy process but a worthwhile one. Having done so much exploration and groundwork, I now feel really good about my design (though I still want to build a vardo to use as an art studio one day!). Harking back to the Isak Dinesen quote in my post on designing sparefully, I can now hear the silence speaking. It feels right.
Lessons learned:
- Do lots of research, think hard about your needs, and allow yourself time to change your mind and direction over and over (and over…).
- Try on a tiny house if you can.
- Pay attention to those niggling feelings!! You’ll know when you’ve got it right.
Next steps are to draw up the framing plans and start sourcing materials. Since I’m not experienced in this, I’ve been learning a lot about building codes and framing practices (see Resources), as well as studying other tiny house plans. I will have PAD review my plans for safety and structural integrity, since I’ve been impressed with their expertise. I’d highly recommend anyone doing their own plans to seek professional review!







So cool, and so impressive. When the time comes for me to start building, you can be sure I’ll refer to your blog.
Thanks, Ash! It’s definitely been an incredible learning process.
Great blog! I would definitely do a side door if I could (I ended up “remodeling” an already- started tiny house – while a learning process, I wouldn’t recommend that route! : ) I am so happy I decided to have dormers built into my loft – it makes a huge difference! I had a chance to spend considerable time in the Fencl this summer and totally agree with your comment about not wanting interior walls – the layout of the bathroom to the side of the kitchen. I too like the bathroom in the back or one of the ends, not on the side. Good luck on your project and let me know if you’re ever in DC to come by the Boneyard Studios project!
Hi Lee, glad you like it. I’ve been following all of you Boneyarders closely – it’s exciting what you’re doing. Would love to come visit sometime. And good to know you love your dormers :). I haven’t actually been in a tiny house with them but from pictures they do seem to add a lot. Best of luck to you too!
Best of luck with your project. Fun to see our bus here!
I love your bus, Katy! It was definitely one of my sources of inspiration, and even though I’ve strayed into gable-roof land, I hope to capture some of the same look and feel of yours. Best of luck with all of your endeavors too.
So helpful to see the evolution of your design-process thinking so clearly laid out here, Kate. Great for those of us still in more amorphous stages of identifying the how of the what. 😉
Getting a longer floor plan for seniors and disabled not to have to climb up and down is my issue. I found a tiny home yesterday on tiny house with the roll out pantry/utility segment and the separating of living area so major in use. I would love to see you utilize that Idea in a model with the door on the side and a bedroom added to the end as what you have here has so much clarity. For seniors the bed would have to be accessible from both sides.
As someone who is not yet a senior but getting more and more creaky, I do plan on having my couch convert to a bed for when I am not able to use the loft. I’m also playing with some easier ways to get in and out of the loft besides the typical ladder approach. I think this design will work well for me for however long I choose to live in my house, but I do see more and more models out there with bedrooms on the main floor. I hope you can find or design a plan that works well for you!