

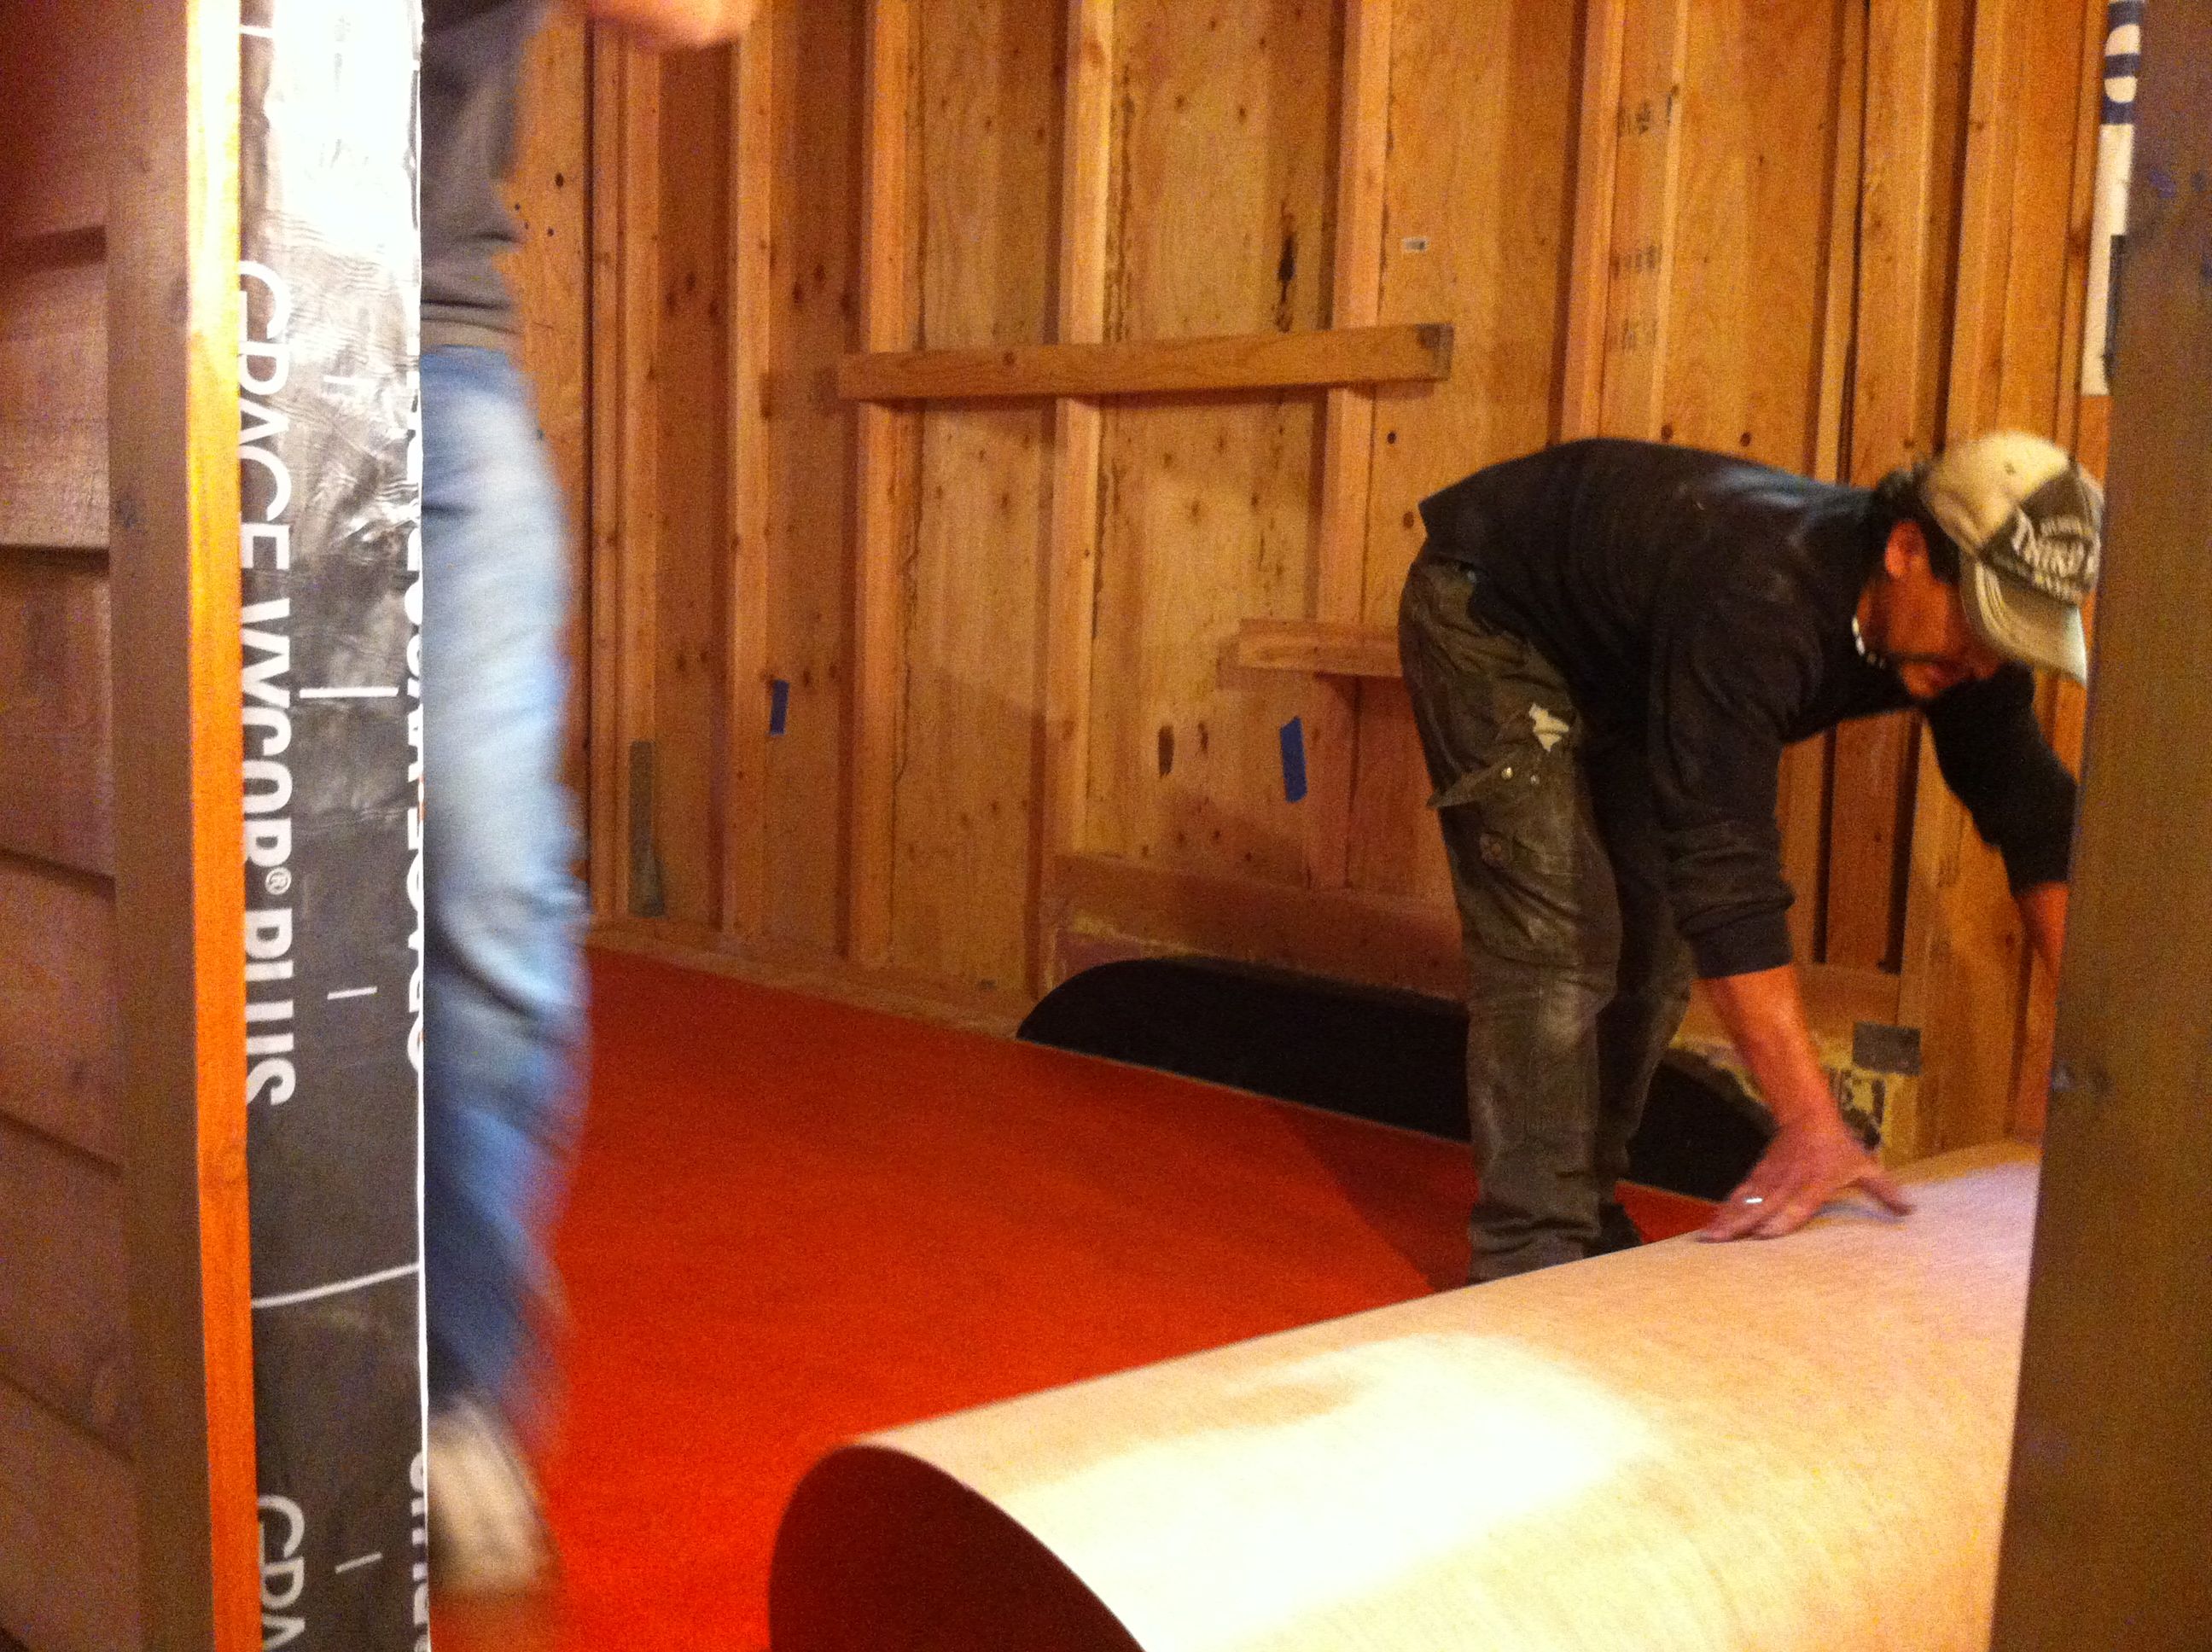
The master (Ben Kelso) at work.
This was originally part of a larger post on color and ambiance, but since that was getting too unwieldy, I pulled this more technical section out as a separate piece. If you’re considering marmoleum as a flooring option, read on…
______________________________
I’ve read lots of discussion about whether to put your floor in early so that you don’t need to work around interior walls and built-ins or put it in later so that there’s less risk of it getting damaged. I decided to start with my flooring and chose marmoleum. As much as I love hardwood floors, I was concerned about the excess weight. Also, in a tiny house, you are constantly walking back and forth over the same areas so there is more wear-and-tear than in a bigger house. Marmoleum is a very tough, natural product that will be good for wet Northwest winters and future pets, plus it comes in super fantastic colors. Here are some key highlights for the health- and environmentally-conscious:
- USDA-certified bio-based product and all natural ingredients (linseed oil, limestone, tree rosin, wood flour, natural mineral pigments and jute)
- SMART-certified
- Allergy and Asthma Friendly-certified, and also antibacterial (it’s used in hospitals). See here for more on health aspects of marmoleum.
- Warranted for 25 years residential and 5 years commercial
- Has the lowest environmental footprint of any flooring
- Carries the most independent Life Cycle Assessment (LCA)-based environmental labels and certifications
Also, the adhesive, Sustain 885, is non-toxic, zero-VOC and won’t off-gas; it’s safe for those with chemical sensitivities. Read this buyers guide for more information about marmoleum types and installation.
If you’re going the sheet route, it is 79″ wide which fit seamlessly between my wheel wells (tip: a lot of flooring places sell discounted remnants that are often long enough for a tiny house). Because my house extends wider than the wheel wells, I was faced with adding additional pieces on either side, which meant dealing with seams along the edges (it also gives you the opportunity to add more color!). This can get tricky so I decided to hire someone to do the installation. However, I was able to save a lot of money by doing all the prep work myself.
The floor is the first thing you build in your tiny house and you may recall that I was a bit stressed installing mine. It’s also when you’re the least experienced (if you’re a newbie builder). Consequently, I’d left larger gaps than were needed in some places and in other places the plywood edges were not quite level where they joined. I also used a boatload of screws, all of which had to be checked that the heads were below surface and the holes filled in (but, hey, my floor doesn’t squeak!). To make matters worse, the plywood I used was full of unfilled knots and defects and undulating surfaces. (Lesson: know what sort of prep your future flooring will require and make sure your subfloor is as good as it can be at the time you construct it. You might not be thinking that far out at the time, but it will save you grief later!)

First I tried to even things out with my orbital sander but it just wasn’t powerful enough.

I then rented a belt sander that about took my arms off when I started it up. I flew along behind it trying to hold on but it definitely did the job. Notice the amount of sawdust it produced with just one pass. I had a piece of marmoleum which was useful to put over areas to check whether they were consistently flat.
A word about safety: Up to this point I had only used the paper masks when sawing and sanding, but the more I read that even untreated wood dust can be a carcinogen, I began to think about getting a respirator. After some research, I bought one recommended by The Wood Whisperer. I’ve been really happy with both it and the filters. Despite looking cumbersome, it’s more comfortable than the paper masks and doesn’t fog up my glasses. Since I was sanding the spackle and the chemical binders in the plywood, both of which created a fine dust you wouldn’t want in your lungs, it was well worth it.

Ready for take-off!

Shop vac/dust collector. It helped immensely to hold this near the sander as I went along. There was still a lot of dust but less than if I hadn’t used it.

All sanded and as flat as it’s going to get.

I used vinyl spackle to fill the zillion seams, screw holes and plywood defects. It felt kind of homey with the lights and my little 400W heater. Hopefully the spackle will hold up over time and moving. Another approach would be to use fiberglass drywall tape as long as it doesn’t create any ridges. A reader also suggested using Thinset and ironing the marmoleum to the floor with adhesive, so ask around to determine the best option.

I then went back and sanded down the spackle so everything was smooth and flat again. The orbital sander was perfect for this.

The marmoleum has to be all warm and relaxed so that it lies flat and any bends get worked out. I had a massive fire raging in the woodstove behind the wall.
I feel really fortunate that once again I got to work with someone who brought good energy to my house. Ben Kelso of Kelso Construction does a wide-range of construction work, including installing marmoleum. I was impressed with how conscientious and careful he was. He was great about advising me on the prep work and letting me take pictures and ask a million questions while he worked. He even took pictures for a part of the process I had to miss since I was picking a friend up at the airport (his are the good ones – my old iPhone doesn’t handle low light very well!)
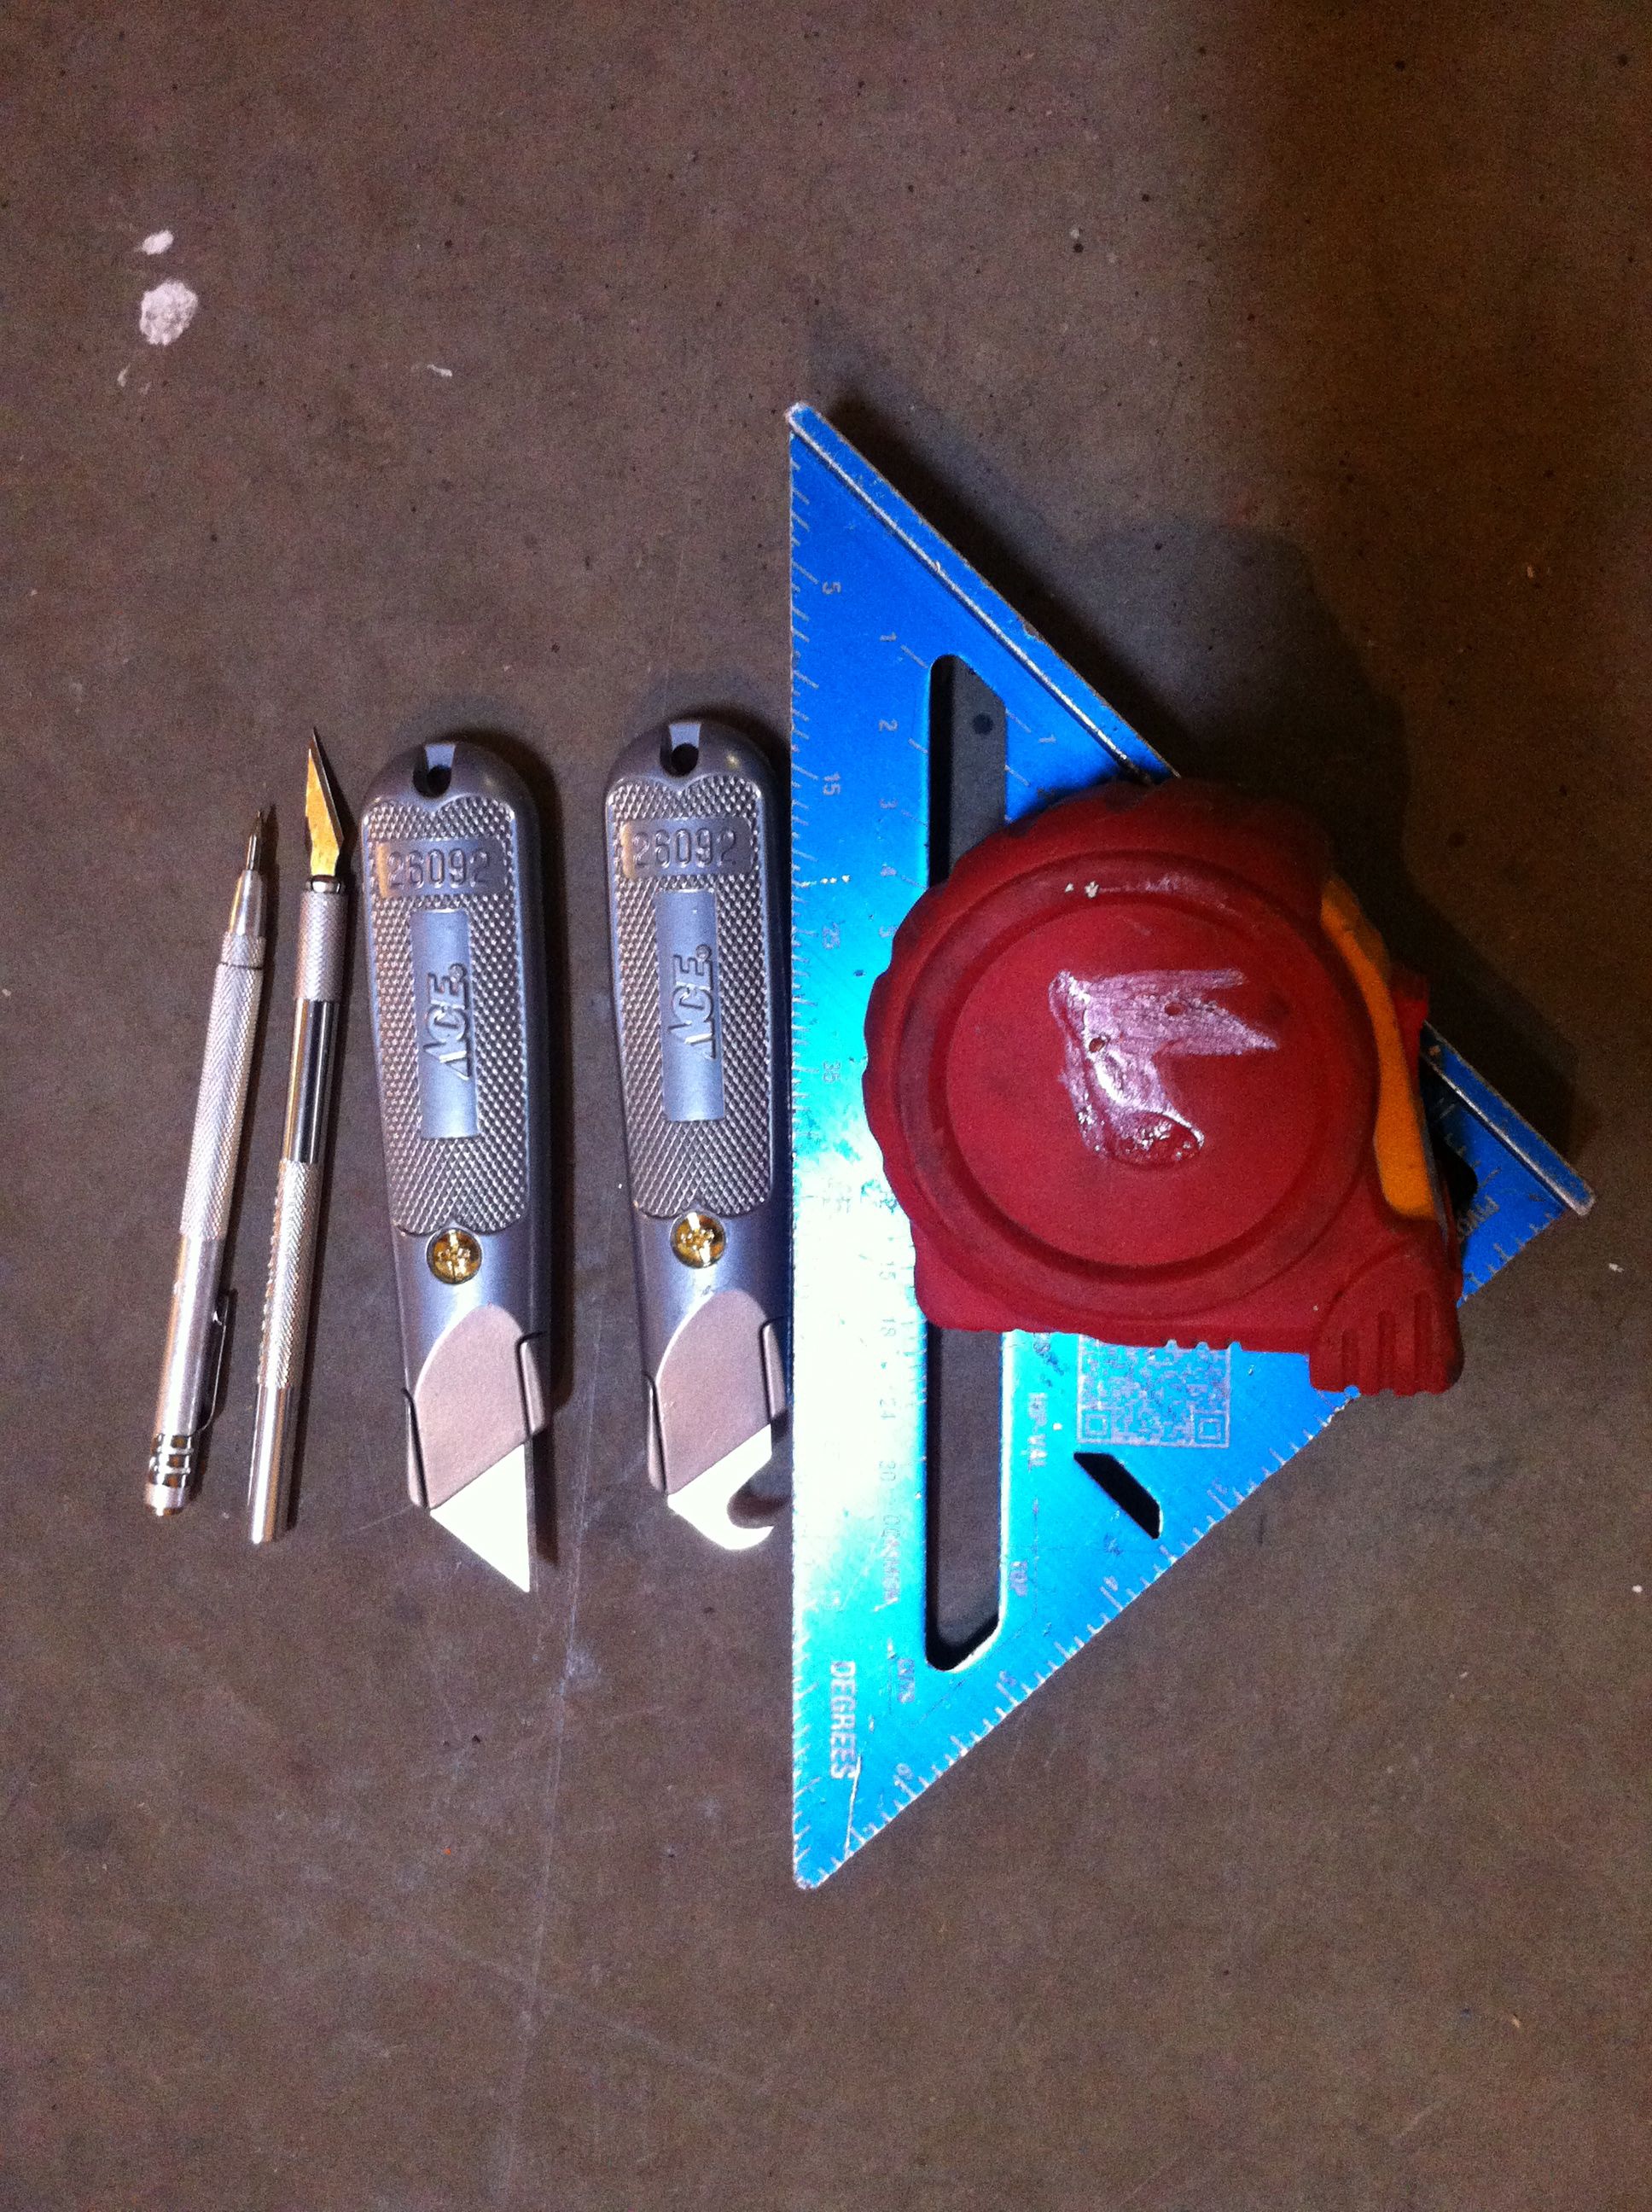
Some of the scribing, cutting and measuring tools used.

We rented the 100 lb. roller that’s required. Make sure that it’s perfectly clean and smooth, and that there isn’t dirt and debris up in the axle that might fall out and cause problems.

I had already vacuumed it twice and wiped it down, but Antonio swept it a couple more times. Like the princess and the pea, any little piece of dirt or wood can make an annoying bump under the marmoleum.

More tools of the trade – a trowel and a small hand roller.

Ben applying the glue. It was amazing watching him in action: fast, effortless sweeps like a painter on a large canvas. The teeth on the edge of the trowel help spread the glue to a consistent thickness.

Adding more glue. You have to move quickly, but Ben was very calm and collected.

Waiting for it to get to the right tackiness. It had sort of a shimmery quality that would change from light to dark as you moved around. When I asked how long it would take, Ben replied sagely, “The glue will tell you.”

The main piece trussed up like a Thanksgiving turkey. It has already been cut to size. You want to cut it about 1/2″ short since it spreads out when you go over it with the roller.

It might be lighter than a hardwood floor, but it’s still incredibly heavy.

They had about 6 inches to walk along the sides that wasn’t covered in glue.

Precariously climbing over the wheel wells with their heavy load. Right about now I was very glad I had decided not to attempt this myself!
Rolling it out.

Carefully, but quickly, lifting and pulling it until it hit the placement marks. This was an intense moment until everything lined up.

Antonio with the 100 lb. roller.

He got this great side-to-side motion going, swapping it between hands. It was like watching a tango.

More rolling. It takes a lot.

They then cleaned up the excess glue along the edges so that the adjoining pieces would lie flat. It’s good to get the main piece down and let it set for at least 4 hours so that it won’t budge while you’re fitting the adjoining pieces up against it. (This and the next few pics are the ones Ben took!)

Using a scribe to mark the edge to cut.

You need to cut the edge at a 45 degree angle that then slightly overlaps the piece it’s going up against. This helps ensure a clean join with minimal space between. This is where it helps to be an expert since screwing up can mean a whole piece is ruined. You have to work slowly, cutting through both the marmoleum and the woven jute layer on the back.

Fitting the pieces prior to gluing and rolling. Make sure you have something to clean up any excess glue.

Even with careful attention, you often have tiny gaps that need filling. A great trick is to sand some marmoleum scraps and mix the dust with some glue. Use a putty knife to put the pigmented mixture in any gaps. It’s works incredibly well.

Finished floor! There will be insulated boxes built out over the wheel wells that will cover the gaps. Sadly a lot of the red will be covered by cabinets and built-ins, though it’s quite visible in the doorway. I had debated putting some stripes down the middle but decided that would be too busy and now that I know how tricky seams are, I’m glad I bagged that idea. Now to lay down the hardboard I got to protect it from all the construction to come…

Hey girl, I love your new floor & color! It’s cozy, warm hearth tone. I’m looking for something to replace the carpet in my apartment and I’m thinking this would be great. Do you know how it would do over cement? Nice to hear its good for pets. Lastly do you mind sharing what it costs with installation? I’m reading $2.99 a foot on line.
If you come down this way give me a ring, miss ya!
Happy Holidays!
Xo nancy
After further investigation it looks like it will be closer to $6 sq’. I read nothing but possitive things about it.
Nance – good to hear from you! It’s funny you used the word ‘hearth’ in your comment since my other post on color talks about that too. If you follow the buyers guide link in my post, it discusses what to be aware of when putting it over cement. Regarding pets, I was thinking in terms of wet dogs – turns out you do have to be a little careful of stains with regards to frequent pet accidents, as well as any acidic foods landing on it. I imagine that is only if left for a period of time. Here’s a good article on some cons to be aware of: http://hubpages.com/hub/Pros-and-Cons-of-Marmoleum-Flooring.
Regarding price, I found prices in the $3-4/sq.ft. range for just the marmoleum (cheaper if you can find a remnant big enough and the color you want). The glue is about $47/gallon (which covers supposedly 125 sq. ft. but mine ran short so unfortunately I had to buy a second one). Then you have to figure in the installation costs if you hire someone and whether they do the prep work. I would call an installer and they can give you the total price. Supposedly the click tiles, though more expensive than the sheet rolls, are cheaper in the long run because they don’t need glue and you can install them yourself. They didn’t have the color I wanted so I didn’t pursue this, but it might be a good option for on top of cement. I’m sure there are cheaper routes to go, but for my small space I really liked how non-toxic and long-lasting it is, not to mention the yummy colors.
Good luck and I’ll definitely look you up whenever I get down there next. Be well!!!
With there being around 6″ of walking space on each side does that make the internal floor width around 90″ pre internal walls? What do you figure your floor space width will be once the walls go up? I am working on a floor plan for a build on a 20′ iron eagle PAD trailer, and would love to know what kind of floor dimensions I have to work with.
Assuming you’re using 2×4 construction and putting your bottom plates along the edges of your trailer, you just have to take your trailer dimensions and subtract 3.5″ for your bottom plates on each side (total 7″) plus whatever the width (x2) of the interior wall paneling you intend to use. Don’t forget to factor in building the insulated boxes around the wheel wells. You want 2-3″ of insulation all around them plus the thickness of the boxes themselves.
Thank you for the update. The trailer claims to be 100″ wide, I am planning to work with 2×4 framing, and 1/2″ interior sheeting. The number I get is 93″ interior width (not counting the insulated wheel box). Does exterior sheeting factor in at all, or is the framing’s bottom plate itself up to the edge of the trailer extension wings? Thanks a ton!
The way I was taught to do it (there may be other ways) was to put the bottom plate right up to the edge of the trailer and then extend your sheathing down about a 1/4″ past the join where the plate meets the trailer. This helps protect that seam from moisture and provides a drip edge. You can also caulk the seam before you put the sheathing up. I also put some Z flashing along the bottom of my sheathing to protect it.
Doh! Forgive me…93″ minus 1″ of interior sheeting, so 92″.
hi there, just wanted to let you know I’m about to go through this process in my own tiny house. I patched the plywood substrate yesterday. gonna give the glue-down and rolling a go! wish me luck! thank you for your detailed instructions. questions : 1) how long did Antonio use the 100 lb roller? Above you say “it takes a lot” and elsewhere online I am not seeing an exact amount….i want to be sure not to over-do it. 2) how important would you say it was it for the surface of the floor to be *perfectly* smooth after the spackle? i am using a DAP floor patching product. It has a naturally course nature, and sanding it down is only so effective. it’s verrry close to completely smooth but not 100%. many thanks for your time writing this post. so helpful.
The purpose of the roller is to smooth out the glue evenly and squeeze out any air bubbles, making sure the marmoleum is securely adhered to the subfloor. I’m not an expert but from watching it being done, I don’t think you have to worry about overdoing it. Antonio rolled over the floor in long, sweeping motions, going over the whole thing multiple times. He kept it up for at least 20 minutes, maybe more. The key part is to lay down the glue evenly with the right size trowel, letting the glue dry until it is tacky, and then getting the marmoleum down and in place without disturbing the glue much. If all that goes well, the rolling is just to really seal it down. (It’s also good to do it in socks so any hard edge on your shoes doesn’t indent the surface before it’s dry.)
Regarding your smoothness question, what I found helpful was to have a square of marmoleum to press flat over areas I was sanding and seeing if I could feel any unevenness through it. It doesn’t need to be marble smooth but if you have a dip where the sparkle or patching product shrinks in a seam, you might see that over time (but the glue might fill it in too). Best advice is to do the best you can until it drives you nuts and then just go with what you have. There are always area rugs!
Right after mine was installed, I put down sheets of hardboard to protect it and duct taped the seams so that grit wouldn’t get under it and be pressed into the marmoleum. This was well worth the $30 or so since I’ve been scraping ladders, dropping tools, etc and haven’t had to worry about damaging the floor.
Good luck!
Wow! Such a generous reply. Thank you so much. I just finished the rolling and feel pretty satisfied with how it turned out. A stressful time-sensetive process! —especially solo. Now just crossing my fingers it sets up as it should. I am sending you and your house gobs of good wishes and making a mental note to respond to the next person who asks me a tiny house process question as generously as you did here for me. Cheers!
Belatedly getting back to you. Congrats on getting it done!
hey! replied to this a few days ago but it looks like it didn’t post. just wanted to thank you so much for the generous reply. It was so helpful to me. finished the process yesterday and now I’m just keeping the temp at 68 degrees (as specified by the adhesive & forbo people) until it fully cures. so far so good. a discerning eye can see some very subtle lumpy character here and there, but what the hell. It sure felt good to learn how to do the process on my own and your blog gave me some much needed courage and clarity on the process. making a mental note to be generous with my own replies when I am asked for advice by perfect strangers. thank yoU! sending you and your home good thoughts, laurel
Congratulations, Laurel – that’s awesome that you did it all yourself! Glad I could be of some help. Good luck with the rest of your build.
PS I want to share two things. 1) I had affectionately been referring to my house as “Miles’ house”—a house for my beloved 13 year old cat. Unfortunately he passed this fall before its completion. I like to think he and Naj can be tiny house comrades in the after life. 2) Dee Williams is a friend of sorts of mine (we know one another as I used to live in Olympia and we worked on a few projects together here and there.) So happy you know her Big Tiny book! If you find yourself in Fort Collins, CO please feel free to pay me a visit on our farm here.
I’m sorry to hear about Miles – I know how much that must hurt. I love the idea of them being tiny house comrades…a great image, thanks! Yeah, Dee’s a good pal. That’s great you’ve worked on stuff together. Not sure when I’ll get to CO but thanks for the invite!