
Slow but sure progress…
I just completed my second stint of building my tiny house and it’s very exciting to see it start to take shape. (See the Blood, Sweat & Tears and Doing Justice to Complexity posts for how the first stint went).
As most of you know, I’m currently living in Berkeley but am building at my parents’ place in Oregon. This means I am building in concentrated chunks of time, with one to two months off in between. There are pros and cons to this approach. There’s a lot of pressure to get as much done as I can while I’m there, so it can be exhausting building day after day. Despite this, I hate to leave it for so long when I’m done. On the flip side, it forces me to take a break and gives me time to step back and rethink things, and to be better prepared for the next stint. I do wish I lived closer, though.
Here are the last few weeks in pictures:
Arrival

No, I didn’t travel by balloon! As I left the Bay Area, I came across these puppies slowly floating past me. Quite the opposite of the loud, fast commuter trains and honking cars I’d been experiencing in the city. Seemed like a good sign.

Got to my parents’ house and they were overflowing with bounty from their CSA (community-supported agriculture) weekly food box and tomatoes from a friend’s garden. I always eat really well there. Mom is a fantastic cook!

My uncle and aunt are building a house nearby and two days before a worker had found a kitten in the grass, all wet with the placenta still attached. No sign of the mother anywhere. They took it in and have been feeding it with eyedroppers and syringes. They named him Scout to go with their other black and white cat, Atticus.

Scout’s a wiggly little thing! His eyes were still closed at that point. This was about a month ago; he’s continuing to do well.

The night before had been a blue moon, known as the Sturgeon Moon. It was still pretty spectacular.
Finished the walls
This is where I had left off after the first building stint.
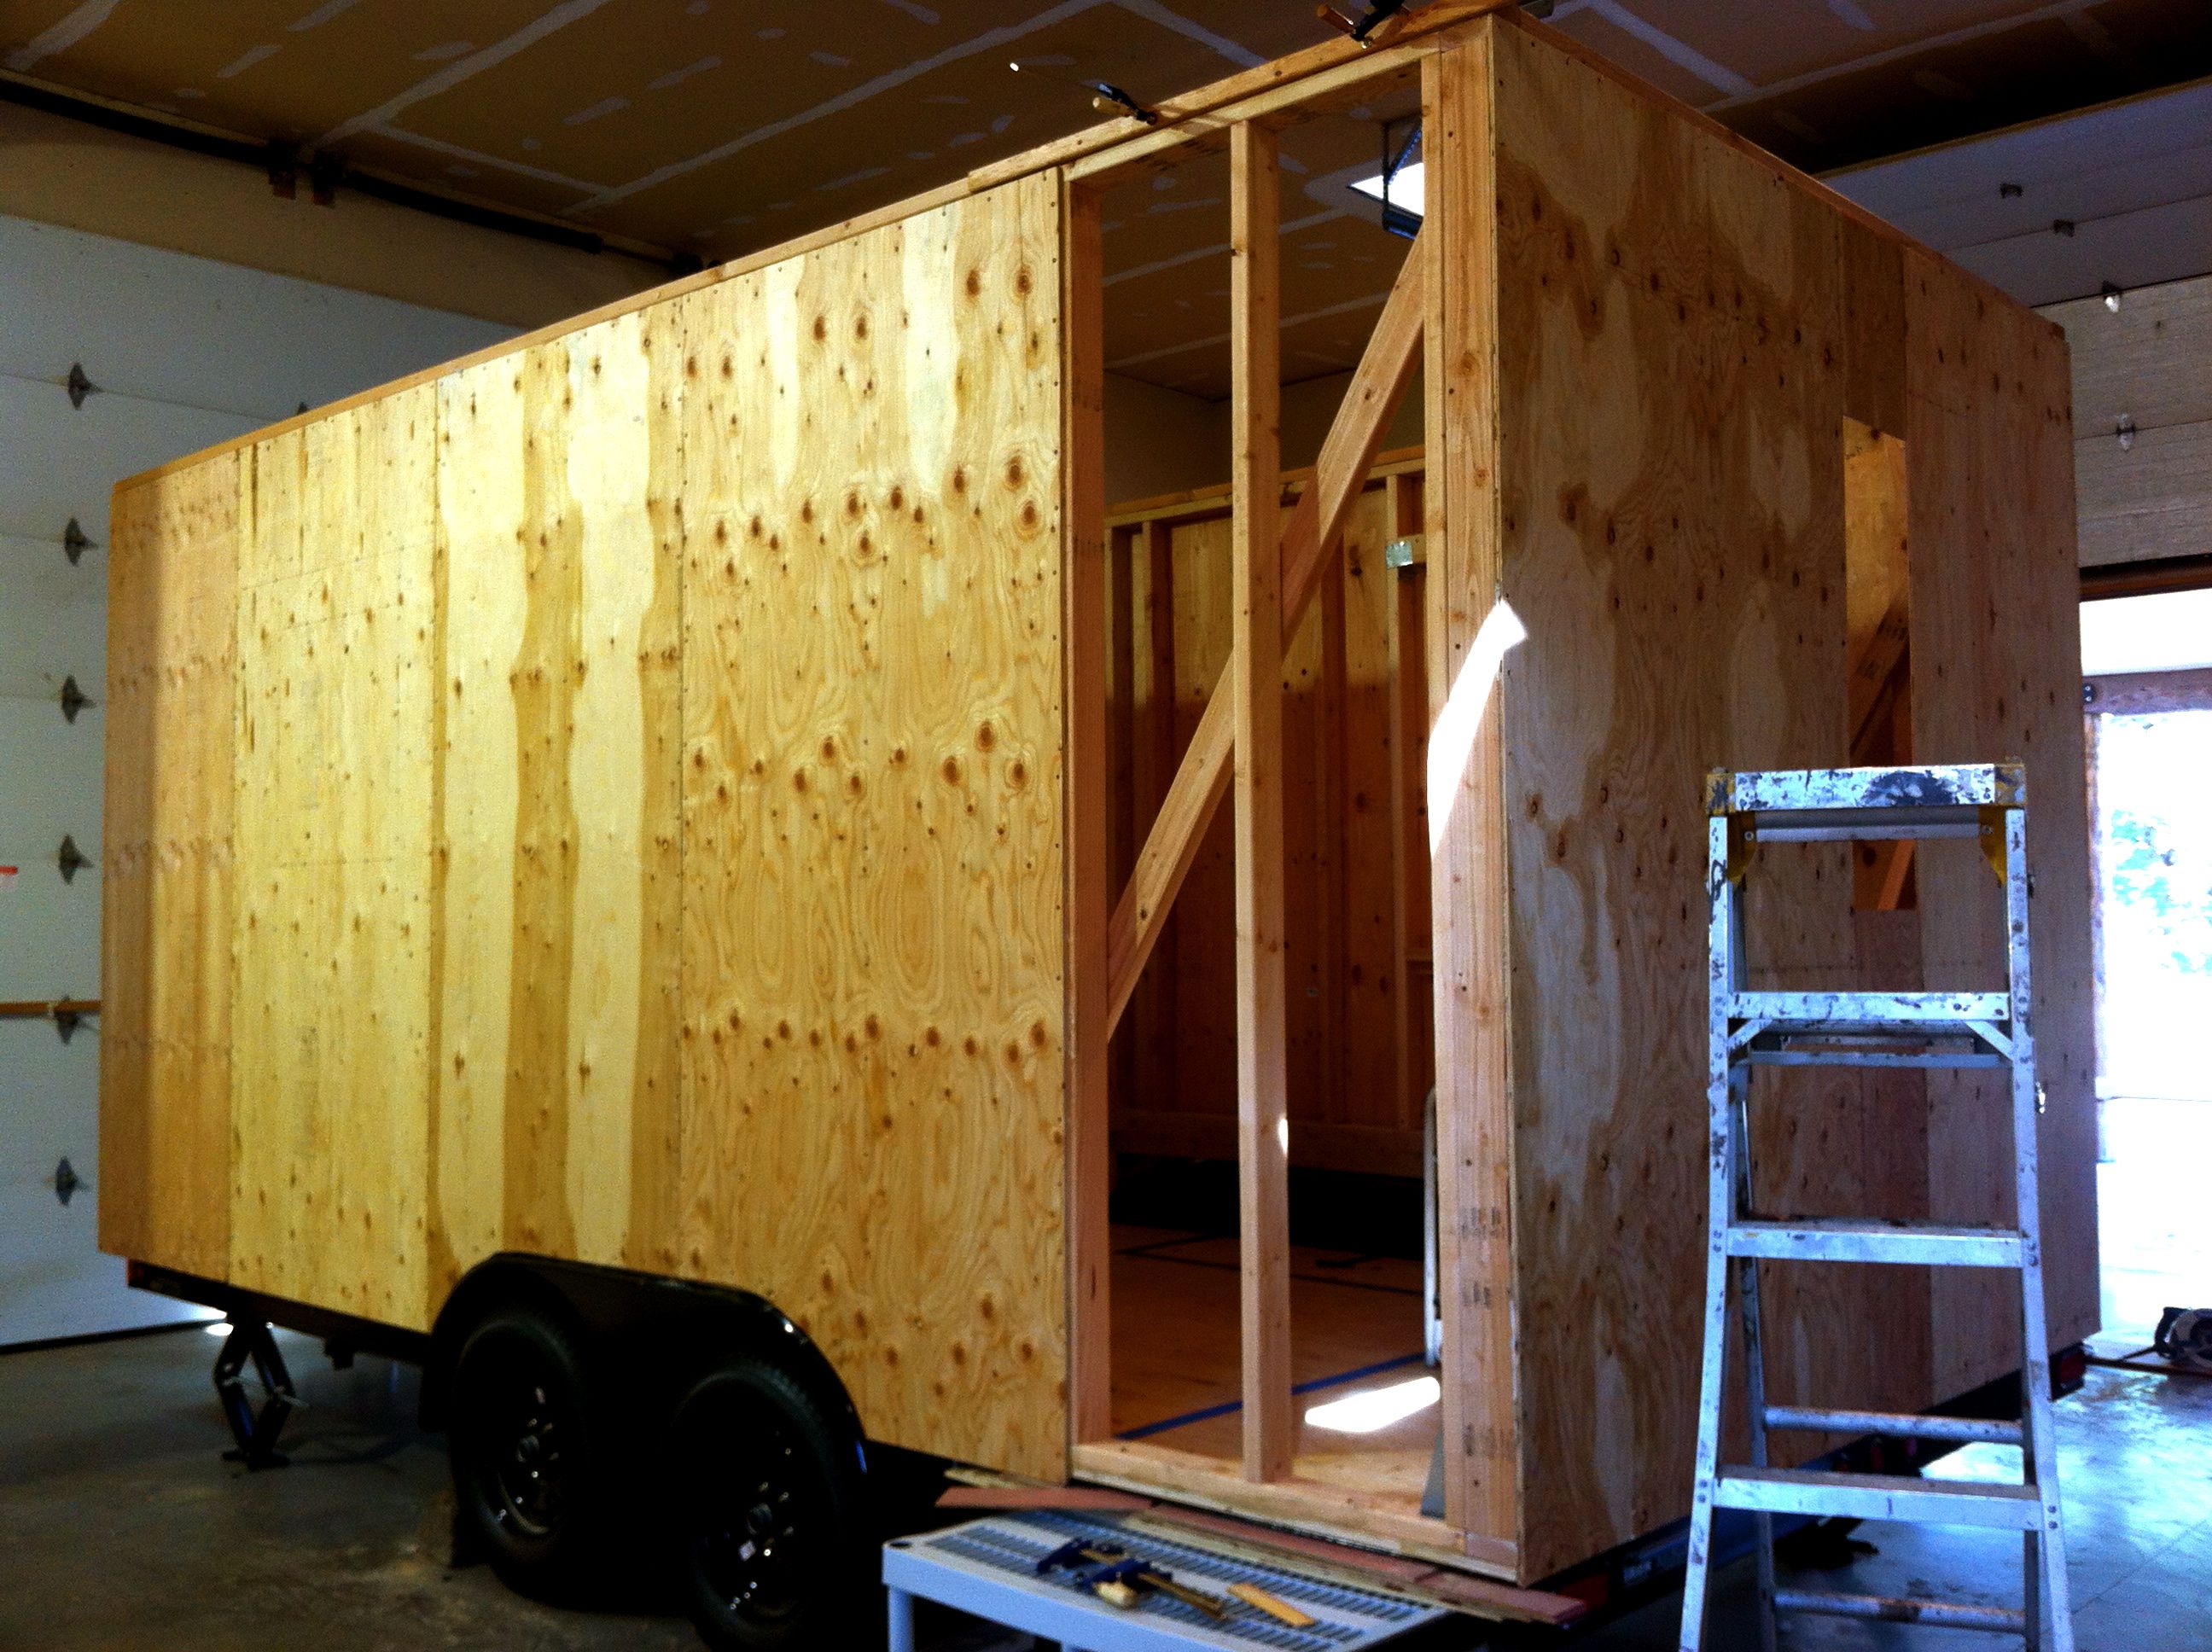
I got the last of the sheathing up. This time around I thought to put a board at the top to butt the plywood up against, rather than the complicated method I had used last time. As before, cutting the wheel wells out was a pain and I despise the gluing, but otherwise there is something satisfying about cutting each panel and screwing it down tight. Was glad to have it done, though.

I wear a tool apron and discovered that lefties are at a disadvantage when using circular saws. I don’t mind using a right-handed saw, but quickly learned that the way I hold it, I was in a direct line with the spewing sawdust. It all managed to collect in the pocket of my tool apron, completely burying the handful of screws I had in there for sheathing!

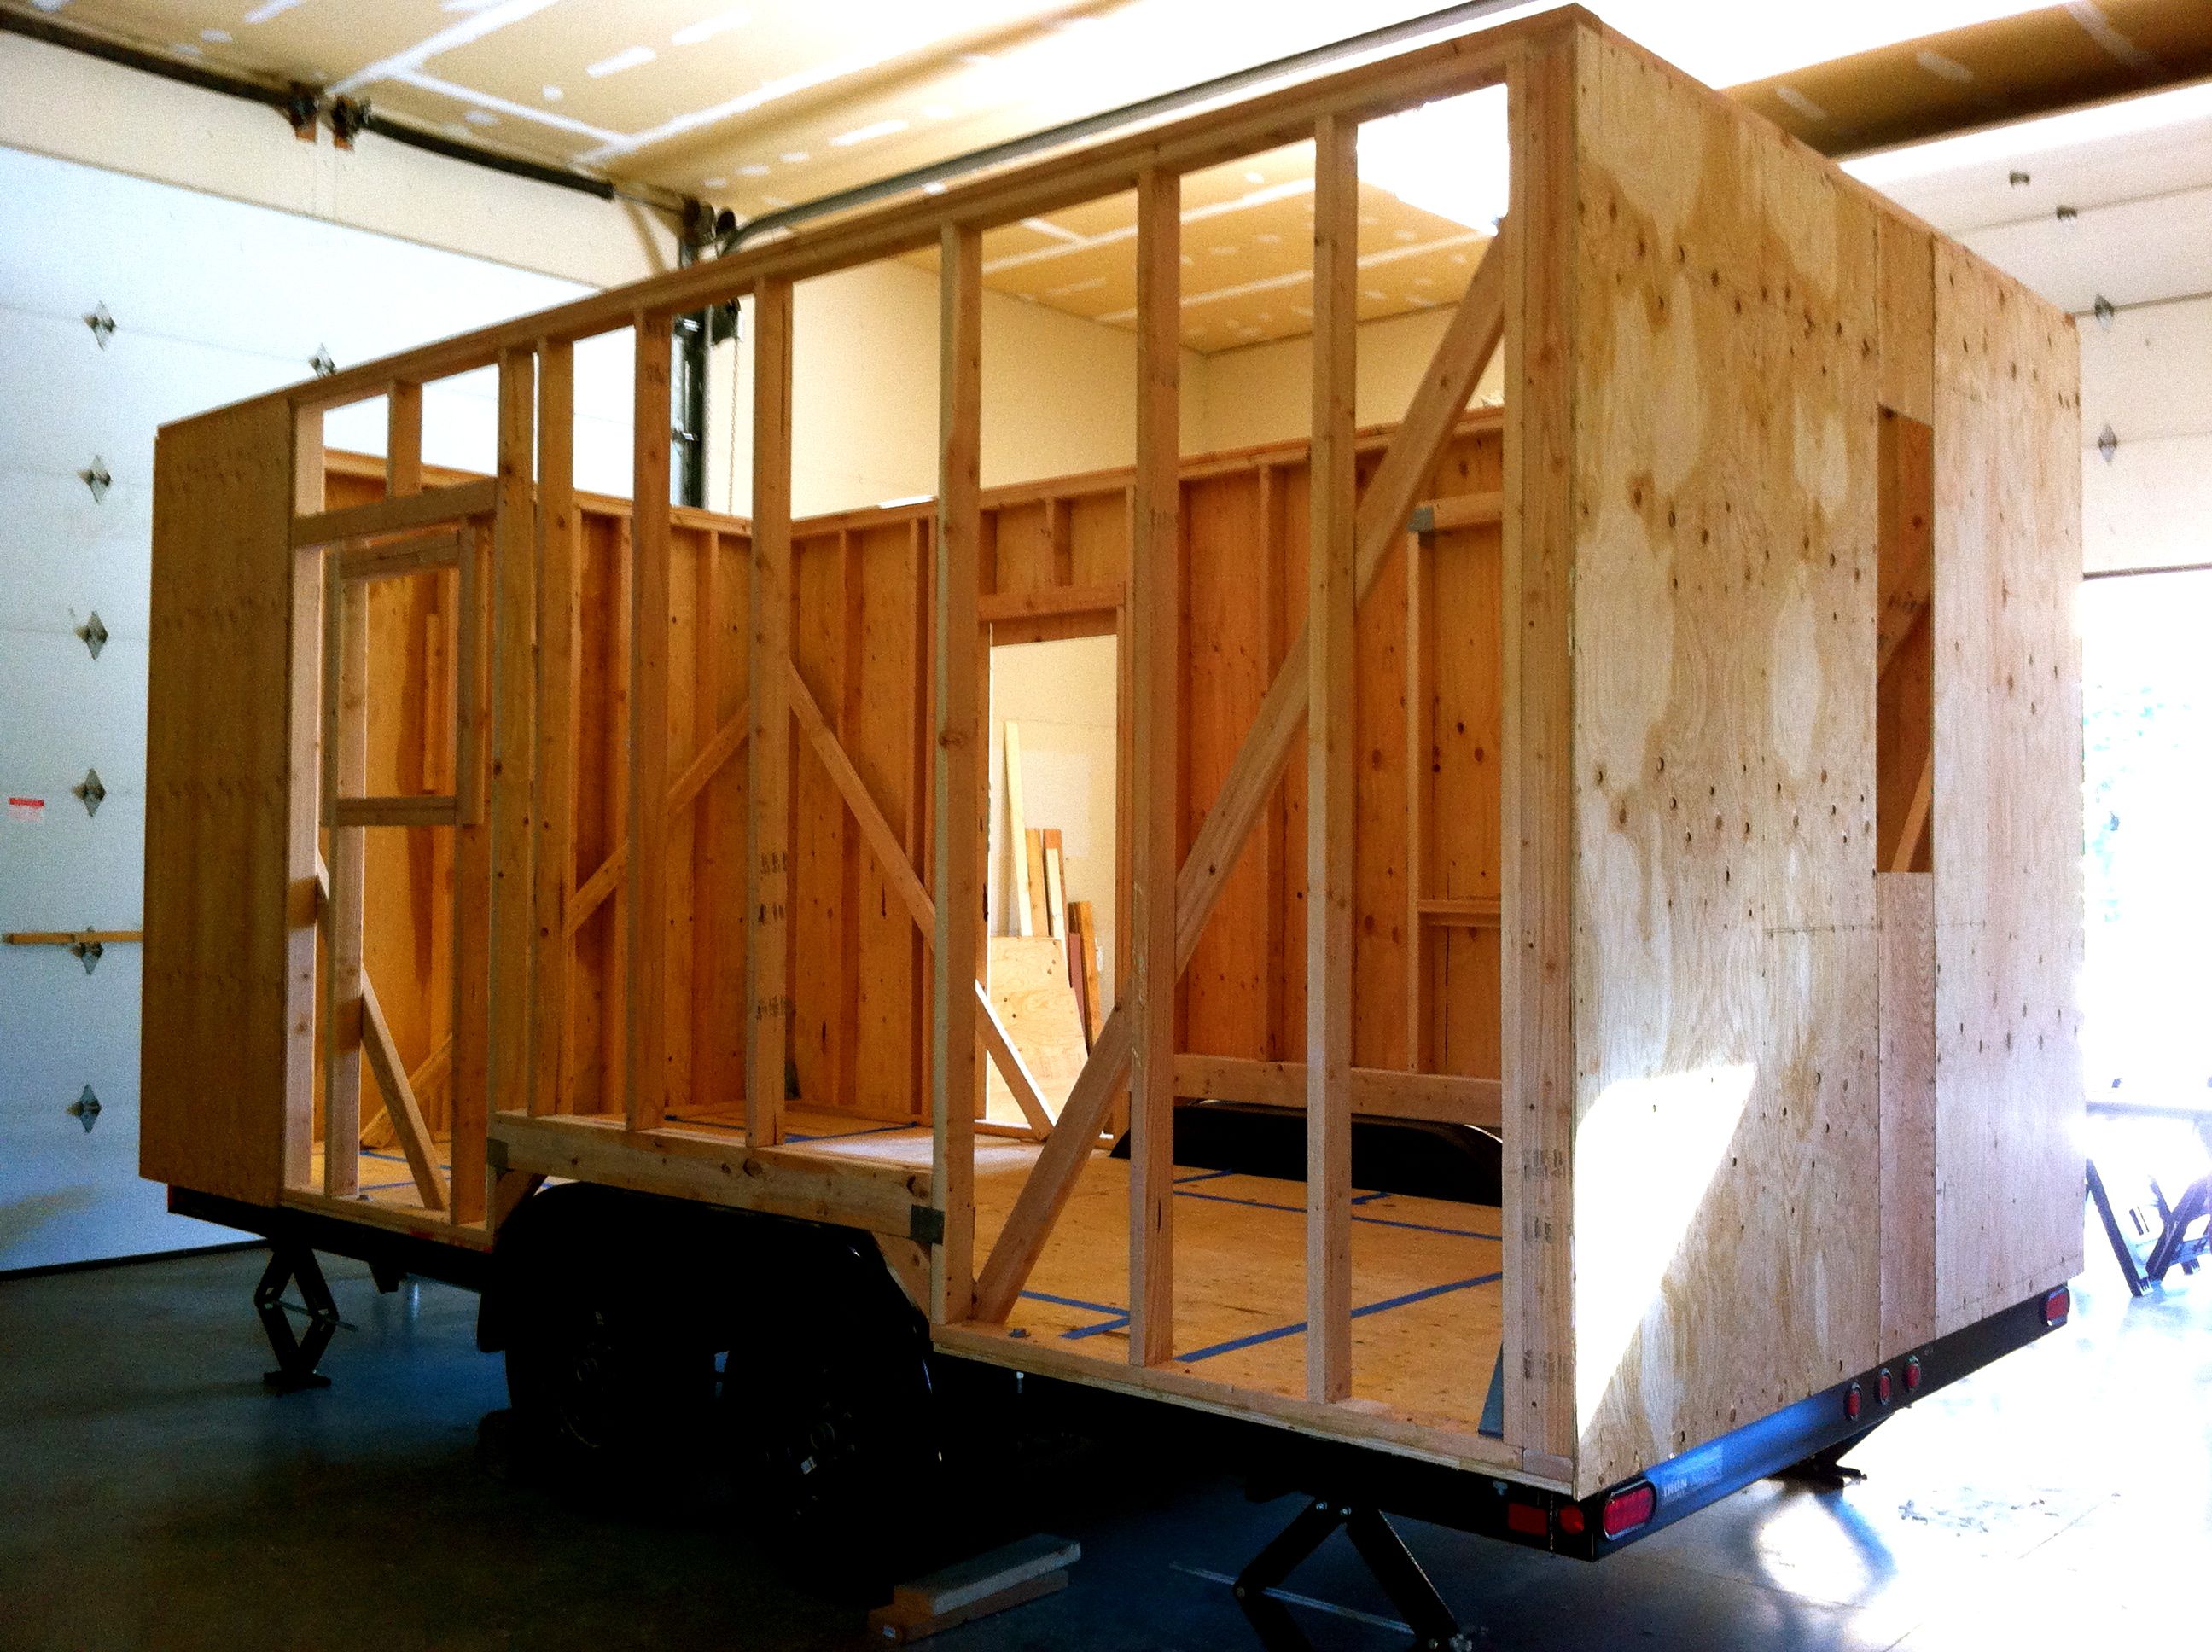
With the sheathing done, I got my first real sense of what the interior space will be like. It felt a little small! I told myself not to panic.

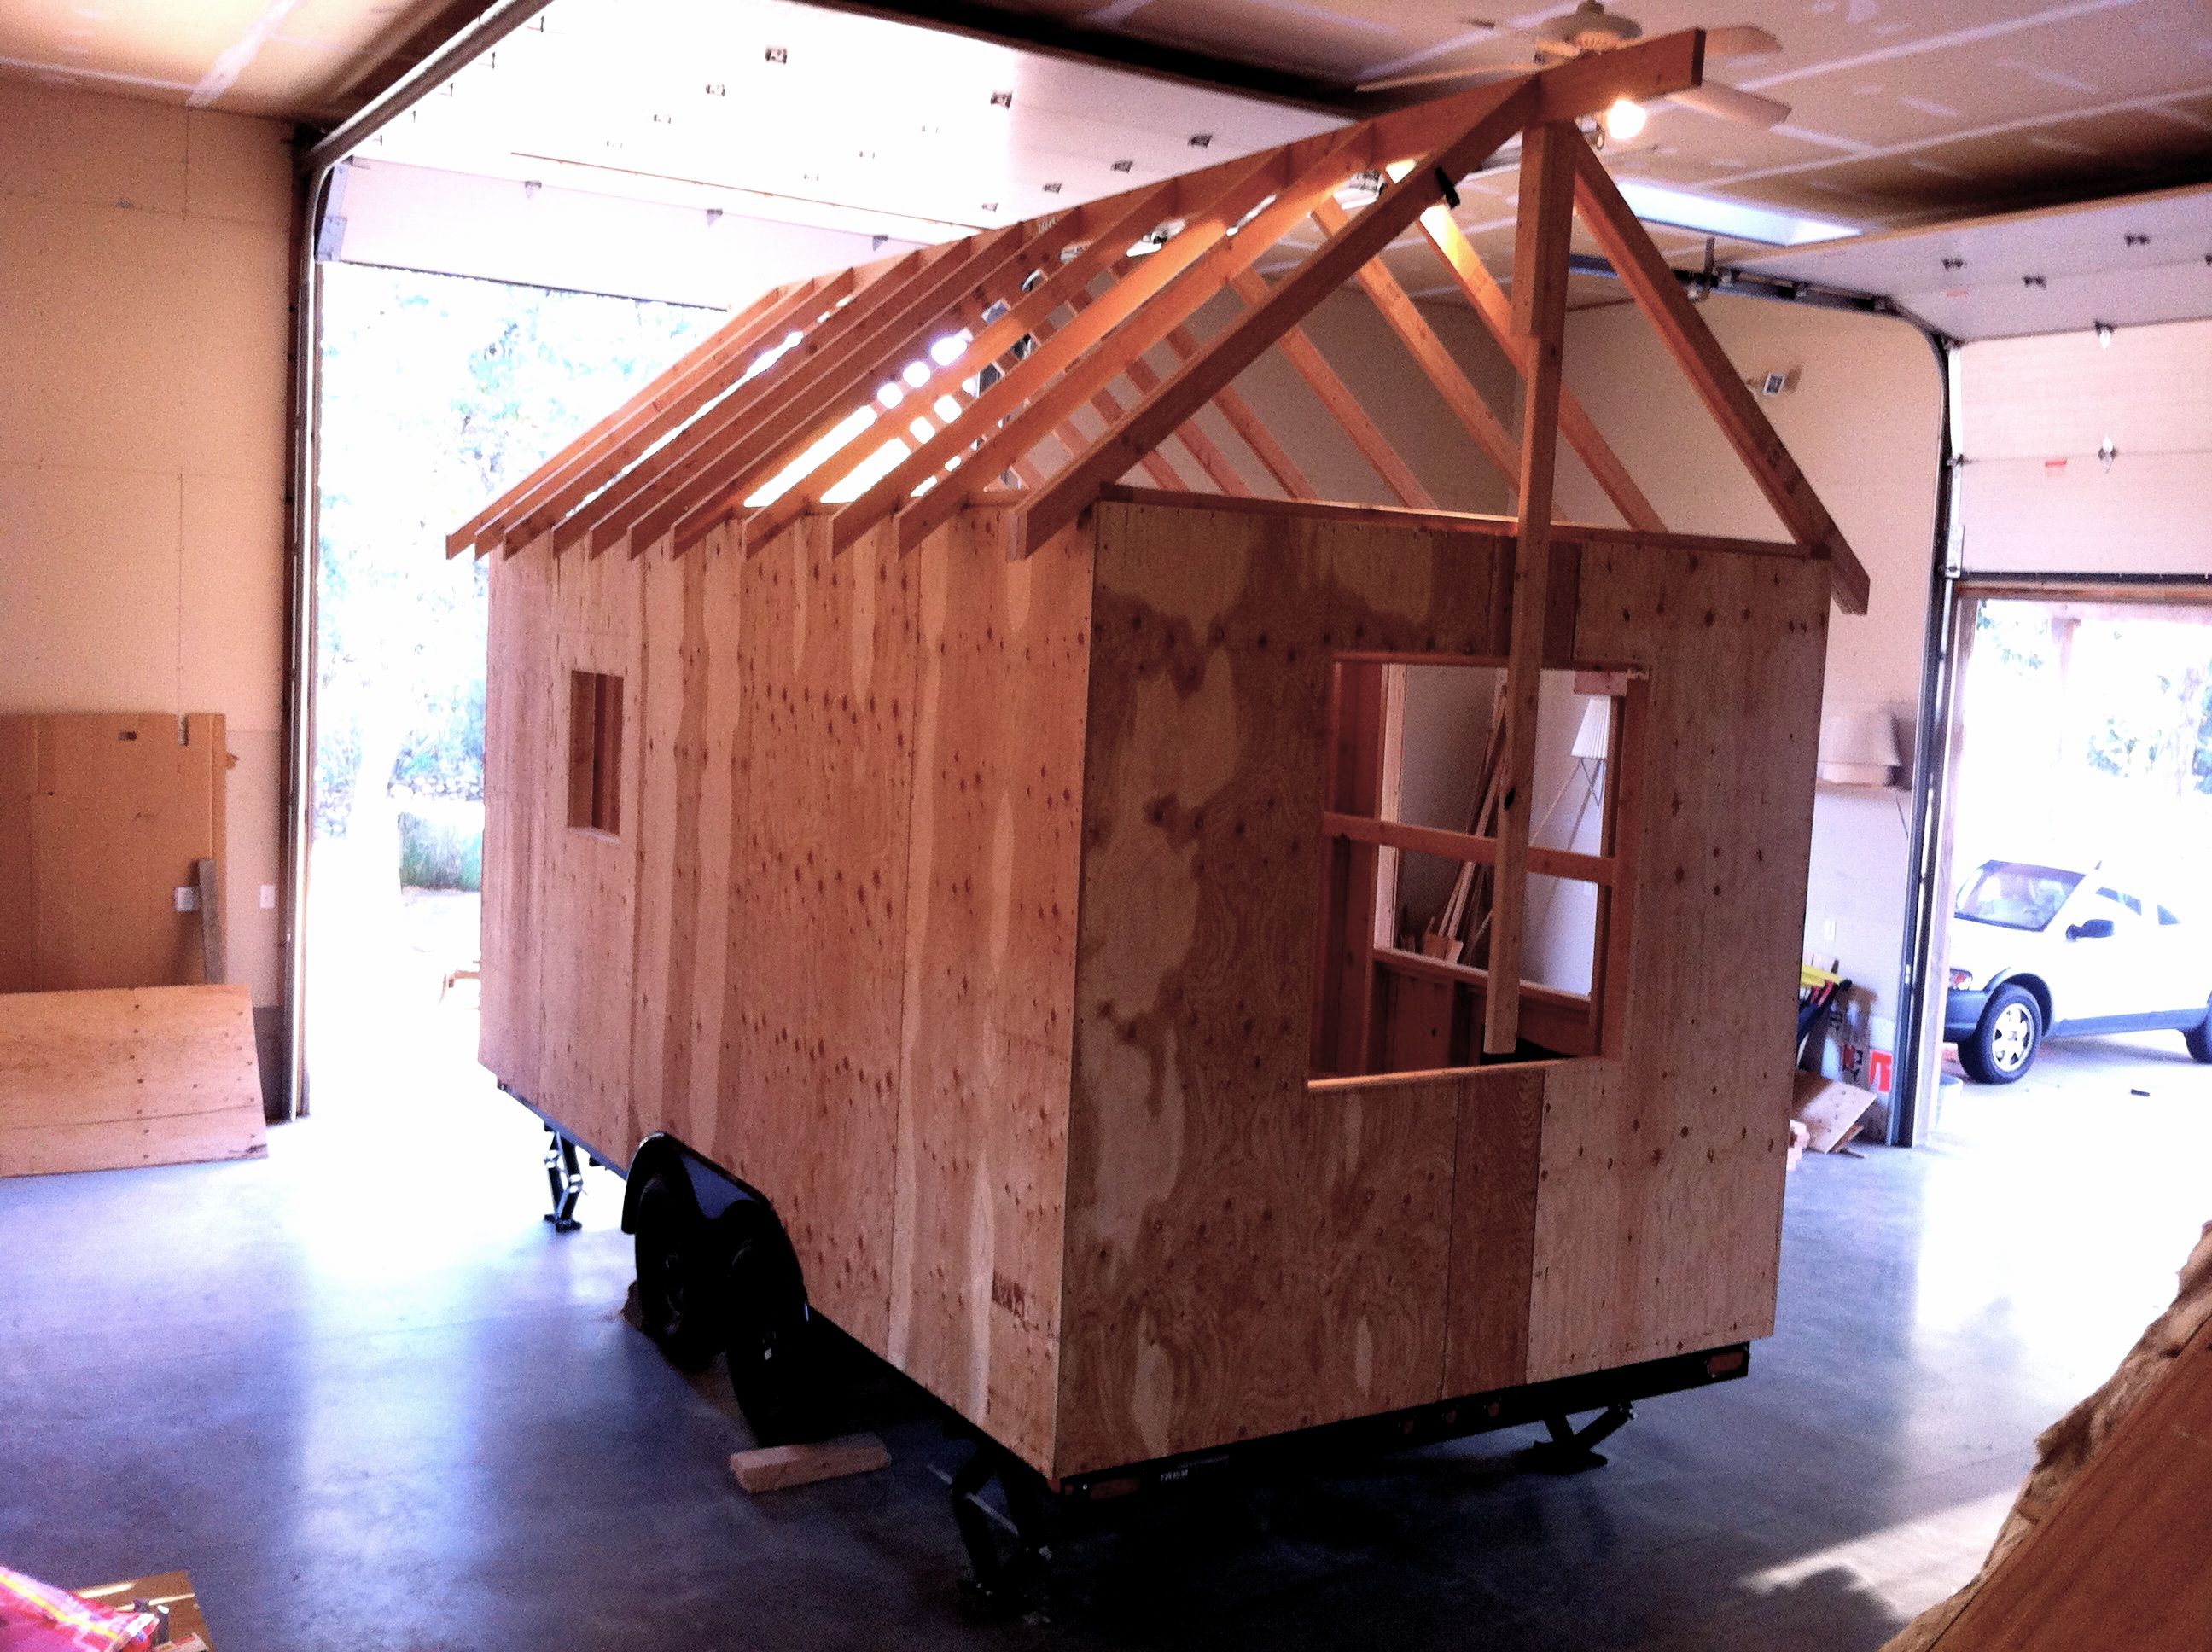
Using a jig saw (and snapping three blades), I cut out the windows and the door and felt a huge sense of relief. With the window frames, the actual windows will be smaller than the openings, but it still feels really open. I had opted not to put a window in that end of the wall on the right since that is where the heater will go and it seemed like you need some solid wall space in places, but I was worried this might have been the wrong decision. However, it felt fine. There is going to be a big skylight above plus a small window in the peak of the gable end so I think we’re good. There’s also a window in the wall just to the right of where I’m standing.

The Shoebox. The overhead light makes it look lit from within. At this point it was starting to feel real, but also strange since it looks so contemporary and that’s not at all where I’m headed with it.
Loft

Tailor Dee taking my measurements for my loft the last time she was over. We decided I needed about 50″ at the peak. Credit: Lina Menard

In between stints, I visited a lot of salvage yards looking for interesting wood for loft joists. It was a little overwhelming and I wasn’t quite sure what to look for. I gave up and decided to just use regular fir 2x4s, plus a 2×6 where I will have a sliding barn door. I spent some time sanding them down, under a covered porch while a thunderstorm passed by. Using a couple grits of sandpaper, I was surprised how beautiful the grain can be with a little loving care. I wasn’t ready to make decisions about stain colors at that point but figured I could do that later. This was a nice glimpse into finish work and I think I’m going to like it, as far off as that feels at the moment!

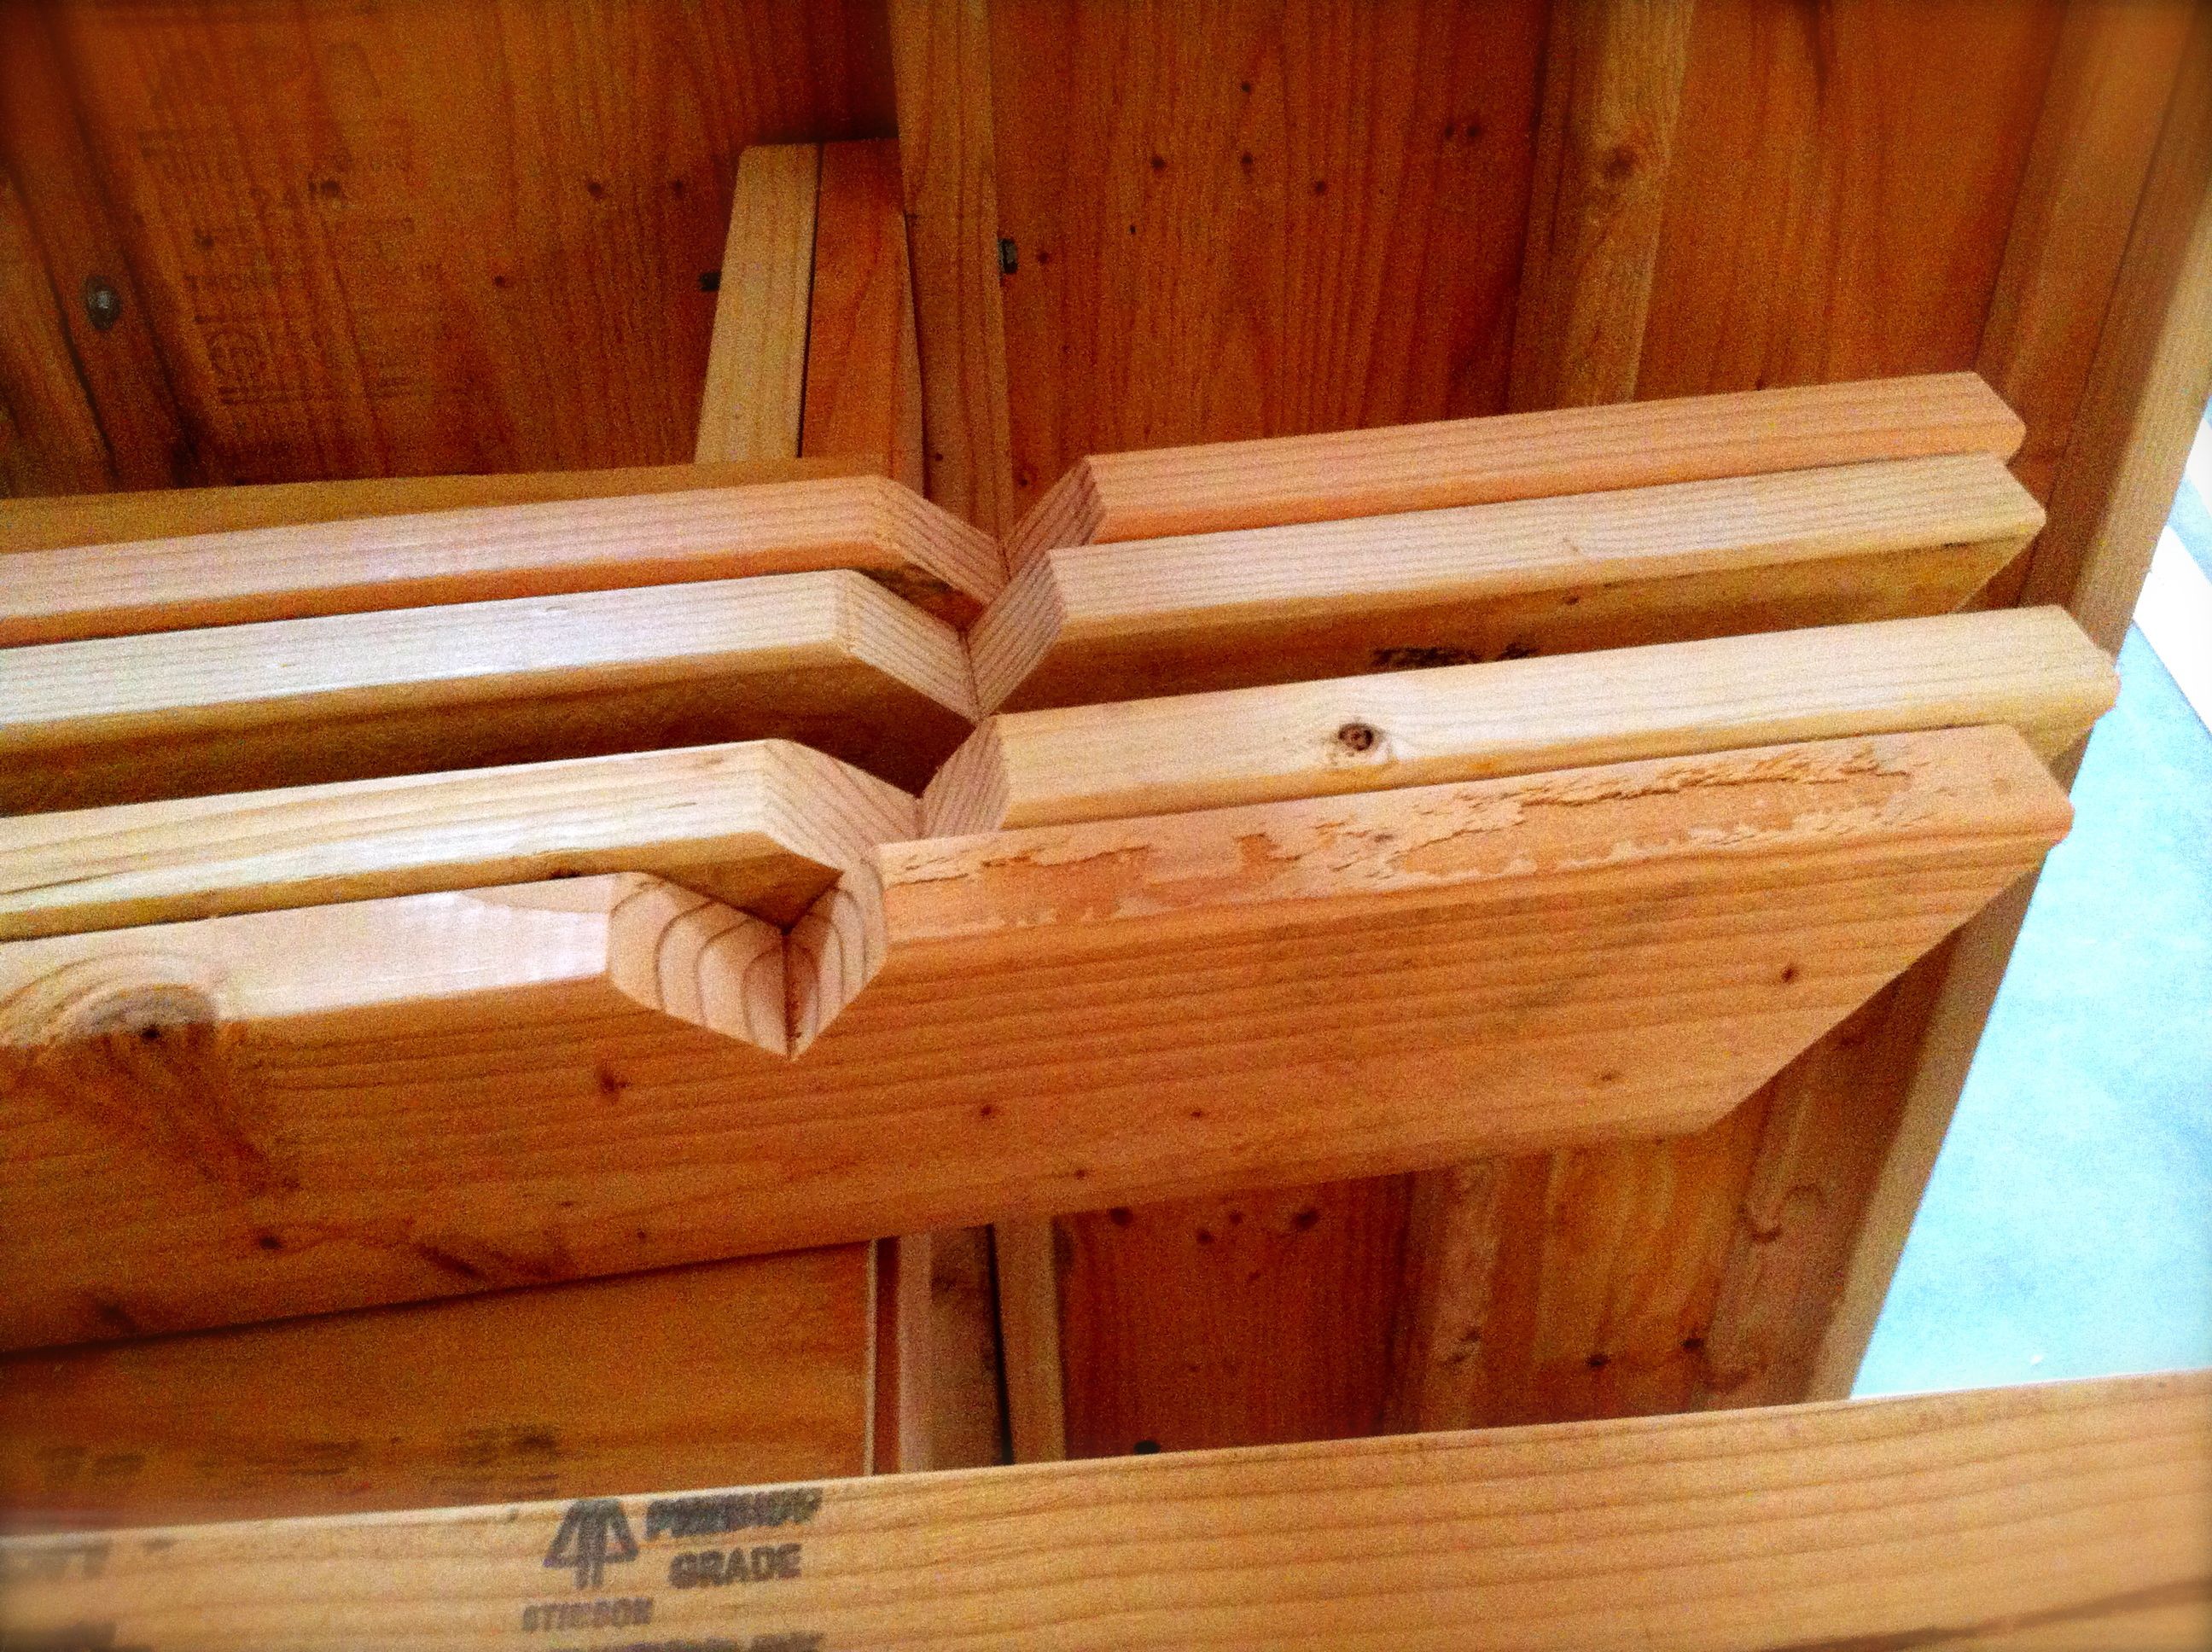
During my design phase, I didn’t know enough to trust joist hangers for all my joists. I did a complicated arrangement with bolting the joists on the ends into the studs, but put hangers for the ones over the window and door. It meant I had to place my studs at 16″ OC. In retrospect, I might have done all hangers and less studs, but live and learn. The real horrifying mistake I discovered was I didn’t properly check the span load tables somehow. This was a basic screwup I swore I wouldn’t make, and yet somehow did anyway. The 98″ span was way too big for a single 2×4 and it bowed with just a little weight on it. This led to the expected freakout, but when I calmed down I worked out options to salvage it. I looked into using different kinds of wood, but to no avail. I could go to 2x6s but then I’d lose height in the loft, or I could use 4x4s or double 2x4s (though these weren’t in the span load tables so I wasn’t totally sure they would work). I talked it over with Dee and decided to try the double 2x4s, since I had gotten so attached to my grain patterns. It was tricky installing the hangers so that they made for a level loft. I also wanted to use hangers with concealed flanges but these were hard to nail in. I discovered a 3/8″ bolt made a good nail set!

Checking that all will be level.
The double 2×4 joists in their hangers. Since I hadn’t sanded enough boards, I have more finish work to do, but this is all just temporary so that I can get the roof up. I also needed to use shims since the 4×4 hangers are meant for 3 1/2″ wood and my two 2x4s only are 3″ wide.

The temporary loft installed with a glimpse of some of the grain patterns. Now that I can step back from it, I might continue to look for interesting salvaged wood, but am glad to know that I have an option that will work and that I like. It was a good lesson that everything can be worked out somehow.

My sister and nephews came down for an early birthday celebration. These lovelies were from Lynda and Joe’s garden. Credit: Tracy Goodnight
Ridgeboard

I’m finding that there are certain things you just get mental blocks about. A big one for me was how to get the ridgeboard up and in the right place, and how to figure out the right pattern for the rafter angles. I kind of got it in theory but standing looking up at the house, it was a little overwhelming. This is what my desk looked like during this period.
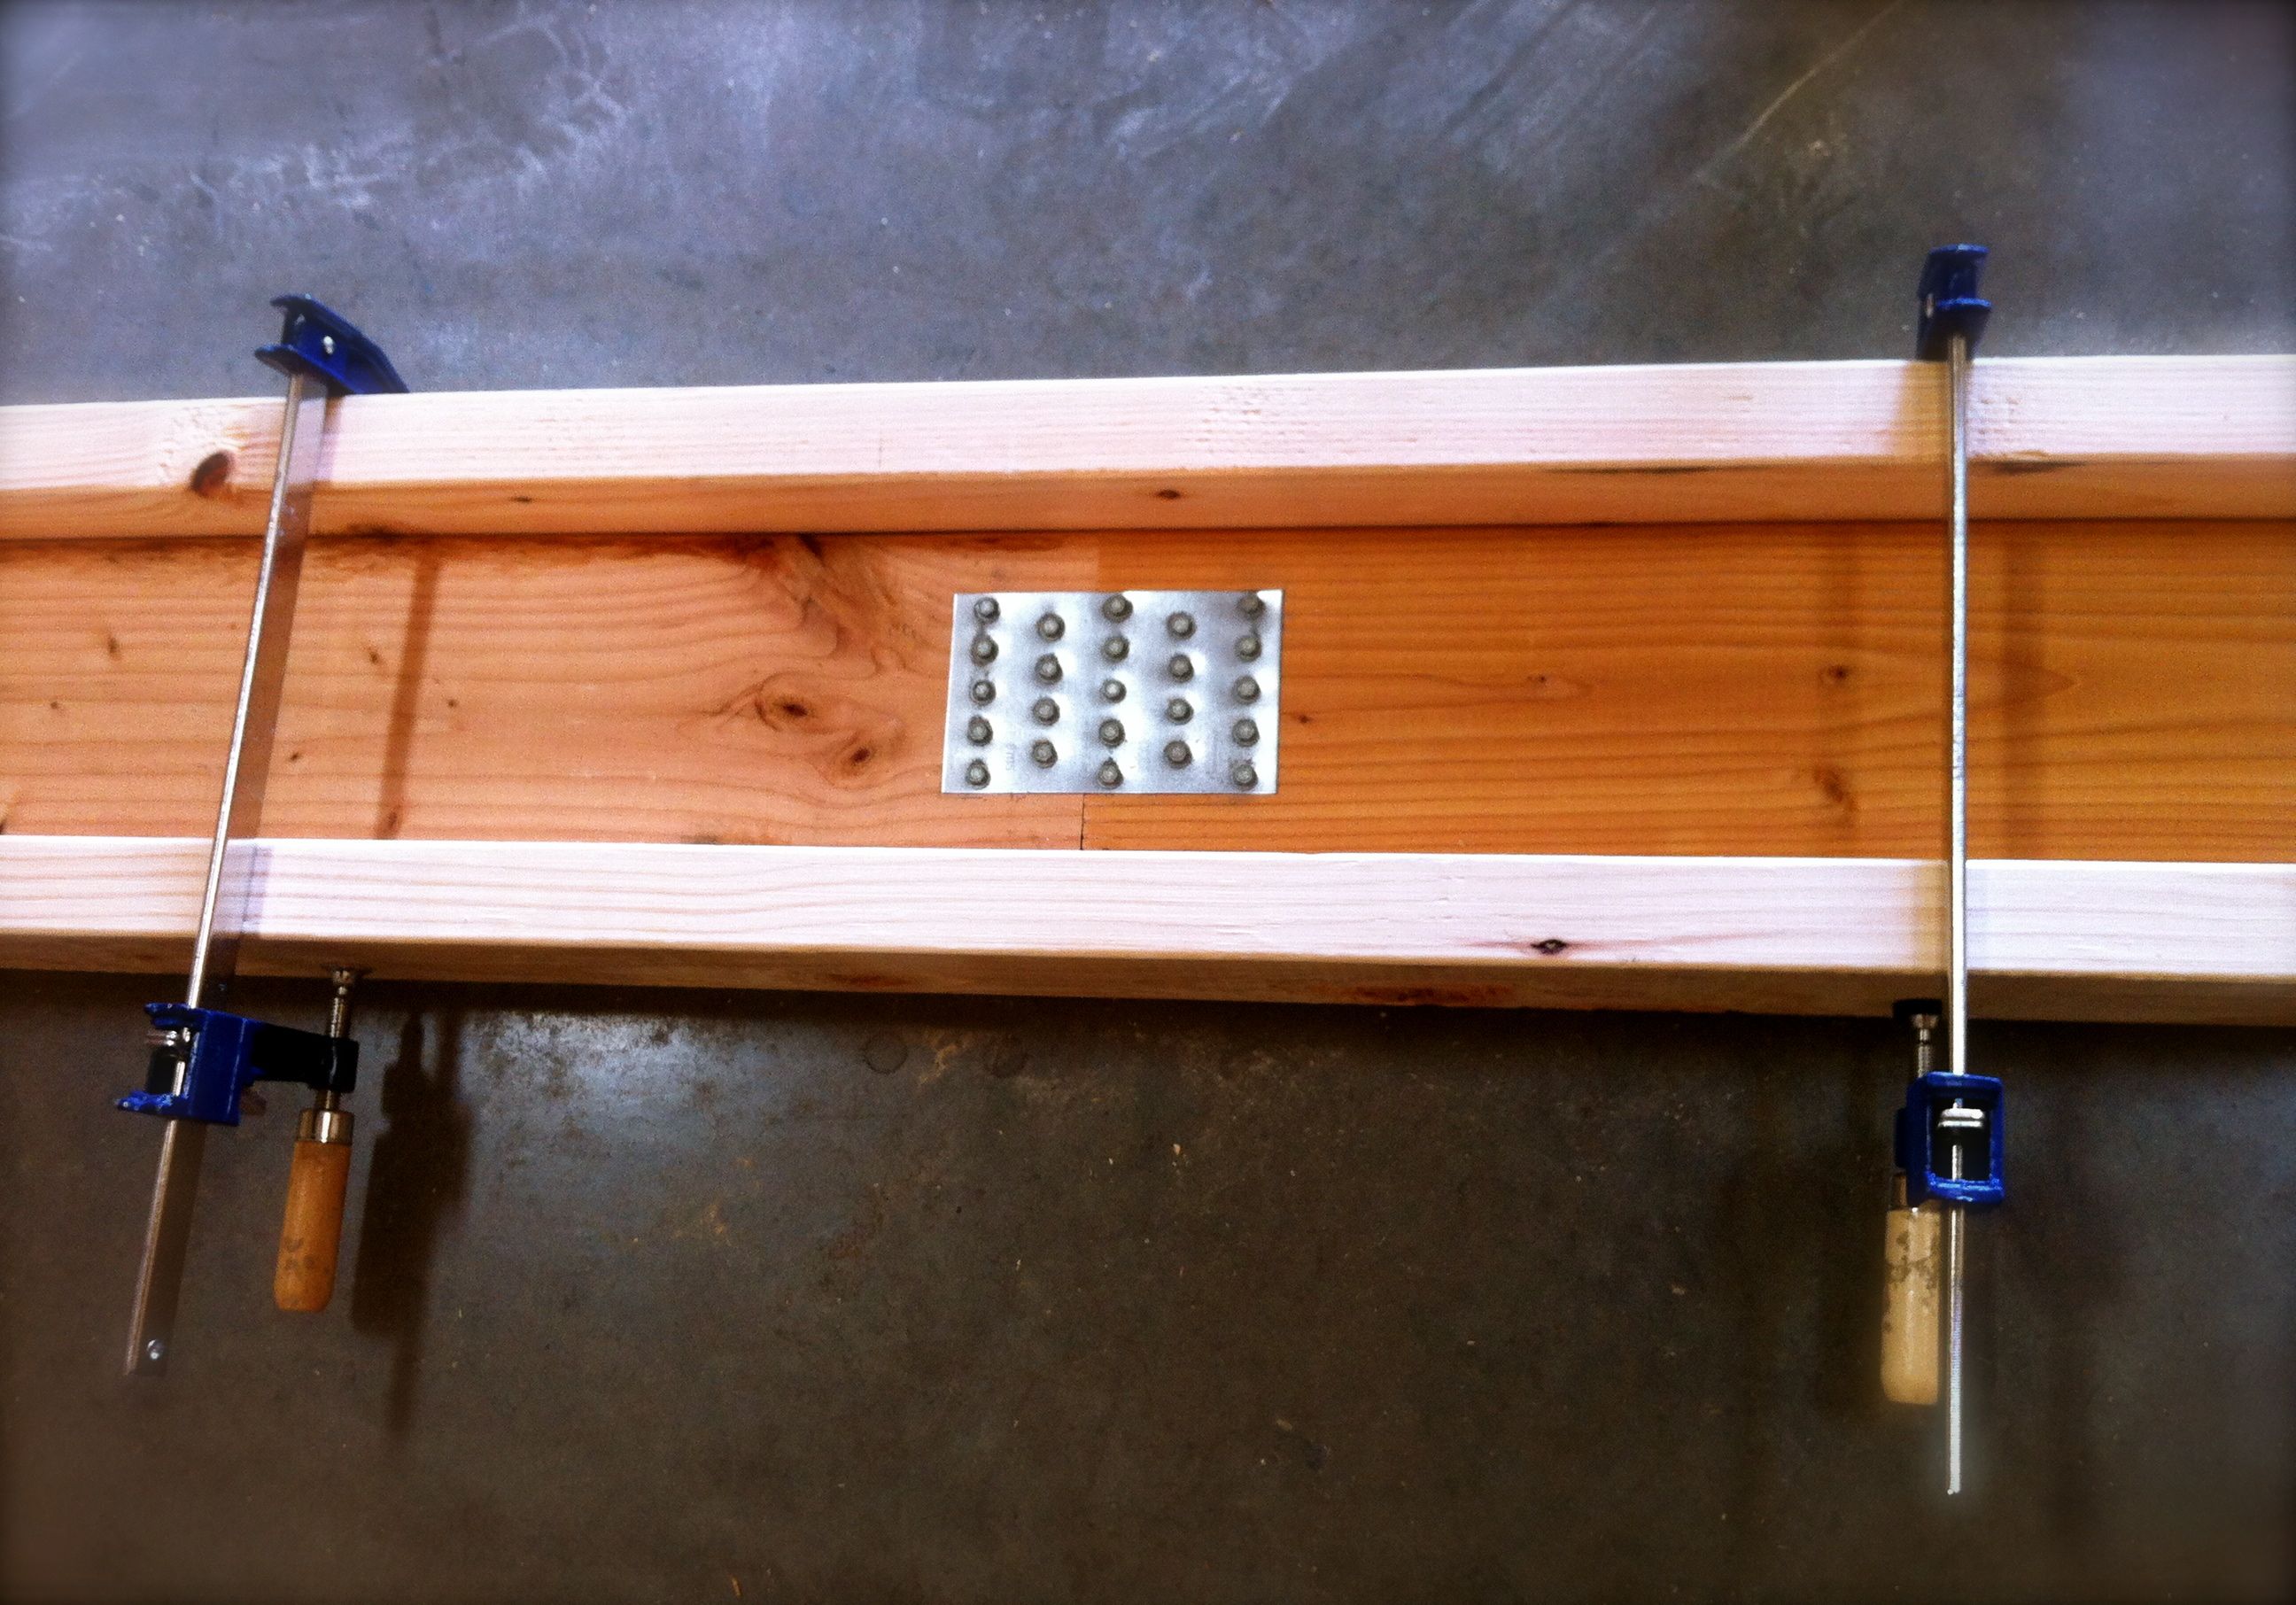
I knew it was going to be hard to find a perfectly straight 20-foot long 2×6, so I got two 10′ lengths and used metal plates to connect them. Unfortunately, the hardware store only had one size and I later discovered this was too flimsy (but it looks nice!). Turned out it didn’t really matter since once it’s in place with the rafters, there isn’t any real weight on the joint. It’s just a matter of holding it together until it gets mounted. In the end, I just screwed on a 2×4 to keep it rigid, which worked fine as a stop-gap measure.

The ridgeboard. I clamped it between 2x4s when I attached the plate to make sure it was straight. You can see it has a slight twist, but this got corrected when the rafters were installed.

I had gotten as far as joining the ridgeboard and then was stumped. Fortunately Dee showed up to save the day. She was fearless clambering around on the walls and the temporary catwalks we installed (I, on the other hand, have a rather significant fear of heights which made the whole rest of the stint quite challenging…more on this in the next post). Note how close we came to the fan!

Dee’s new puppy, OluKai. Cutest thing ever.

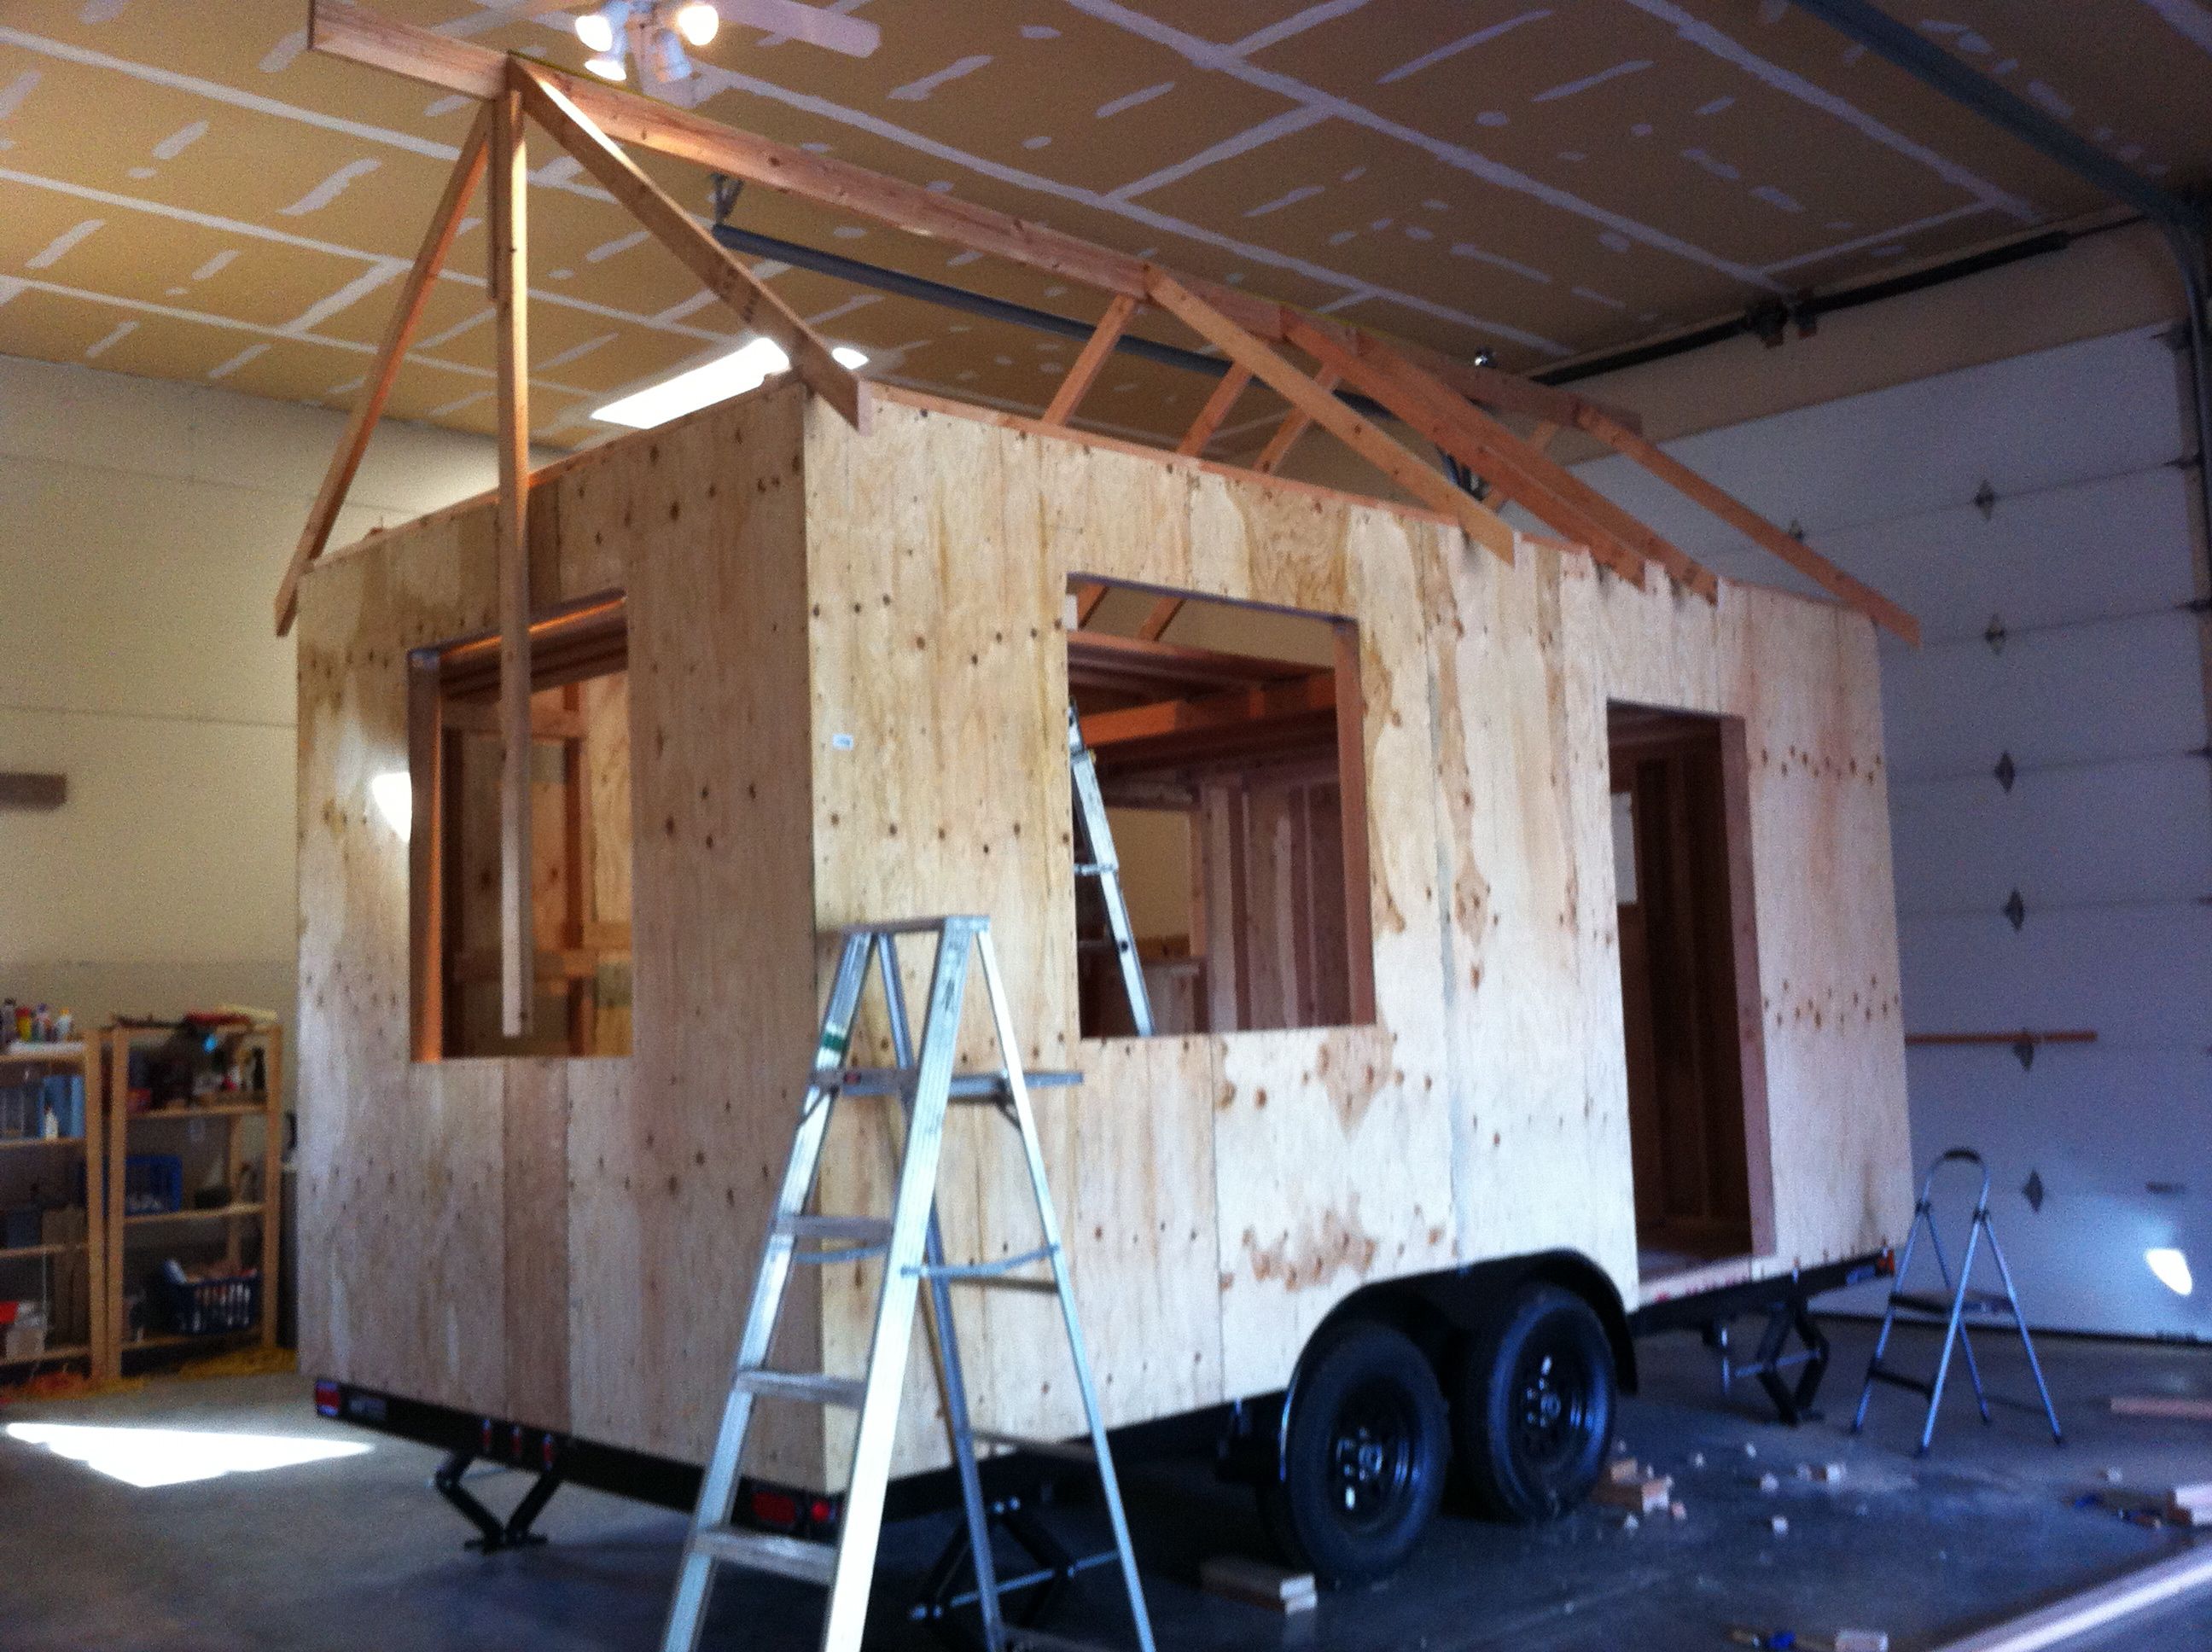
The Boombox. We spent a lot of time getting the supports in just the right place. Plumb Bob is now my best friend. It paid off, though. We tied ropes to the ridgeboard and hoisted it right up. It slid in place perfectly level, at the right height and centered. I was so excited I ran around shouting “Raise high the roofbeams, carpenters!”. My dad had been saying this every time I talked about my roof and it became our joke. Turns out he got it from the title of a J.D. Salinger story, but originally it’s from a poem by Sappho.

Dee caught me staring at my house that night. I was pretty transfixed. It was also my birthday and what a huge gift that was to get over the hurdle of the ridgeboard and working out the rafter pattern. Huge thanks, Dee! Credit: Dee Williams.
Rafters

Dee took off after we got a few of the rafters successfully up, but now I had the confidence to continue. Rafter ends began piling up.

I used a jigsaw to cut out the bird mouths on the rafters.
Rafters ready to be installed.
The first rafters going up. The last week of building was interesting since my parents were away and I was completely on my own, which wouldn’t be a big deal except for my fear of heights and the thought of crashing down with no one the wiser. Got through it though. Probably made me take extra care.
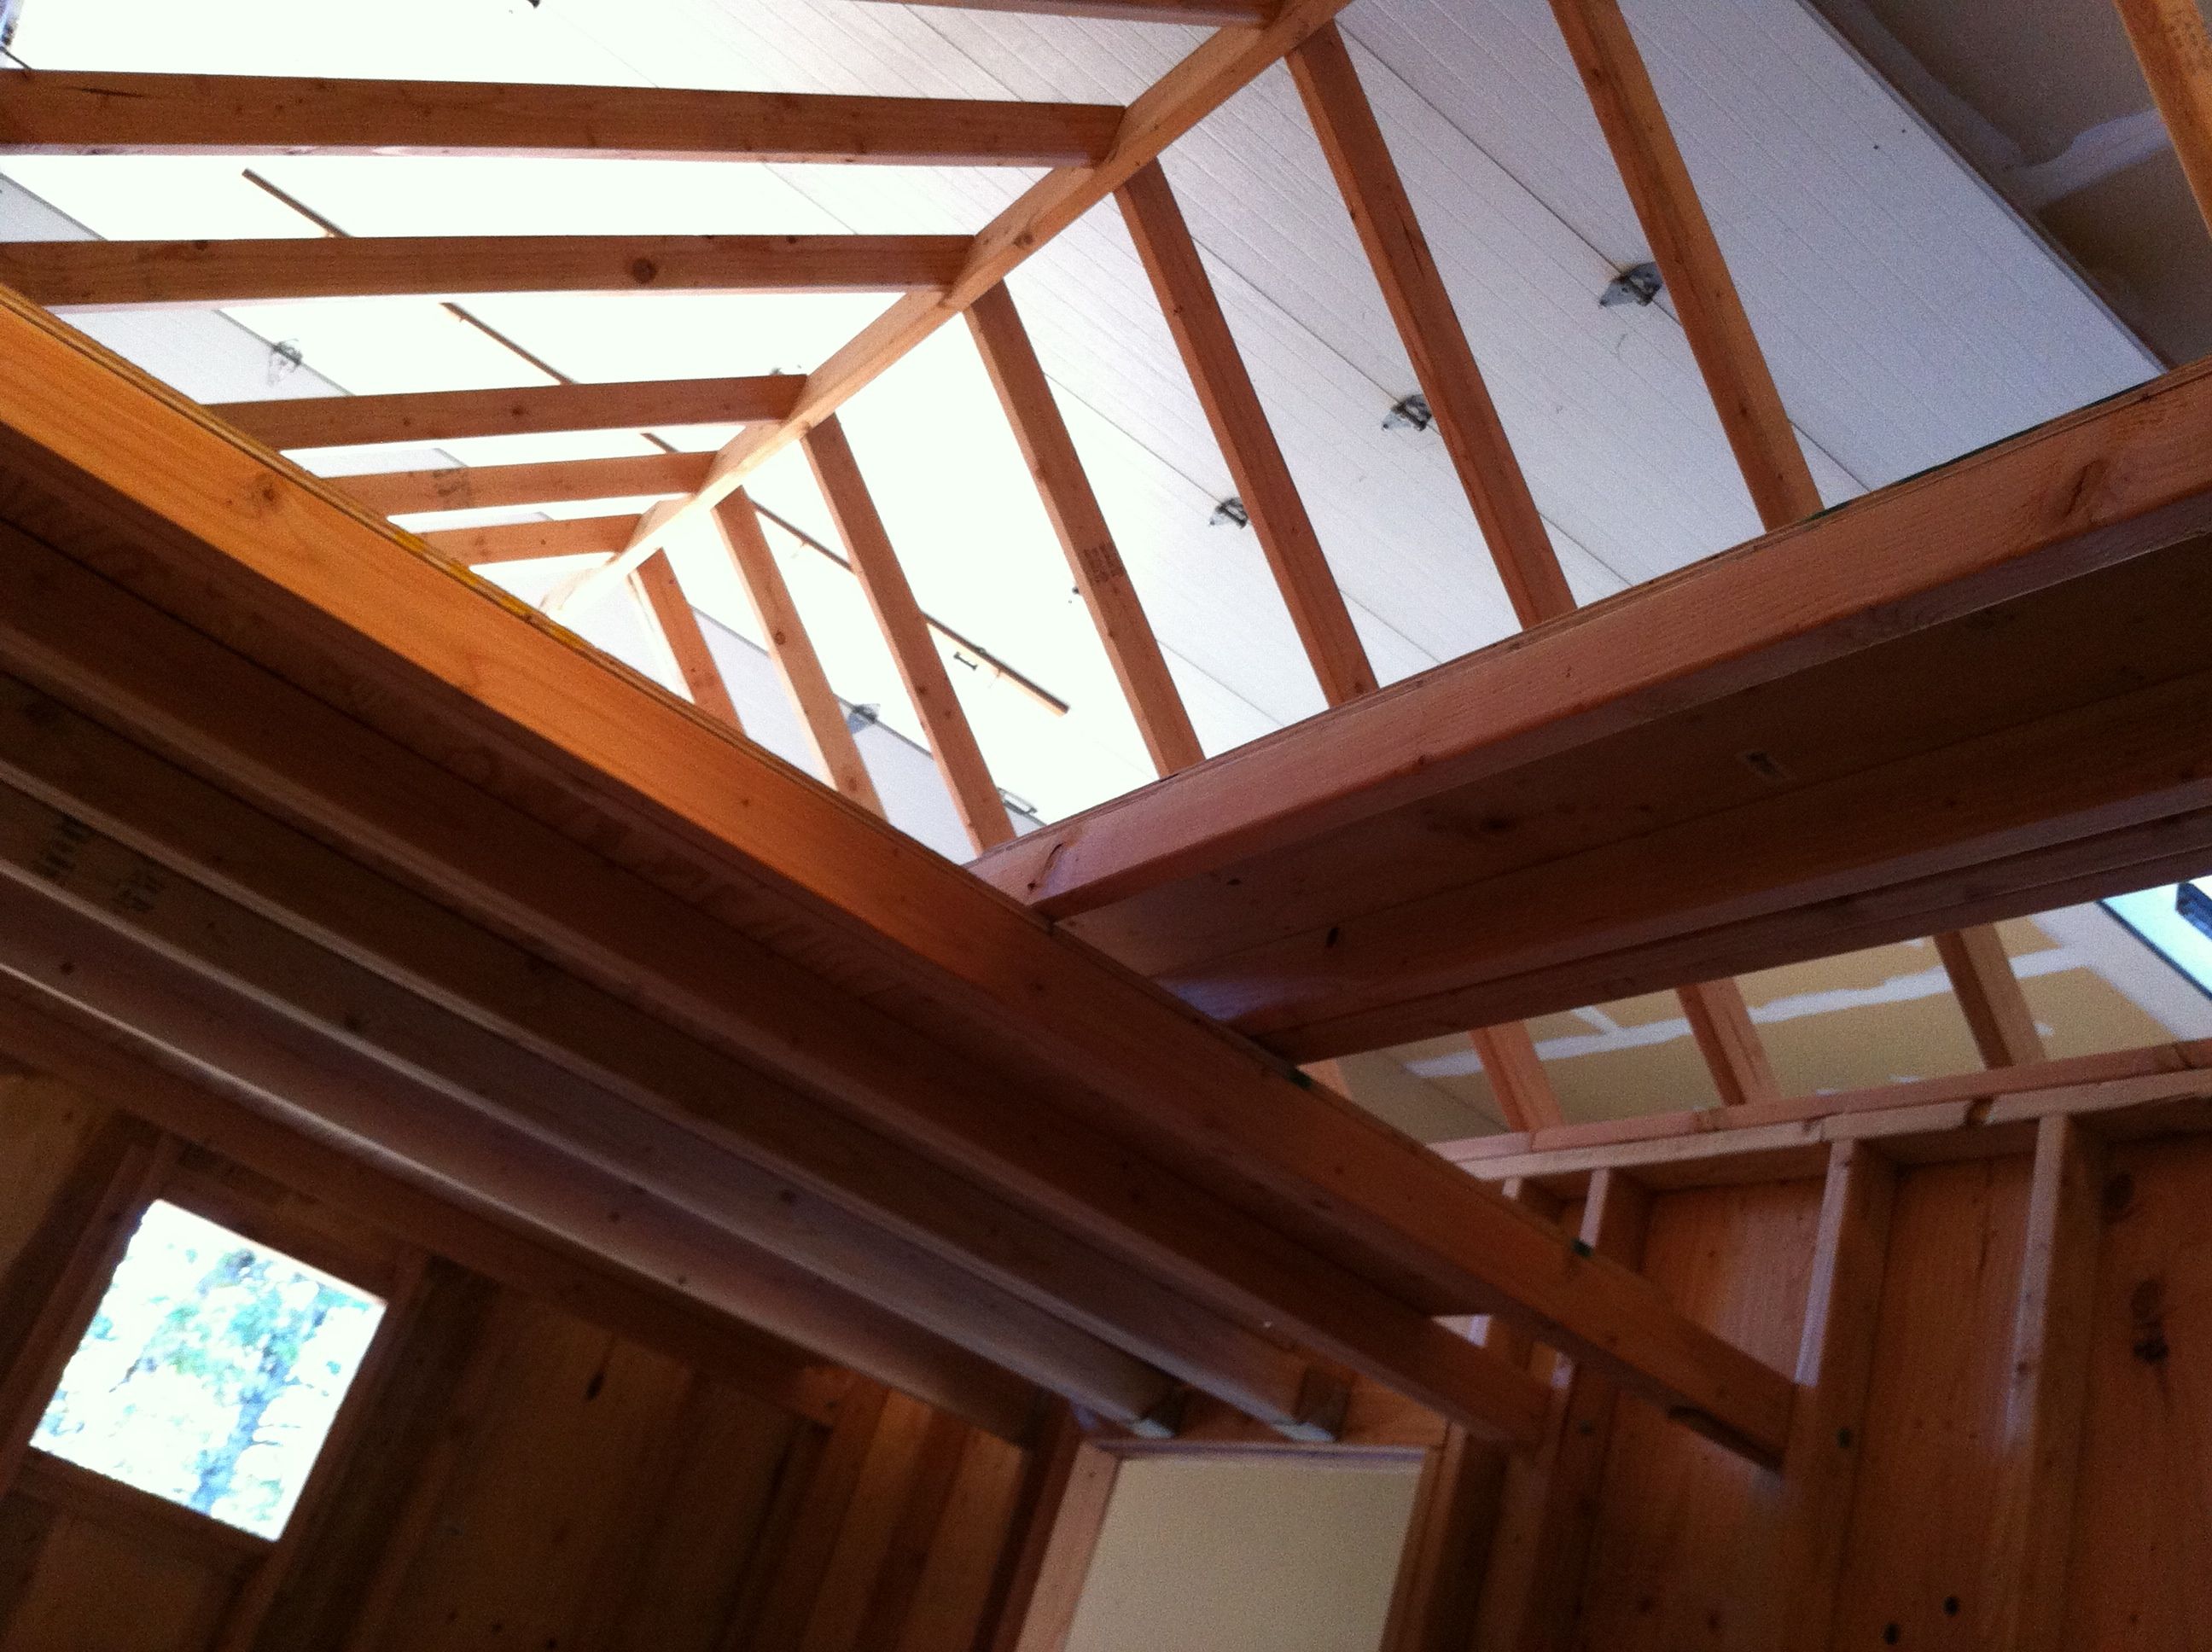
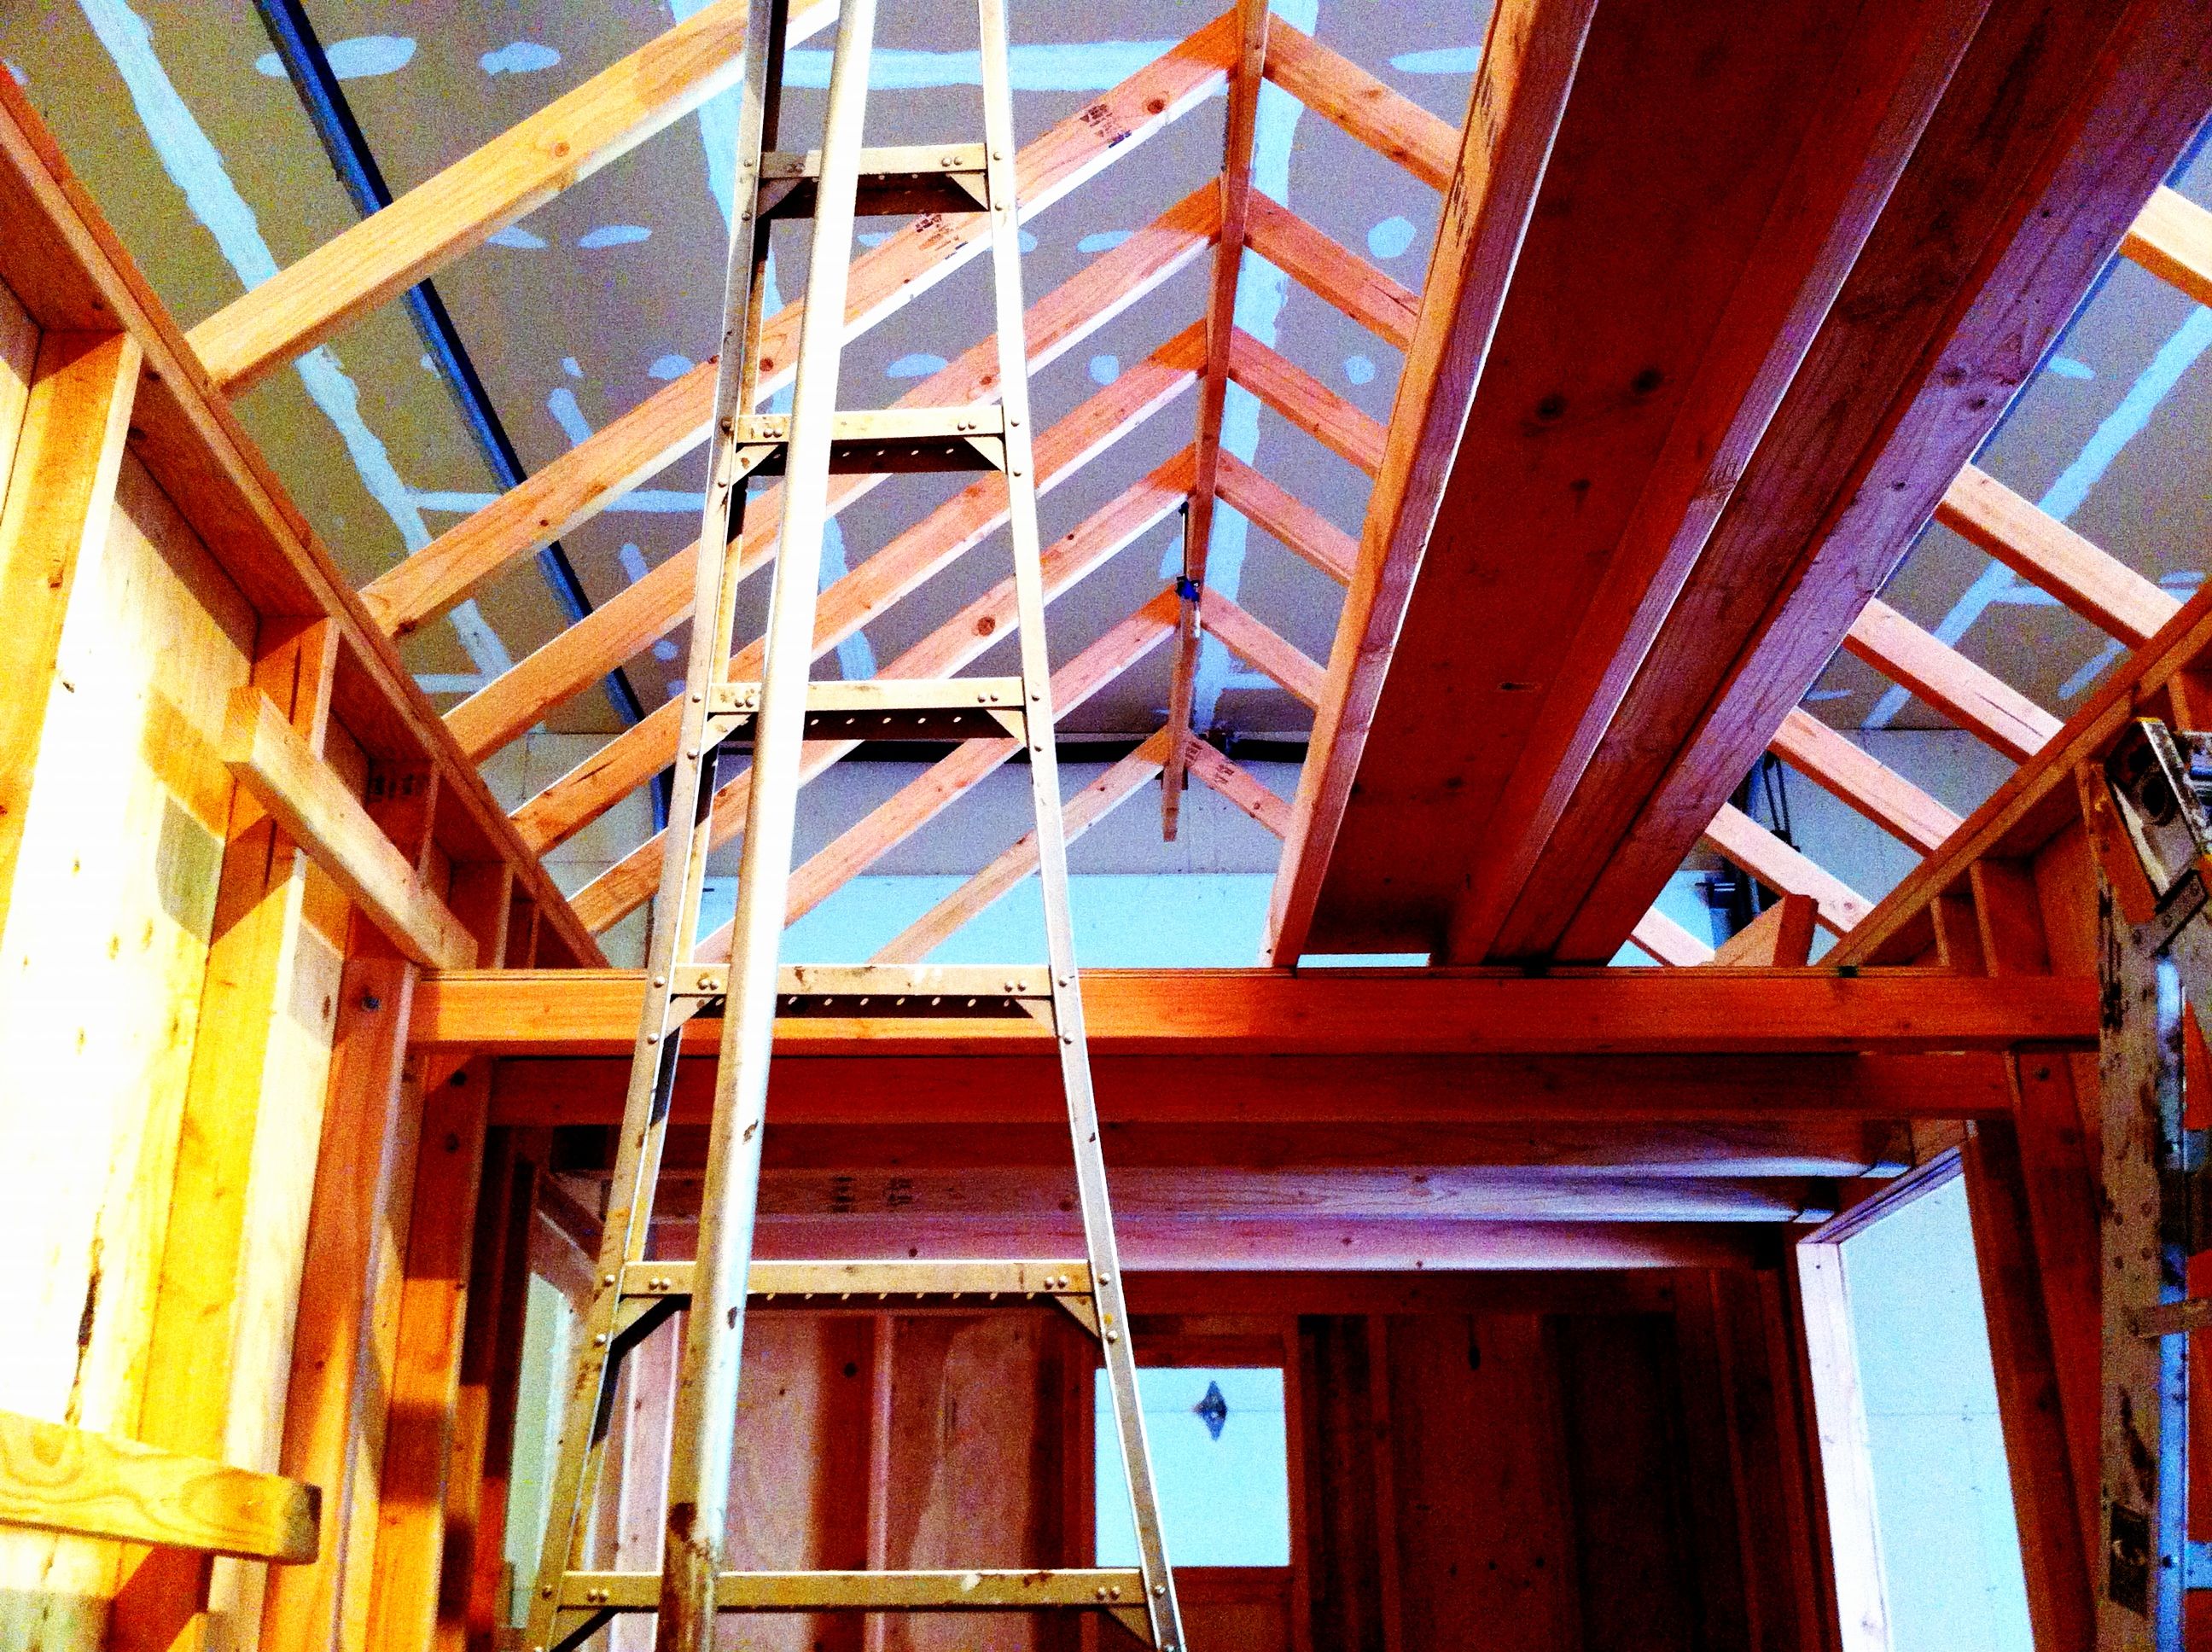
Looking up from inside the house.

As far as I got this stint. Still have to put on the flying rafters and add the skylight framing, blocking, straps and hurricane ties, but it feels really good. After working in the weeds for so long, it was a great feeling to step back and realize how far I’d come and experience the sheer “beingness” of it. Definitely the biggest art project I’ve ever done! 🙂
View from the other side.

I intentionally put in a fairly low loft so that I could maximize the space above. The bottom of the joists is at 6′ 2 1/4″, so most people won’t bump their heads and it’s a good 8″ above mine, but psychologically it does feel low. I’m pretty sure I’ll get used to it once it’s all finished.
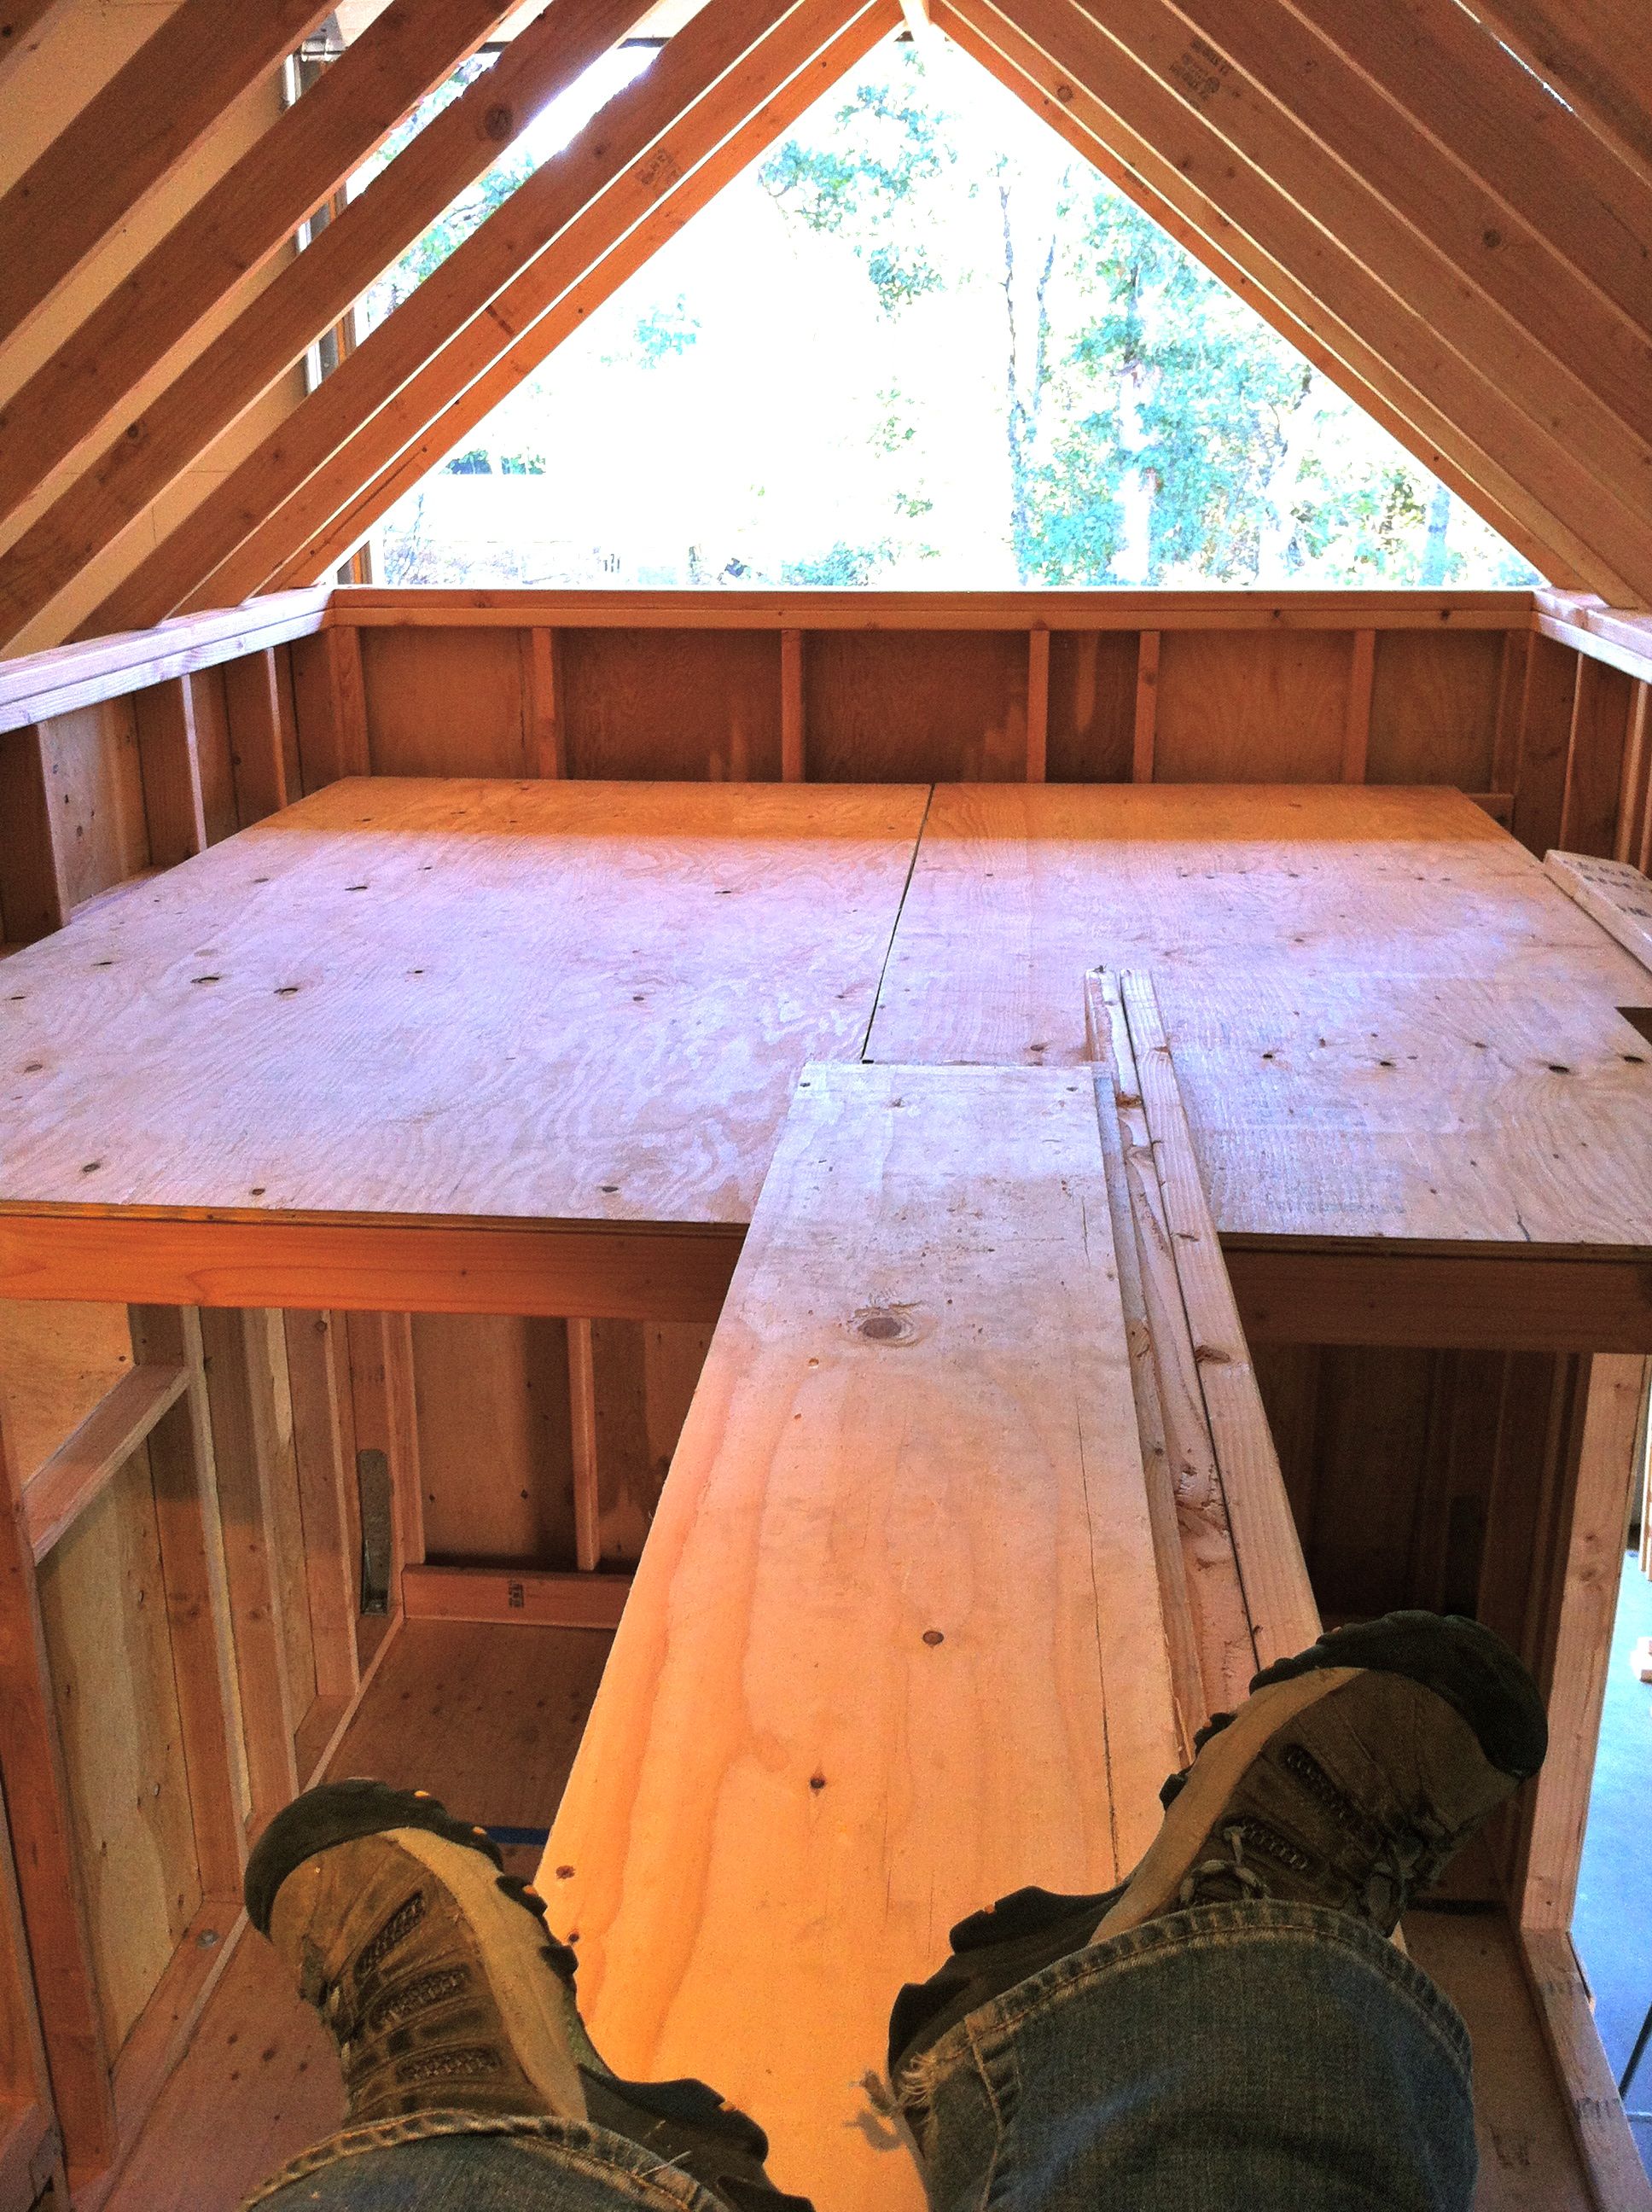
But here is the upside (literally!) – I ended up with a 54″ tall loft that feels super expansive. There will be a big skylight that opens, plus a small window in the peak. I’ve already taken my first nap up there and it feels great. 🙂 It also is a nice contrast to step out from under the low loft and experience the soaring 11″ ceilings in the living room. Sometimes you need contrasts to keep things interesting.

This is my favorite picture so far of Naj Haus, with Lucy in the foreground.
I went into Portland on my last day and met up with Lina Menard, who was covering for the owners of Caravan, the new tiny house hotel. It was great to see her again and see the tiny houses that make up the hotel. We got into an animated, rather explicit discussion about the pros and cons of different kinds of compost toilets, which gained us funny looks from a woman standing outside. Also got to meet John Labovitz, who’s wonderful house truck I had seen on a tour last year, and his mother, who was staying at the hotel. It’s a small world (ha!). Wound up the trip by spending an awesome evening with Joan and Rita at Pod49. They have created such an amazing space there. It’s always so good to see them and get inspired by what they’ve done. Also met Jeannie, who is just about to start building her tiny in Corvallis. Such a great community in Portlandia.
So there you have it. Now I’m back in the Bay Area wondering how I’m going to last two more months before I can get back up there again!

Take me back!!!

Wow, wow, and more wow. Girl, you got you some mad carpentry skills! Lovin’ every minute, and every photo, of this blog.
Thanks, Ash! It certainly is an incredible learning experience. Feels good.
Fantastic and I’m jealous as all get out! I’m still in the planning stage, you go girl!!!
Thanks, Julie – you’ll get there!
Hi Kate, Next time your out to work on your place and could use a hand. If its on a Thursday or Friday or Saturday, please give a shout. I would love to come out again and do what I can to help. Matt Adams
Hey Matt – that would be great. I’ll be up for most of November and will be in touch. Thanks!
I love living vicariously through your adventures. It’s looking great!
Thanks, Terri!