

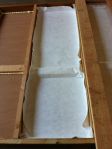
Naj Haus subfloor – doesn’t look like much…
Now that I’m about to leave to build my roof, maybe it’s time I caught up on how I constructed my floor! The three big take-away thoughts I had on the floor were:
- Floors look deceptively simple, but they encompass nearly every aspect of building the entire house.
- Because of #1, they are a good training ground for learning most of the skills you will need later on.
- Because of #2, the floor will probably take waaaaaay longer than you think.
But I should insert a caveat here – my floor was perhaps more complex than most due to a) the way I decided to integrate the house and the trailer, b) my choice of insulation, and c) my perhaps neurotic concerns about moisture and mold. The following walks through why I made the choices I did and then documents how I went about creating my floor.
(Note: this is all pretty technical and matter of fact; if you want to read about all my agonies and ecstasies during this time, see my Blood, Sweat and Tears… post!)
Integrating the trailer and the house: two different approaches
The majority of tiny houses on wheels are built on flat-bed utility trailers. If you buy a standard one off a lot, it needs to be customized before you can build a house on it. Typically, the cross ribs are welded at the top of the side rails to support a wood decking that will need to be all or partially removed. The side rails are usually on the inside of the wheel wells, which, without further customization, limits the width of your house. Often there are stake pockets and other additions welded on that need to be cut off. Many tiny house builders start with this type of trailer design and build the floor frame to sit on top of the trailer, bolting it to the cross ribs or the decking.
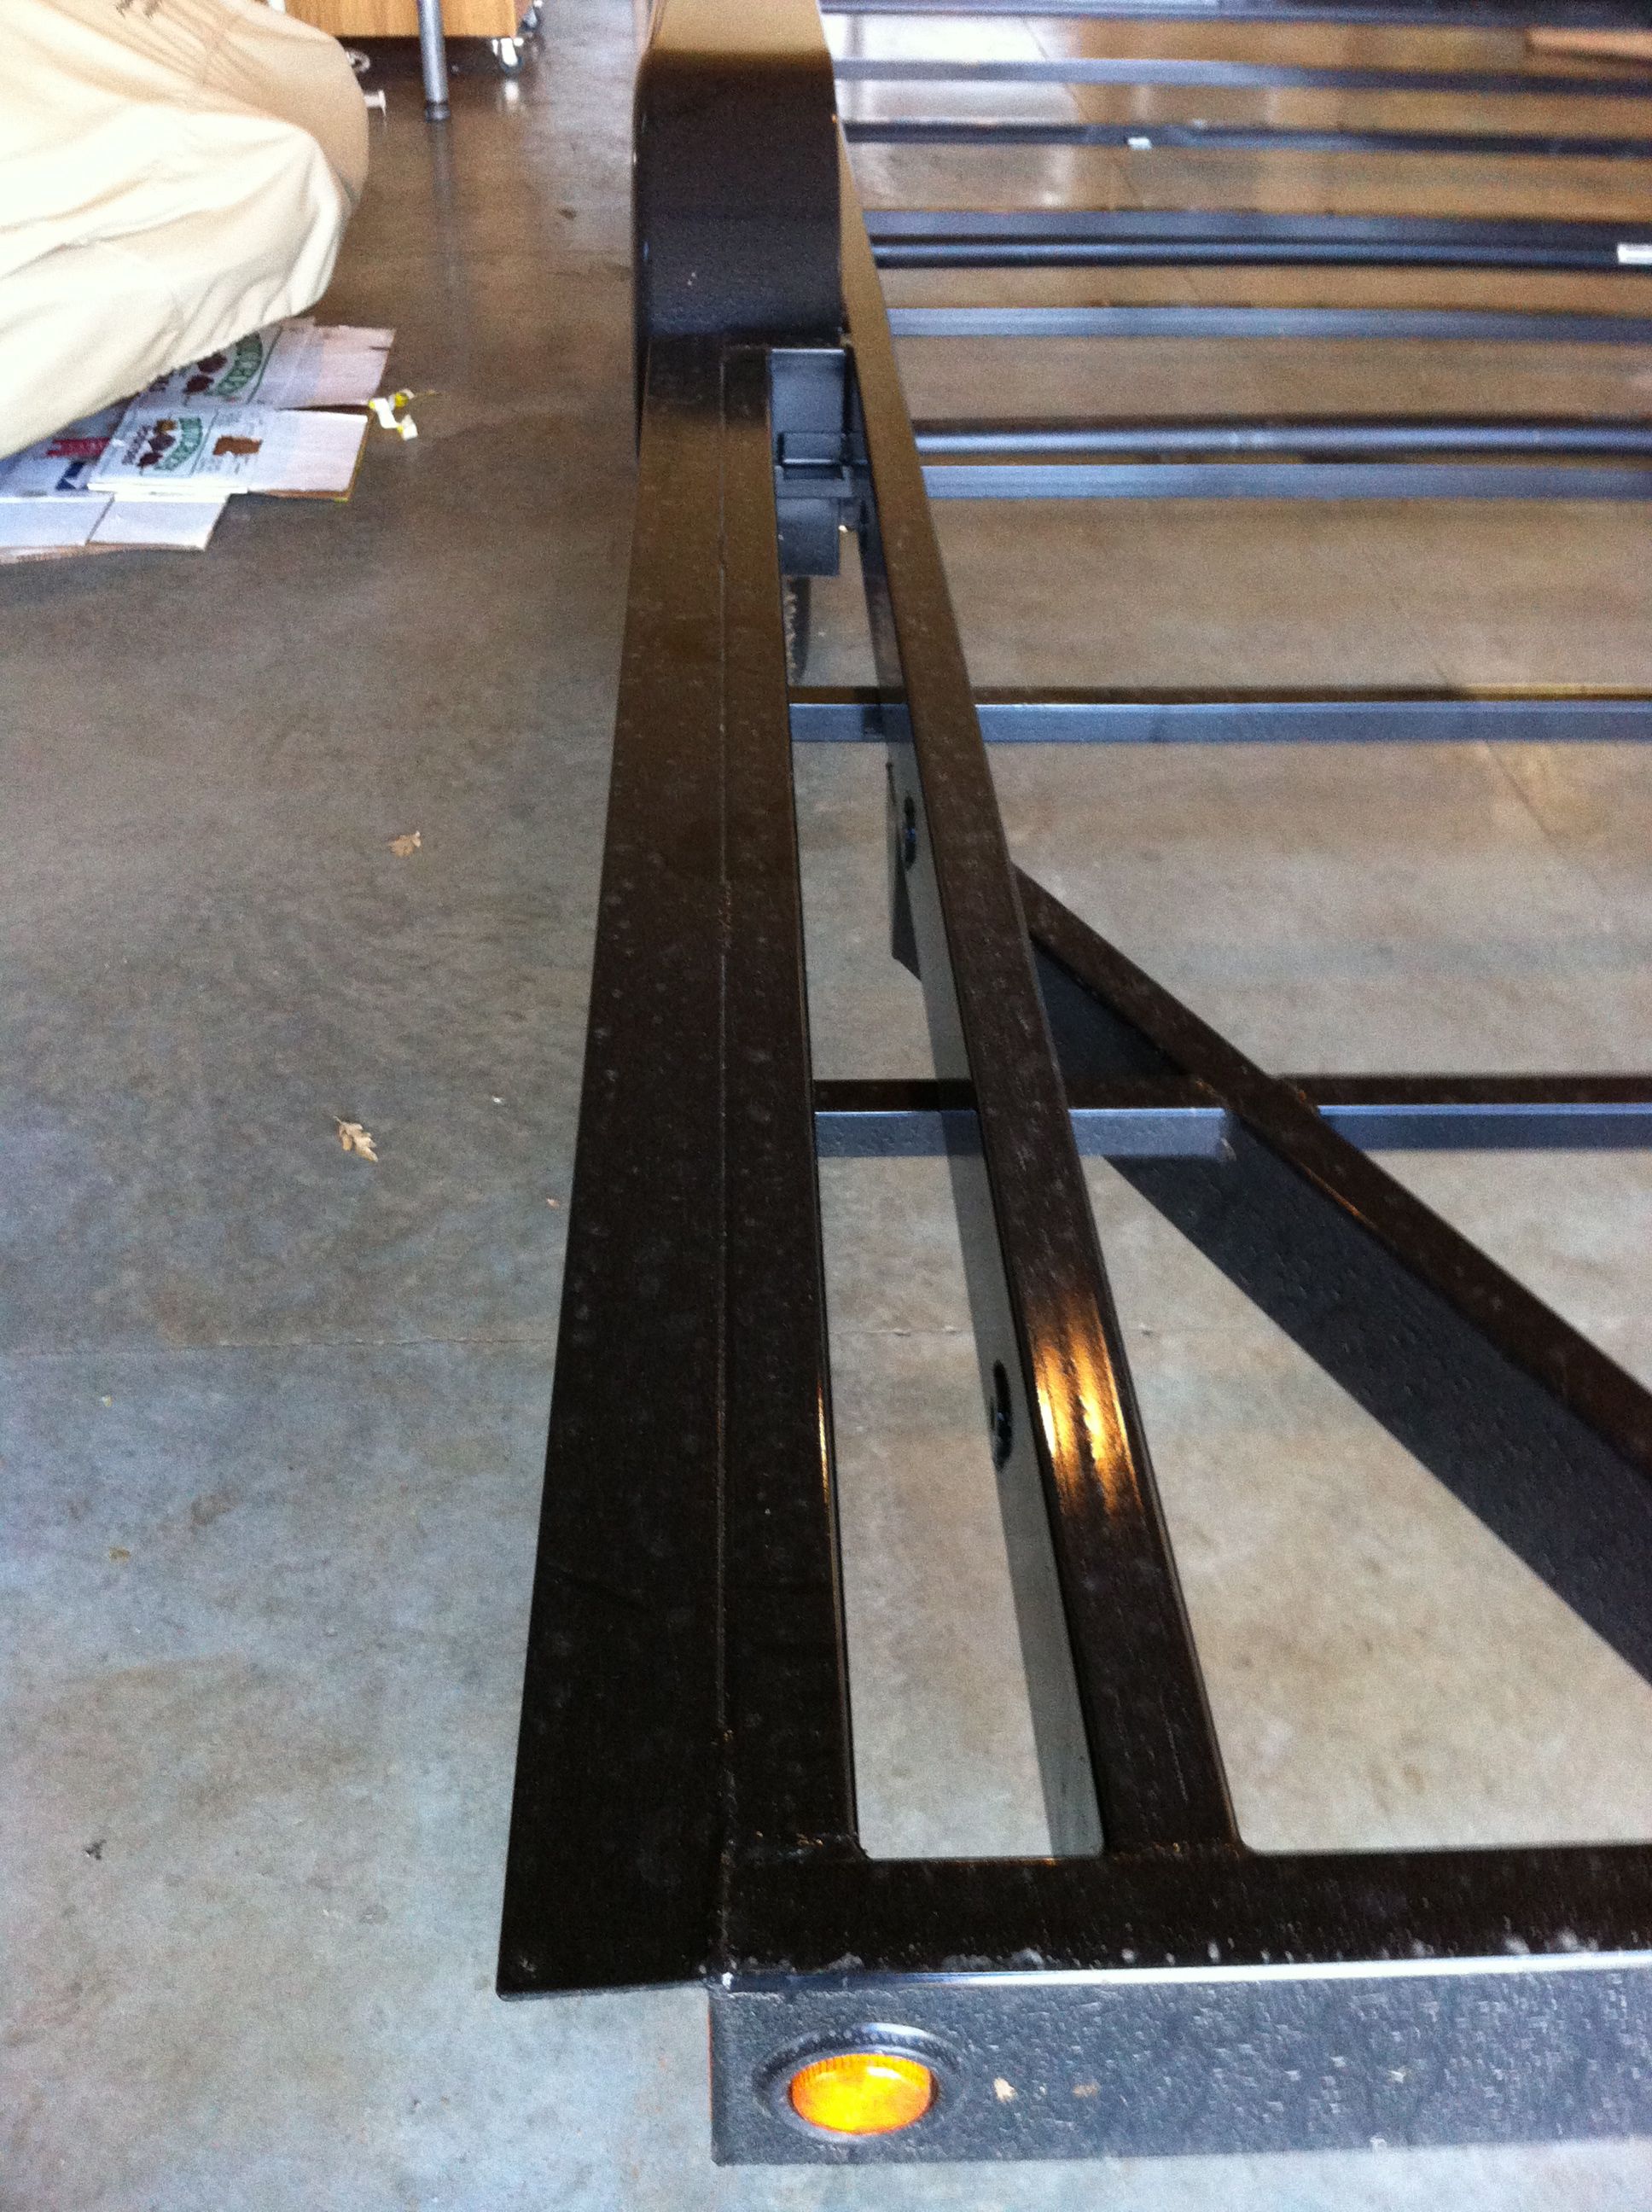
I chose a different approach, one in which the floor frame is dropped into the trailer frame so that the top of the floor is level with the top of the trailer. I ordered a trailer from Iron Eagle Trailers, outside of Portland, OR, that was custom-built for a tiny house. Iron Eagle has worked with PAD and other tiny house designers to drop the cross ribs to allow the floor frame to be set into the trailer. Holes are drilled in the side rails to bolt the floor frame securely to the trailer.

My trailer from Iron Eagle. Note how the cross ribs have been welded to the bottom of the side rails rather than level with the top, and one of the pre-drilled holes for bolting the floor frame to the trailer.
There are pros and cons to both the sit-on-top and the in-set methods and you’ll need to decide which makes sense for you. I suspect the sit-on-top method might be more simple and straightforward to construct. Depending on who’s doing the trailer customizations, this might also be the cheaper method, though from prices I’ve seen I’m not sure that is always true.
I went with the in-set method since I liked the idea that the floor was more firmly integrated with the trailer by being enclosed by the trailer frame and really bolted in, both horizontally and vertically. PAD’s excellent Go House Go construction manual explains how this works. I also knew there was a good track record with Iron Eagle building trailers for tiny houses. See my post on buying my trailer for how awesome they were to work with.
Additionally, two huge advantages of the in-set method are that it allows more interior house height and room for insulation. With a tiny house on wheels, you are locked into a maximum road legal height of 13.5′ or 14′ depending on which state you live in. The top of the trailer frame is typically about two feet off the ground. If you build your floor on top of the trailer, you have that much less height in your house (this usually means less room in the loft). Also with the sit-on-top approach, you will need to decide whether to sacrifice more interior height in order to use 2×6 floor framing for the extra insulation, or use 2x4s which limits how much insulation you can have. With the in-set method, you don’t have to make either sacrifice. Since you are dropping the floor down 5 to 6 inches below the top of the trailer, you get both a good amount of depth for insulation and that much more room up in your loft, which can make quite a difference.
The “side pocket” extension that adds an extra 6″ to each side. The angle iron allows you to bolt the walls down vertically to the trailer, in addition to the horizontal bolts through the side rails.
The other customization Iron Eagle did was weld on side pocket extensions along with angle iron on the outer edge. This way I could build out to the full 8.5′ width. I’d visited several tiny houses and having that extra foot of room on the interior is really noticeable. Because I want to have eaves off my gable roof, I will exceed the 8.5′ road legal limit but this just requires getting a temporary permit when you take it on the road (as long as you stay under 10′ wide). Since I don’t plan on moving it frequently, paying $30-40 and giving a day or two notice seemed like a good tradeoff for the extra room year round. (Note that this is true for the states on the west coast; it may differ in other locations so be sure to check it out if you’re considering going this route.)
Thoughts on insulation and moisture control
Before you start your floor, you need to make decisions about how it will be insulated. The floor doesn’t necessarily have to be insulated with the same materials you are using in your walls and roof. I agonized over this for quite awhile since I wanted something that was as energy efficient as possible but I also had concerns about the environmental and potential health impacts of many of the insulation types on the market. In the end, I decided to go with sheep wool from Oregon Shepherd since it’s natural, renewable, non-toxic, doesn’t off-gas, resists fire and pests, and handles moisture well, plus it felt good to support a local company. Wool has an R-value of about R-4 per inch which is in the middle range of the other options out there. It costs a little more but the benefits were worth it to me. The only real downside is that it is rather time- and labor-intensive to install, since it comes packed densely in boxes and you need to “fluff” it to allow air space around the wool fibers, which is what gives it its insulating properties (there are machines that can blow it in but I’ve heard that these don’t always work well, though I may look into this more for the walls.)
Last April, I helped Derin Williams of Shelter Wise pre-build the floor and one of the walls for the Casa Pequena tiny house build workshop. Derin is an expert in sustainable building and has been exploring a number of ways to create very energy efficient tiny houses. One of his methods is to create a thermal break (which slows heat loss) between the metal of the trailer and the frame of the house where possible. I liked his idea of inserting rigid foam board around the inside edges of the trailer to create a thermal break from the in-set floor frame. It also has the advantage of reducing the chance of condensation accumulating on the metal edge where it might rot the wood. So, while I had opted not to have rigid foam board as the primary floor insulation, it did make sense to use it in these targeted areas. I also used it to fill the side pocket extensions.
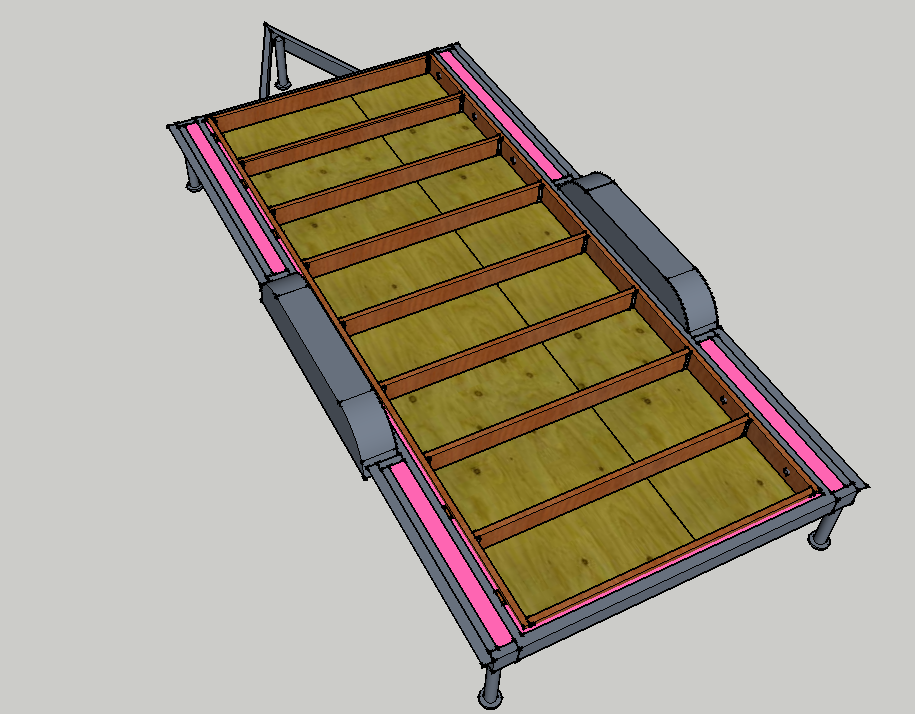
Naj Haus floor frame – the pink is the rigid foam board. Note how there is a 3/4″ layer between the trailer and the floor frame.
So I had made my insulation decisions, but that led to a quandary on the proper use of vapor barriers and/or vapor retarders. This is a complicated and changing field of building design, one that I will only touch on. Basically, you want to prevent moisture from getting trapped in your walls and causing mold and rot. Moisture can get in either via outright leaks from poor rain protection or plumbing problems, or via air movement when it is in its vapor state. The source of the vapor may be on the outside finding its way in, or from cooking, showering or other activities inside the house that generate steam or water vapor that moves out through the walls. Because of the their compact size, tiny houses are more vulnerable to moisture-from-within problems than larger homes. HUD has produced a great publication on the problems that can arise from moisture in manufactured homes, which is applicable to tiny houses. (Be forewarned, it might give you nightmares! On a side note, it makes an excellent recommendation for putting down a sheet of plastic beneath gravel under your house to prevent water vapor from rising out of the ground and up into your house.)
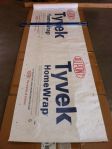
The Green Building Advisor has a set of related articles on how the focus should be not so much on adding lots of vapor barriers, due to the issues with condensation if not used properly, but on making an air-tight building package that doesn’t allow the moisture-laden air to get in from the outside. It’s interesting reading, though you may end up feeling more confused than ever about where tiny houses fall into the equation. There’s a nice summation at the end of the article on air barriers that’s worth reading. In short, at minimum use house wrap and make sure every seam and potential leakage spot is well sealed.
Oregon Shepherd recommends having house wrap on the outside, but no vapor barrier on the inside, in order to allow the walls to breathe. As I understand it, house wrap is essentially a directional vapor barrier and a vapor retarder (actually I think it is technically a vapor retarder with different permeance levels depending on which side is facing out). It resists moisture from entering from the outside, but allows moisture generated on the interior to pass through.
For the floor, which can’t have house wrap on the outside since it would be shredded when on the road, I had to come up with some other solution. Many tiny house builders use metal flashing to line the underside of the floor frame. This has advantages in terms of protecting against flying rocks and debris on the road, preventing rot of the undercarriage, and discouraging insect and rodent incursions, but it also seemed like it might trap any moisture that might come from the interior. Since warm, moist air rises, this might not be a real problem unless you have a plumbing leak or are generating an excessive amount of moisture inside.
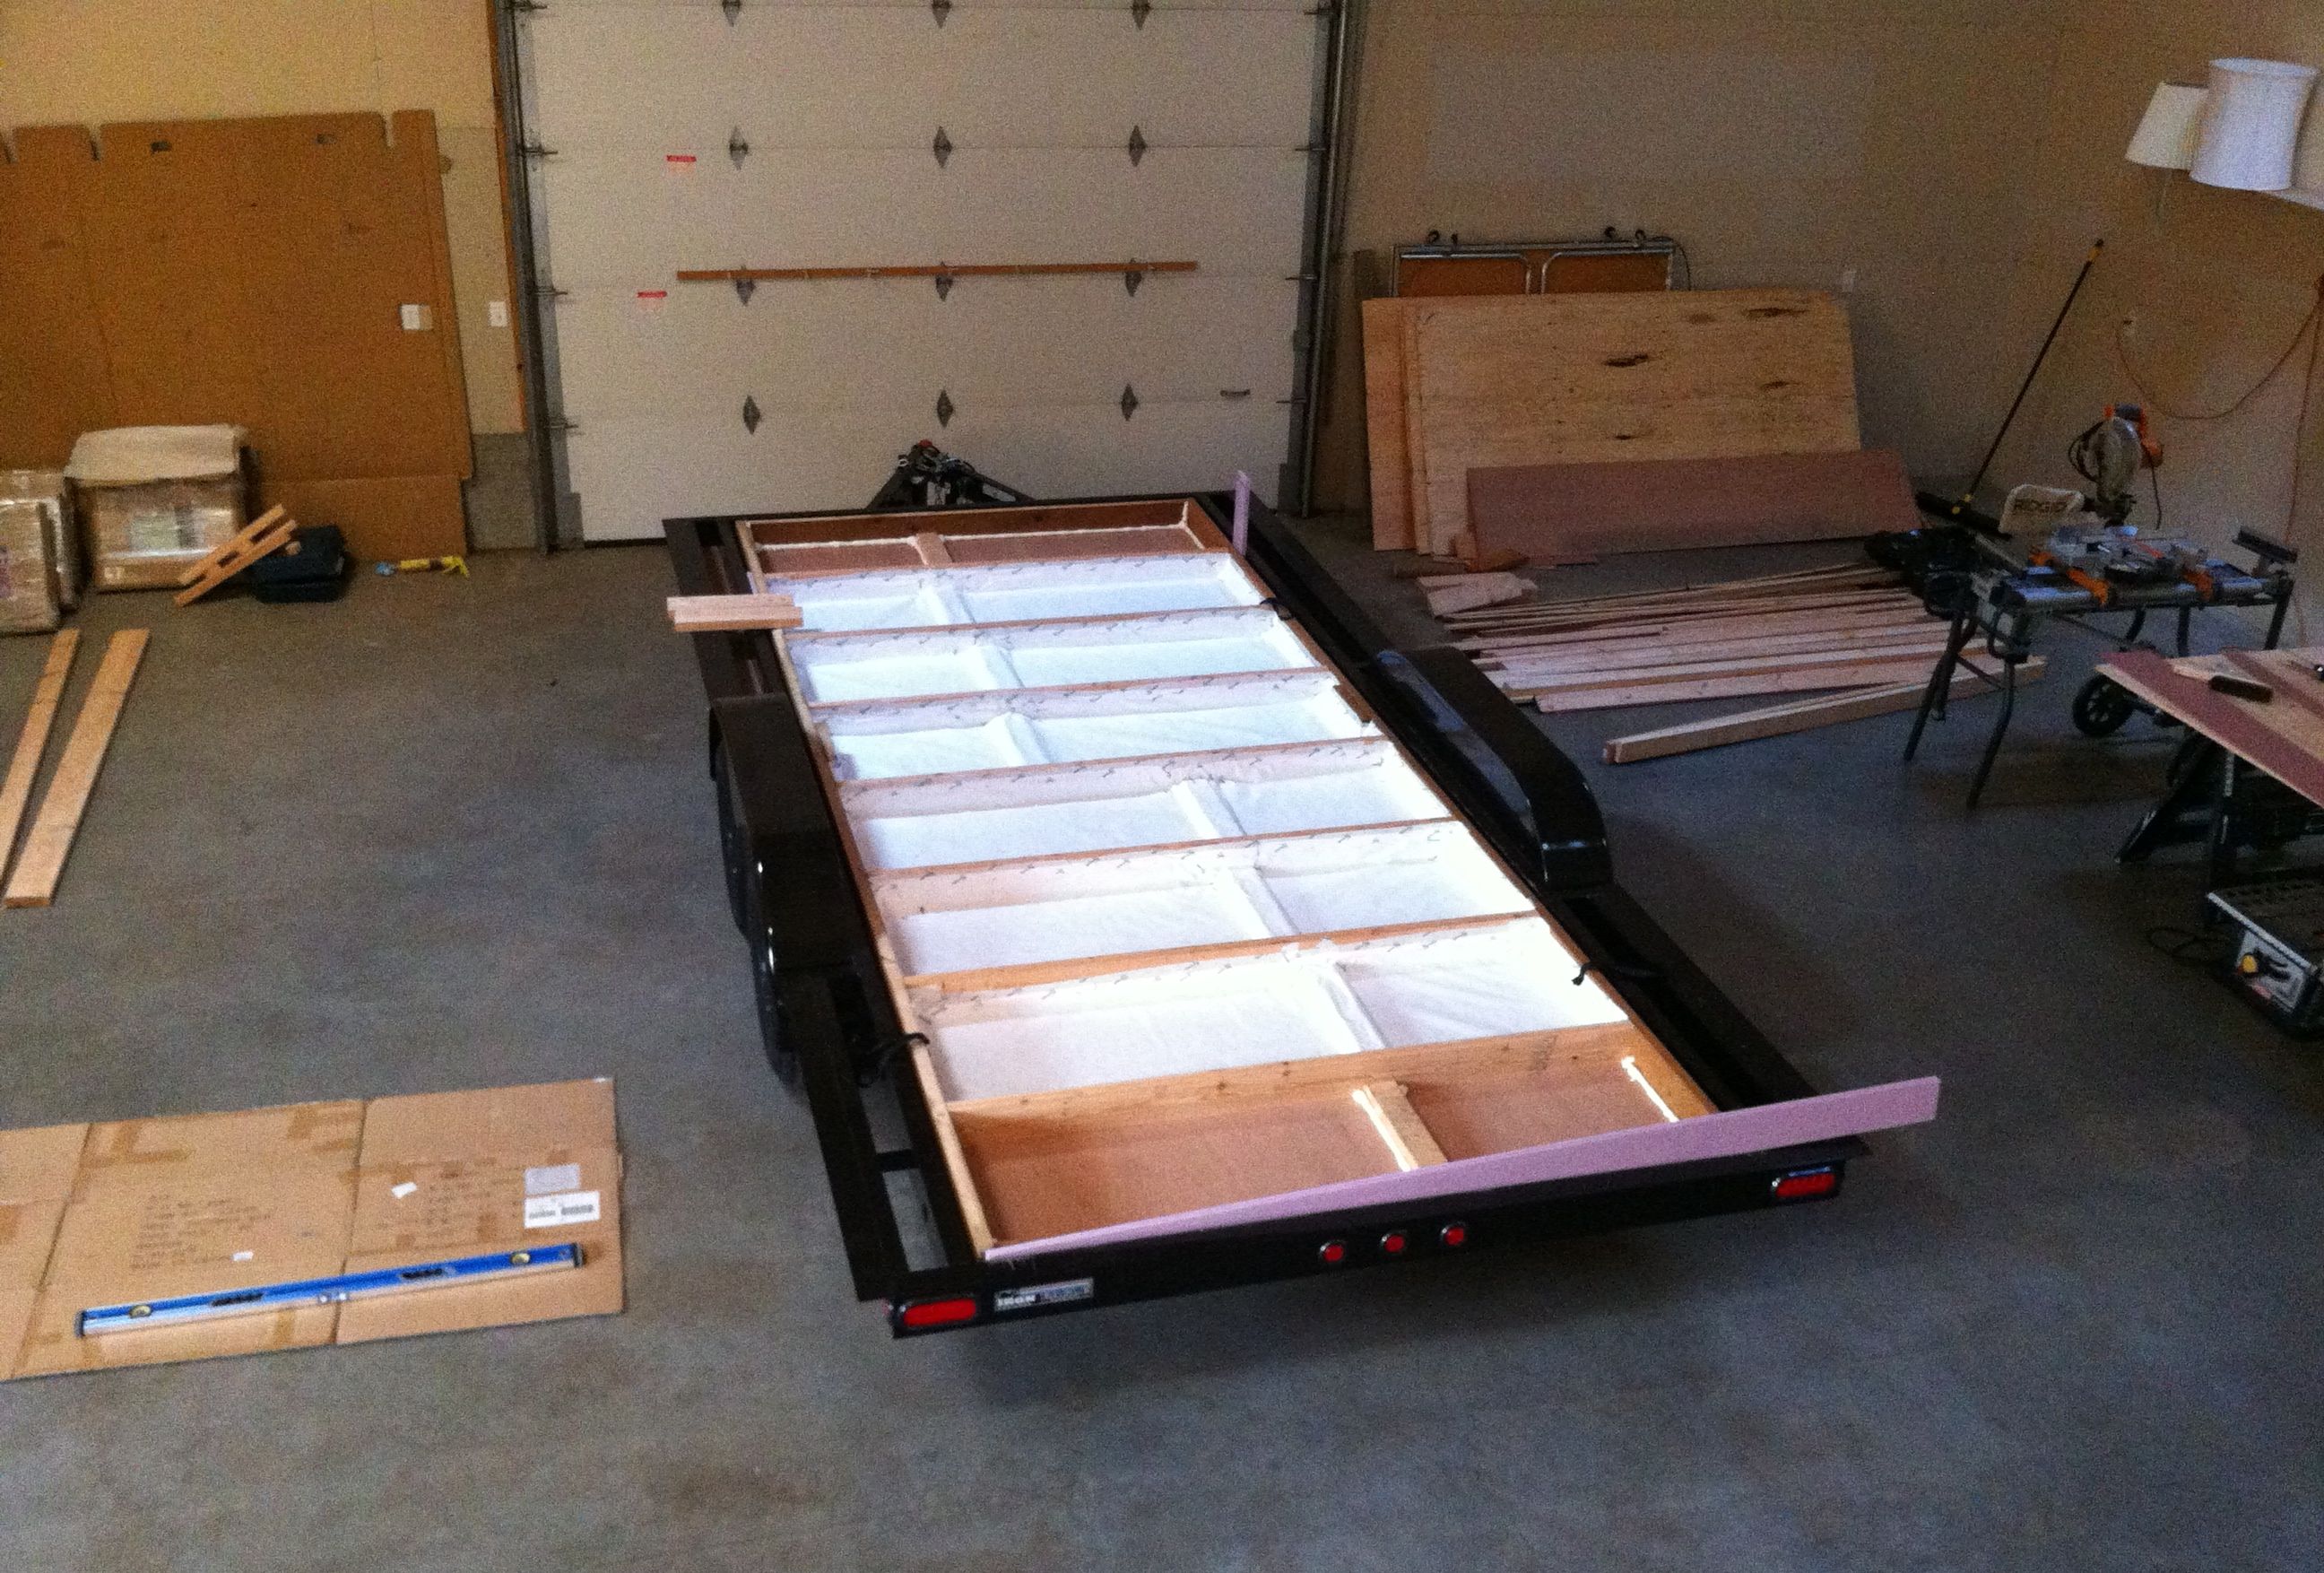
My solution: lining the interior of the floor frame with house wrap that is super tightly sealed from outside air. Note the purple rigid foam board that was later cut and placed between the floor frame and the trailer.
I decided to use marine-grade 1/4″ plywood for the undercarriage that was painted with a couple coats of oil-based paint. I then lined the floor frame with house wrap, made sure it was tightly sealed, added the wool, then attached the subfloor. My hope is that the plywood and house wrap will keep air and moisture from entering from outside but will allow any moisture from the inside to work its way out. There is a possibility that moisture from the inside could collect between the house wrap and the undercarriage if the paint is really acting as a vapor barrier, but I decided that since I didn’t have any plumbing and am taking pains to reduce inside moisture from cooking and other activities, that this was probably a low risk.

Right before adding the subfloor plywood, hoping the wind doesn’t suddenly pick up!
The actual steps of how I built the floor are below in case they are helpful to others. However, since I am not an expert in construction and moisture control, you should do your own research and get professional advice on how to design your house shell. Your approach will likely vary given your particular climate; whether or not you have plumbing; your choices of heaters, air conditioners and other appliances that might affect interior moisture levels; and whether you have proper fans and vents to handle water vapor.
Constructing the floor
Click on a photo to enlarge it. You can then click on the left and right arrows to scroll through the pictures in the viewer mode.
-
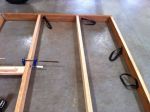
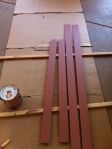
- Because the floor frame is bolted into the trailer, the joists do not have to be supported by the cross ribs; you can use joist hangers instead and put them between the ribs. This allows you to avoid the thermal bridge created by the joists resting on the metal ribs. However, at that point in construction, I didn’t have enough confidence in joist hangers and the bolts, so I ended up putting most of my joists on top of the ribs. In retrospect, I’d probably offset all of them with the hangers. Although I hate the chemicals, I used treated lumber for the four sides of the frame because of concerns about rot, but used untreated fir for the joists since they would be enclosed. This saved weight as well since the treated lumber is significantly heavier.
-

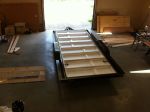
- I used 2x6s but had to rip them all down about 3/4″ so that they would be flush with the top of the trailer. I joined two 8′ pieces together and, since they were pretty bowed, the piece on the left is temporarily holding them straight until I got all the joists in. Because of the location of the cross ribs around the axles, I used joist hangers on two joists. Since the frame is upside down to receive the undercarriage, I had to remember to put the hangers on upside down!
-
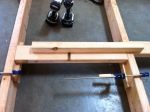
- I was worried about how heavy the frame might be once the undercarriage was on, and whether it would be difficult to flip and maneuver into the trailer. A friend of my dad’s suggested putting in handles.
-

- Close up of how the handles were attached using a 1 1/4″ screw with a washer. In the end, I had 6 people helping and the handles weren’t really necessary but they’re a good option to consider if you need them. You have to remember to attach them before you start to put the undercarriage on!
-
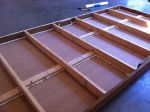
- I had a hard time figuring out the nailers for the plywood. I was going to use 2x2s but quickly realized you can’t put them end to end; you need to toenail them in. At that early point in construction, I wasn’t good at toenailing and so had to use staggered 2x4s so that I could face nail them in. It took a lot of clamping to get them in level with the top. Later Dee taught me how to kerf and chisel out notches in the joists to lay down a long nailer.
-

- Putting on the first piece of undercarriage: 1/4″ marine-grade ply with two coats of oil-based paint (from the oops bin at the store – hence the lovely color!). The rows of nailers are offset so the seams between the plywood sheets will be staggered.
-

- The frame flipped after the undercarriage was glued and screwed on.
-
- I added Great Stuff (spray foam insulation) to seal the seams where air (and thus moisture) might come in.
-

- Lining the bays with house wrap was incredibly time-intensive. The first bay I lined took 2.5 hours and there were seven more to do! Once I figured out how to do it so that it was form fitting and tightly sealed, I got it down to about an hour per bay. In case any one else is going to attempt this, here is the technique I ended up using. You need a utility knife, long straight edge, staple gun and staples, construction glue, house wrap and the special tape for it, and a long piece of cardboard to cut on.
-
- Step 1: Measure out how much you will need per bay (length and width) and mark it out on the house wrap. If you lay it with the writing side up, there are convenient marks and lines of writing to use without having to measure and draw lines each time. Just remember to flip it over after you’ve cut it so that the directional water-resistant barrier is operating the right way.
-
- Step 2: Put some lines of glue down so that the bottom will lie flat.Loosely place the house wrap in the bay and position it so it folds up the sides evenly.
-

- Step 3: Use your thumbnail to crease around the edges so that it lies flat against the undercarriage and the joists. This provides the maximum space for insulation. Use a few staples to hold the edge flaps in place. Be sure to put the staples near the top edge so that they will be covered by the tape. The corners will buckle but that’s dealt with in the next step. Note that it’s good to put some boards across so you have somewhere to put your knees and toes as you’re working on the interior bays. That way you’re not damaging your already-wrapped bays or your undercarriage.
-

- Step 4: Make a diagonal cut from the corner down to the undercarriage. Fold the pieces over themselves so that they overlap and trim off the excess.
-

- Step 5: Tape the end down securely. Put pieces of tape over the corner cuts so they are completely sealed and then run tape all along the edge.
-

- Step 6: Cut the house wrap to fit tightly around the nailers. I finally discovered that the easiest way to do this was by making two diagonal cuts like was done in the corners and one snip in the middle.
-

- Step 7: Tape each cut and all along the entire edge of the bay so that it is completely sealed. If you rip the wrap anywhere, slap on a piece of tape and make sure all your staples are covered. In theory, as long as the house wrap tape holds (which is extremely sticky), each bay should be completely sealed off from the exterior.
-
- Once the bays were lined, I got help to lift the frame into the trailer. I removed the handles and taped over the holes, and put the 3/4″ rigid foam board strips between the floor frame and the trailer (it all fit miraculously well except for one small section. I ended up using a hand planer to shave some of the rigid board down.)
-

- After the frame was in the trailer, I had to drill holes through the frame and rigid foam board so that they could be bolted to the trailer. This was one of the hardest parts since it required very precise measuring to know where to drill so that it would line up with the pre-drilled holes in the trailer. There were washers welded to either side of the holes in the trailer but in some cases they weren’t lined up precisely so I ended up having to drill through a lot of metal, which is not easy. Plus there is something extremely disconcerting about pulling a screaming drill with a 5/8″ bit as hard as you can right toward your heart! The bit would bind and flip the drill around. I had bruises all up and down my forearms. My neighbor, Steffen, taught me that if the hole isn’t quite straight, you can put a nut on the bolt so that it’s supported on each end and pound it with a hammer to put a slight curve in it. After I got all 10 bolts in with washers, I added some lock-tite and, as an added precaution, stripped the threads on the end so the nuts wouldn’t come loose. I then taped over the head of the bolt so the hole inside the bay was sealed.
-
- I cut and painted strips of the 1/4″ undercarriage ply to fit in the side pockets to support the rigid foam board.
-

- Dee, Sam and Kiva arrived to help (yay!). Here they are adding Great Stuff around the rigid foam board to seal the sides and the side pockets. Note the nailer we added for the subfloor ply using the kerf and chisel (“let in”) method – much easier!
-
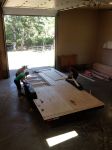
- We also measured and cut the 3/4″ subfloor plywood. This was tricky because my trailer is 16.5′ x 8.5′ so it didn’t lend itself to the standard size of plywood. We had to cut strips to use on some of the edges.
-

- Then came the endless wool fluffing. It’s hard to tell but the mound in the front is the compressed wool and everything else has been fluffed.
-

- Once the frame was full of wool, I glued and screwed the subfloor down.
-

- I put a photo of Naj in as the heart of my house. For the full story on this see my Blood, Sweat and Tears post.

Ha! So now what do you see when you look at the finished floor? Not quite as simple as it first appeared, eh? After all that work it was extremely gratifying to have it feel really solid.

I may have to re daw my TH plans now that I have seen how you put the subfloor inverted. I really like this idea! Question, why didnt you put the house wrap flat on the 1/4 board? I suspect you had a good reaso, just wondering why. Thanks for sharing
Hi Julie – good question! I thought about that but the problem was I wanted to be able to both glue and screw the ply down for added stability and to seal the seams. If I put the wrap down, then I’d be gluing onto the wrap rather than the frame, in which case it wouldn’t make sense to use the glue. It was for this same reason I didn’t run the wrap down the length of the floor frame, up and over the joists, which was something else I considered when I realized how long it was going to take to cut the lining for each bay individually. In the end, this was the best method I could come up with, but you might be able think of something better!!
One thing to be aware of if you go with the in-set method is that the dropped cross ribs might not all be exactly the same distance down from the top of the trailer. Be sure to measure them all and pick the smallest measurement to rip all your boards down to. That way the frame won’t stick up above the trailer (mine did a little in one corner despite doing this but a couple people jumping on it made it settle in 🙂 I was afraid I was going to have to plane the whole thing down.)
Alternatively, if you want to have the full 2×6 framing without cutting it down, you can fill in the space it sticks up above the trailer frame so that the subfloor will stretch flat across both the floor and trailer frames. Hope that makes sense!
Good luck!
Kate
Hi,
Thank you for this great resource. My girlfriend and I are building a tiny house this summer and are also ordering from Iron Eagle. I was wondering how deep your floor is from the top surface of the trailer to the ribs not including the subfloor. 5″?? Did you have to rip down 2x4s to get the subfloor to sit flush on top of the frame? We are building a 24 foot and Rob at iron eagle says the depth will be 5″. Just trying to figure out how to frame the floor with standard lumber dimensions. Thanks so much!!!!!
Hi Ben – yes, I did have to rip down 2x6s for the floor frame…I think to about 5 1/4″ if I recall. My original idea was to build up the platform on the outer rails to be able to use the full 2x6s, partly to get more room for insulation and also because I was intimidated by the table saw at that time! But in the end decided ripping was easier than figuring out how to attach 1xs to the rails. It worked well, just make sure you figure out your shallowest depth at each cross rib and use that to rip down to and don’t forget to factor in the depth of your undercarriage material. Also make sure you get really straight pieces of 2x6s. My frame went in pretty easily but one corner bowed up a little. I thought I’d have to plane a lot down but it turned out a 6’7″ guy jumping on it made it sit in beautifully. 🙂 Good luck!
Hey Kate,
As far as I can see, there’s nothing between the metal of the trailer flange and the top deck of the subfloor plywood. Is this a potential concern for condensation seeping in the outer framing?
Hi Michael – I think you’re talking about the how the subfloor lays down over the side extensions, right? I was worried about condensation too, but the way my subfloor laid out, I was left with putting skinny strips over the extensions. This meant that they were mostly attached with glue initially until I got my wall frame up and bolted down through the subfloor and extensions. If I had put foam between, like I did vertically around the floor framing and trailer, it would made it uneven with the rest of the subfloor (some people have used rigid foam in place of the subfloor under the wall bottom plate but I was worried that would compress). In reality, the wall bottom plates are over much of the extension and so there’s not much chance of moisture getting in there from the interior, and as for exterior moisture, I sealed it up well with glue, caulk and metal flashing so I feel pretty comfortable with it. I think the new Iron Eagle trailer designs deal with this issue.
Hi Kate,
Great blog! Looking forward to getting to see how things turned out for you. I have also been looking at Jake and Kiva’s youtube videos, is that the same Kiva in one of these photos? Anyway, I’m wondering when you bought your trailer from IE? When I compare it to the one Jake and Kiva bought from them there is some difference in the side extensions….Your trailer has a cavity in that section whereas theirs is solid. Did they make a special request or did IE change things…? Thanks! Again, love all the info in your blog!
Hi Jody – I’m not familiar with Jake and Kiva (different from the one I know), but it sounds like they bought one of the newer trailers from IE. PAD, Shelter Wise and IE teamed up to design the latest version: http://padtinyhouses.com/trailer-designed-for-your-tiny-house/ . I got mine in 2013 – it had some of the refinements, but they’ve taken it further since then. Thanks for visiting!
Hi – Yes, IE trailer has changed to include solid extensions now… we just got ours last month. In either case, the outside dimension for the extension is 100″. We wished we’d asked for 96″ to match the length of a 4×8 plywood subfloor panel and to leave some room for roof overhang, and still stay close to the 102″ legal limit (without a permit). Kate – Jody is referring to Jake & Kiva of TinyNest. They have a great series of construction videos online. Question I have for you is, since you are building your wall all the way out to the full width of the trailer, are you still using 45 degree roof slope? And if so, what are your interior dimensions? That should mean that your outer walls are shorter than “typical”, giving less interior headroom on the main floor (though more in the loft). Thanks!
Because I opted to not do dormers, I increased my roof pitch from 12:12 to 10:12 (50 degrees), which I highly recommend if you don’t have dormers – it both gives you an airier feeling in the loft, especially if you have a skylight, and gives you taller side walls. I can’t remember if my side walls are 7’9″ or 8′, but as you say, it all depends how far out you put them and the height and pitch of your roof. Keep in mind that your roof treatment will add height, e.g., a 1″ standing seam cut at an angle at the peak might be 1.5″ or 2″ depending on pitch, and you’ll also have a ridge cap. And you might decide to add rigid foam on the roof, further adding to the height, like I did. I pushed it to the 14′ limit (west coast states are more lenient), though once I lower it off the jacks, it will be less. Another thing you should check is what the width restrictions are where you live/plan to be. In OR, it is based on the width at the wheel height – so eave overhangs don’t count. That gives you freedom to build all the way out to the edge, which you’ll really appreciate!
Excellent site Kate. I just picked up my trailer (also 100″) wide as per daburkle’s comment. I too wish we had 96″ as it makes the build way easier as things just fit, less figuring out and less potential for wasted material.
I also opted for 1/4″ marine ply to apply directly to the trailer frame, I was considering leaving it untreated and just laying it directly on the steel frame? Has your research led you to do otherwise? I see you used oil paint, something I’d like to leave out, but if it saves the wood, then I’d be willing to make that additional step. I have also considered playing some building paper between the ply and the frame, any advice there?
Thanks again
My journey has started over at http://tofinotinyhome.com
Hi Alan, sorry it’s taken me so long to respond. You’ve probably made your decisions on this and well underway. For anyone else with similar questions, I wouldn’t use untreated ply – it will definitely rot out. I don’t think the building paper, if exposed to the road, will hold up for long, but it depends on how much you’re moving it. One thing everyone should do for sure is put a layer of plastic sheeting on the ground beneath the trailer once you are parked. An amazing amount of water vapor comes up from the ground. The sheeting will help protect the underside from moisture and will likely keep your floor a little warmer. Hope it’s going well!
No problem. I have indeed almost finished the structure, siding arrives today. I decided to go with marine ply and paint it with a latex based paint. Great top about the sheeting underneath. I’m going to put a tarp there now. Thanks.