

Iron Eagle Trailers
Now things are starting to get real. Last weekend I picked up my trailer and delivered it to my parents’ garage, where I will start my build this summer. Lots of excitement around that, as well as some nervousness and a funny sort of limbo feeling since it’s still a little ways off. I’m also realizing just how much research and final design work I need to do in the next few months!
Since I’ve found it very helpful to read about other tiny houser experiences, I thought I’d pass on what I learned about buying and towing a tiny house trailer.
The genius that is Iron Eagle Trailers
The trailer is the foundation of a tiny house. I knew I wanted to buy a new trailer rather than trying to convert a used one, for both peace of mind and to save time. I chose to go with Iron Eagle Trailers outside of Portland, OR. They are the company that Portland Alternative Dwellings and others have used, so I knew they were already experienced in the customizations required for tiny houses. It was also convenient that they are only about 45 minutes from my build site.
Turns out this was a brilliant decision. Iron Eagle makes extremely well-constructed and affordable trailers using box tube steel framing that resists twisting and flexing forces better than channel or angle iron framing, while also completely enclosing and protecting the wiring. Their trailers last for decades. Iron Eagle tongues are 12″-18″ longer than most (okay, that sounds funny), which is easier for steering and backing, reduces the weight on the vehicle from 15% of the trailer weight down to 10%, and allows room on the tongue to build a bay window or tool shed. They use LED lights that will likely last the lifetime of the trailer and are maintenance-free and much brighter than incandescents. They provide manuals from the axle company which are a great resource for maintenance questions. The Iron Eagle website also has a good list of what to look for when buying a trailer.
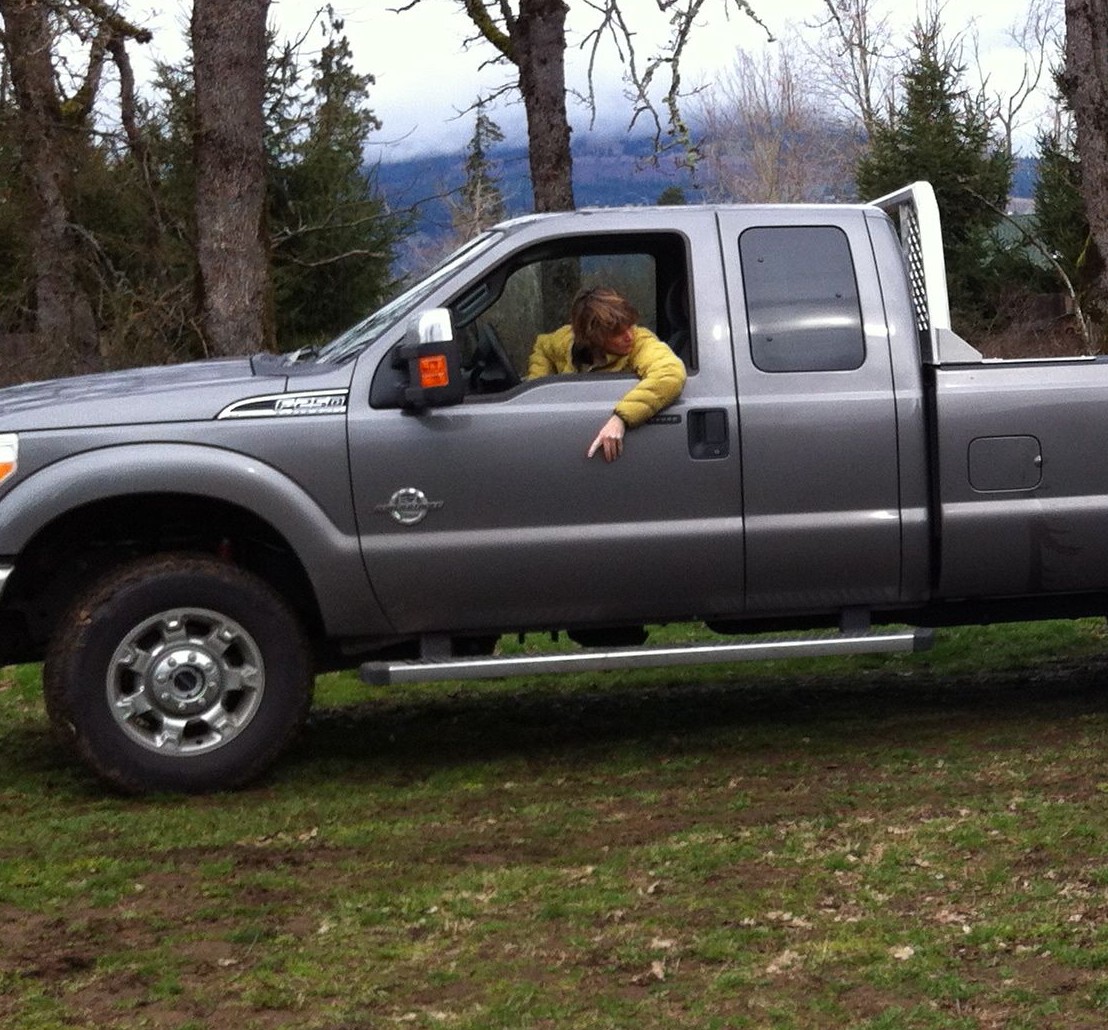
I was most impressed with the level of customer service provided. Rob Mandzij was great about answering lots of questions as I was figuring out the ordering details, during my frantic scrambling to find a tow vehicle with the proper hitch (more about this below), and then taking the time to go over everything I needed to know about hauling and maintaining the trailer on the day I picked it up.

Rob demonstrating proper hitching technique.
Rob is very interested in customizing trailers for tiny houses and has been working with Dee Williams at PAD, Derin Williams at Shelter Wise, LLC, and other Portland tiny house builders to continually come up with new innovations that provide the necessary structural integrity while keeping the weight low. He has a couple of options for extending the frame if you want to build out to the full 8.5′ width limit. On Dee’s recommendation, he used smaller cross ribs to reduce weight and came up with a way to attach them to avoid crowning of the side rails, which can happen from the typical way they are welded on. He also welded the tongue jack on the inside of the tongue so that there is room for stabilizer bars on the sides if needed (often the jack is attached to the outside of the tongue).
When I ordered my trailer, Rob worked with me to determine how far to move the front axle forward to handle the weight of my loft over the front half of the trailer without compromising the space I needed for my entrance door and bathroom. He also had holes drilled in the side rails where the floor framing will be attached, and reinforced them with welded washers on each side. (Note: for more about this approach, check out PAD’s tiny house construction e-guide, Go House Go. I found it to be one of the most solid, secure attachment methods out there. There’s a lot of really great information in the guide – well worth the price.)
Trailer metaphysics
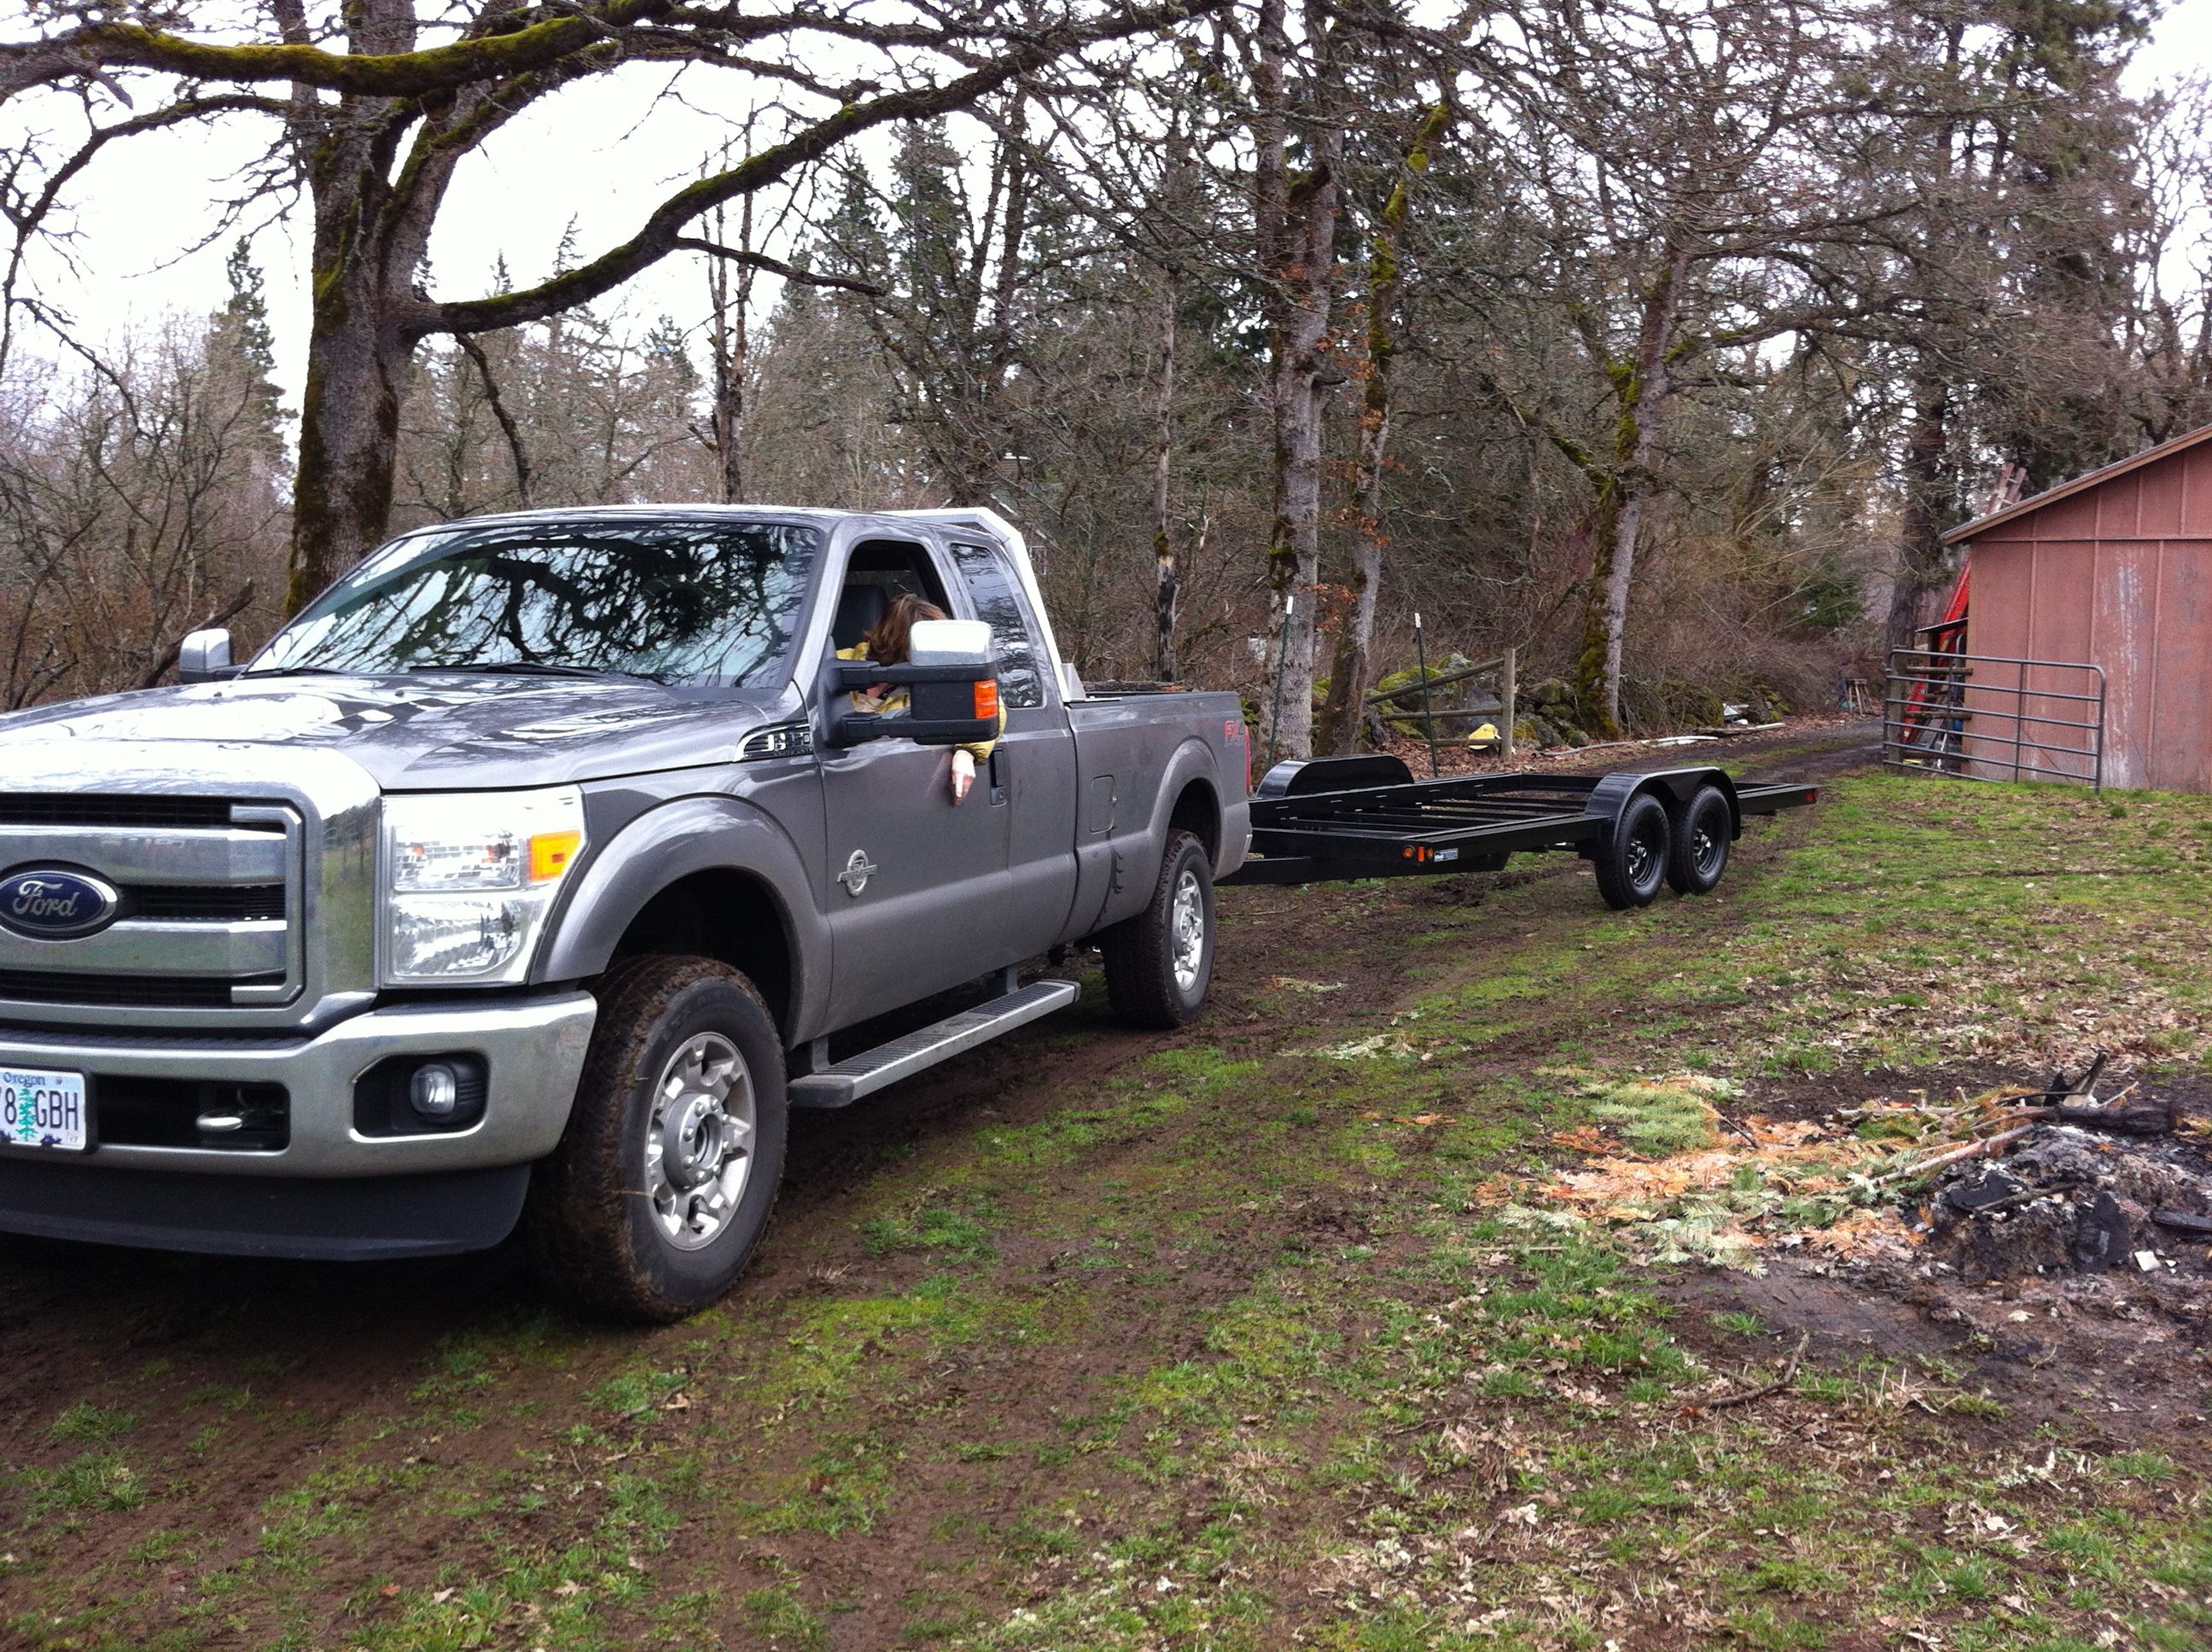
There appears to be a common phenomenon among tiny housers just starting their build where they experience fluctuations in the space continuum – specifically, the shrinking and expanding of their trailer. This has happened to me already and will probably continue as I get the floor down and the walls closed in. From my design work so far, I thought I’d come to terms with living in a space about 16′ x 8′. Then Rob sent me a photo of my trailer when it was done:

My trailer.
Something about the distance and lack of scale made it look very tiny and insubstantial. I had a flash of panic. Would it be solid enough to hold my house? Can I really live in that?
Once I saw it in person, all that quickly changed. It’s actually incredibly hefty and felt much bigger than I expected. Turns out a 16′ trailer ends up being more like 16.5′. That extra few inches can make all the difference in a tiny house; I felt like I’d won the lottery.
While many tiny housers build their walls up entirely between the wheel wells so that they can stay under the 8.5′ road legal width limit, I chose to increase the width. If your house width at its widest point, typically the eaves, is between 8.5′ and 10′, you need to get a special permit in most states (if you go over 10′ you get in the wide load realm, which requires pilot cars, certified drivers, etc.). At least in Oregon and California, where I’ll most likely be, this just involves notifying the state a few days in advance of the move and paying a small fee. I decided that this was worth it for the extra space.

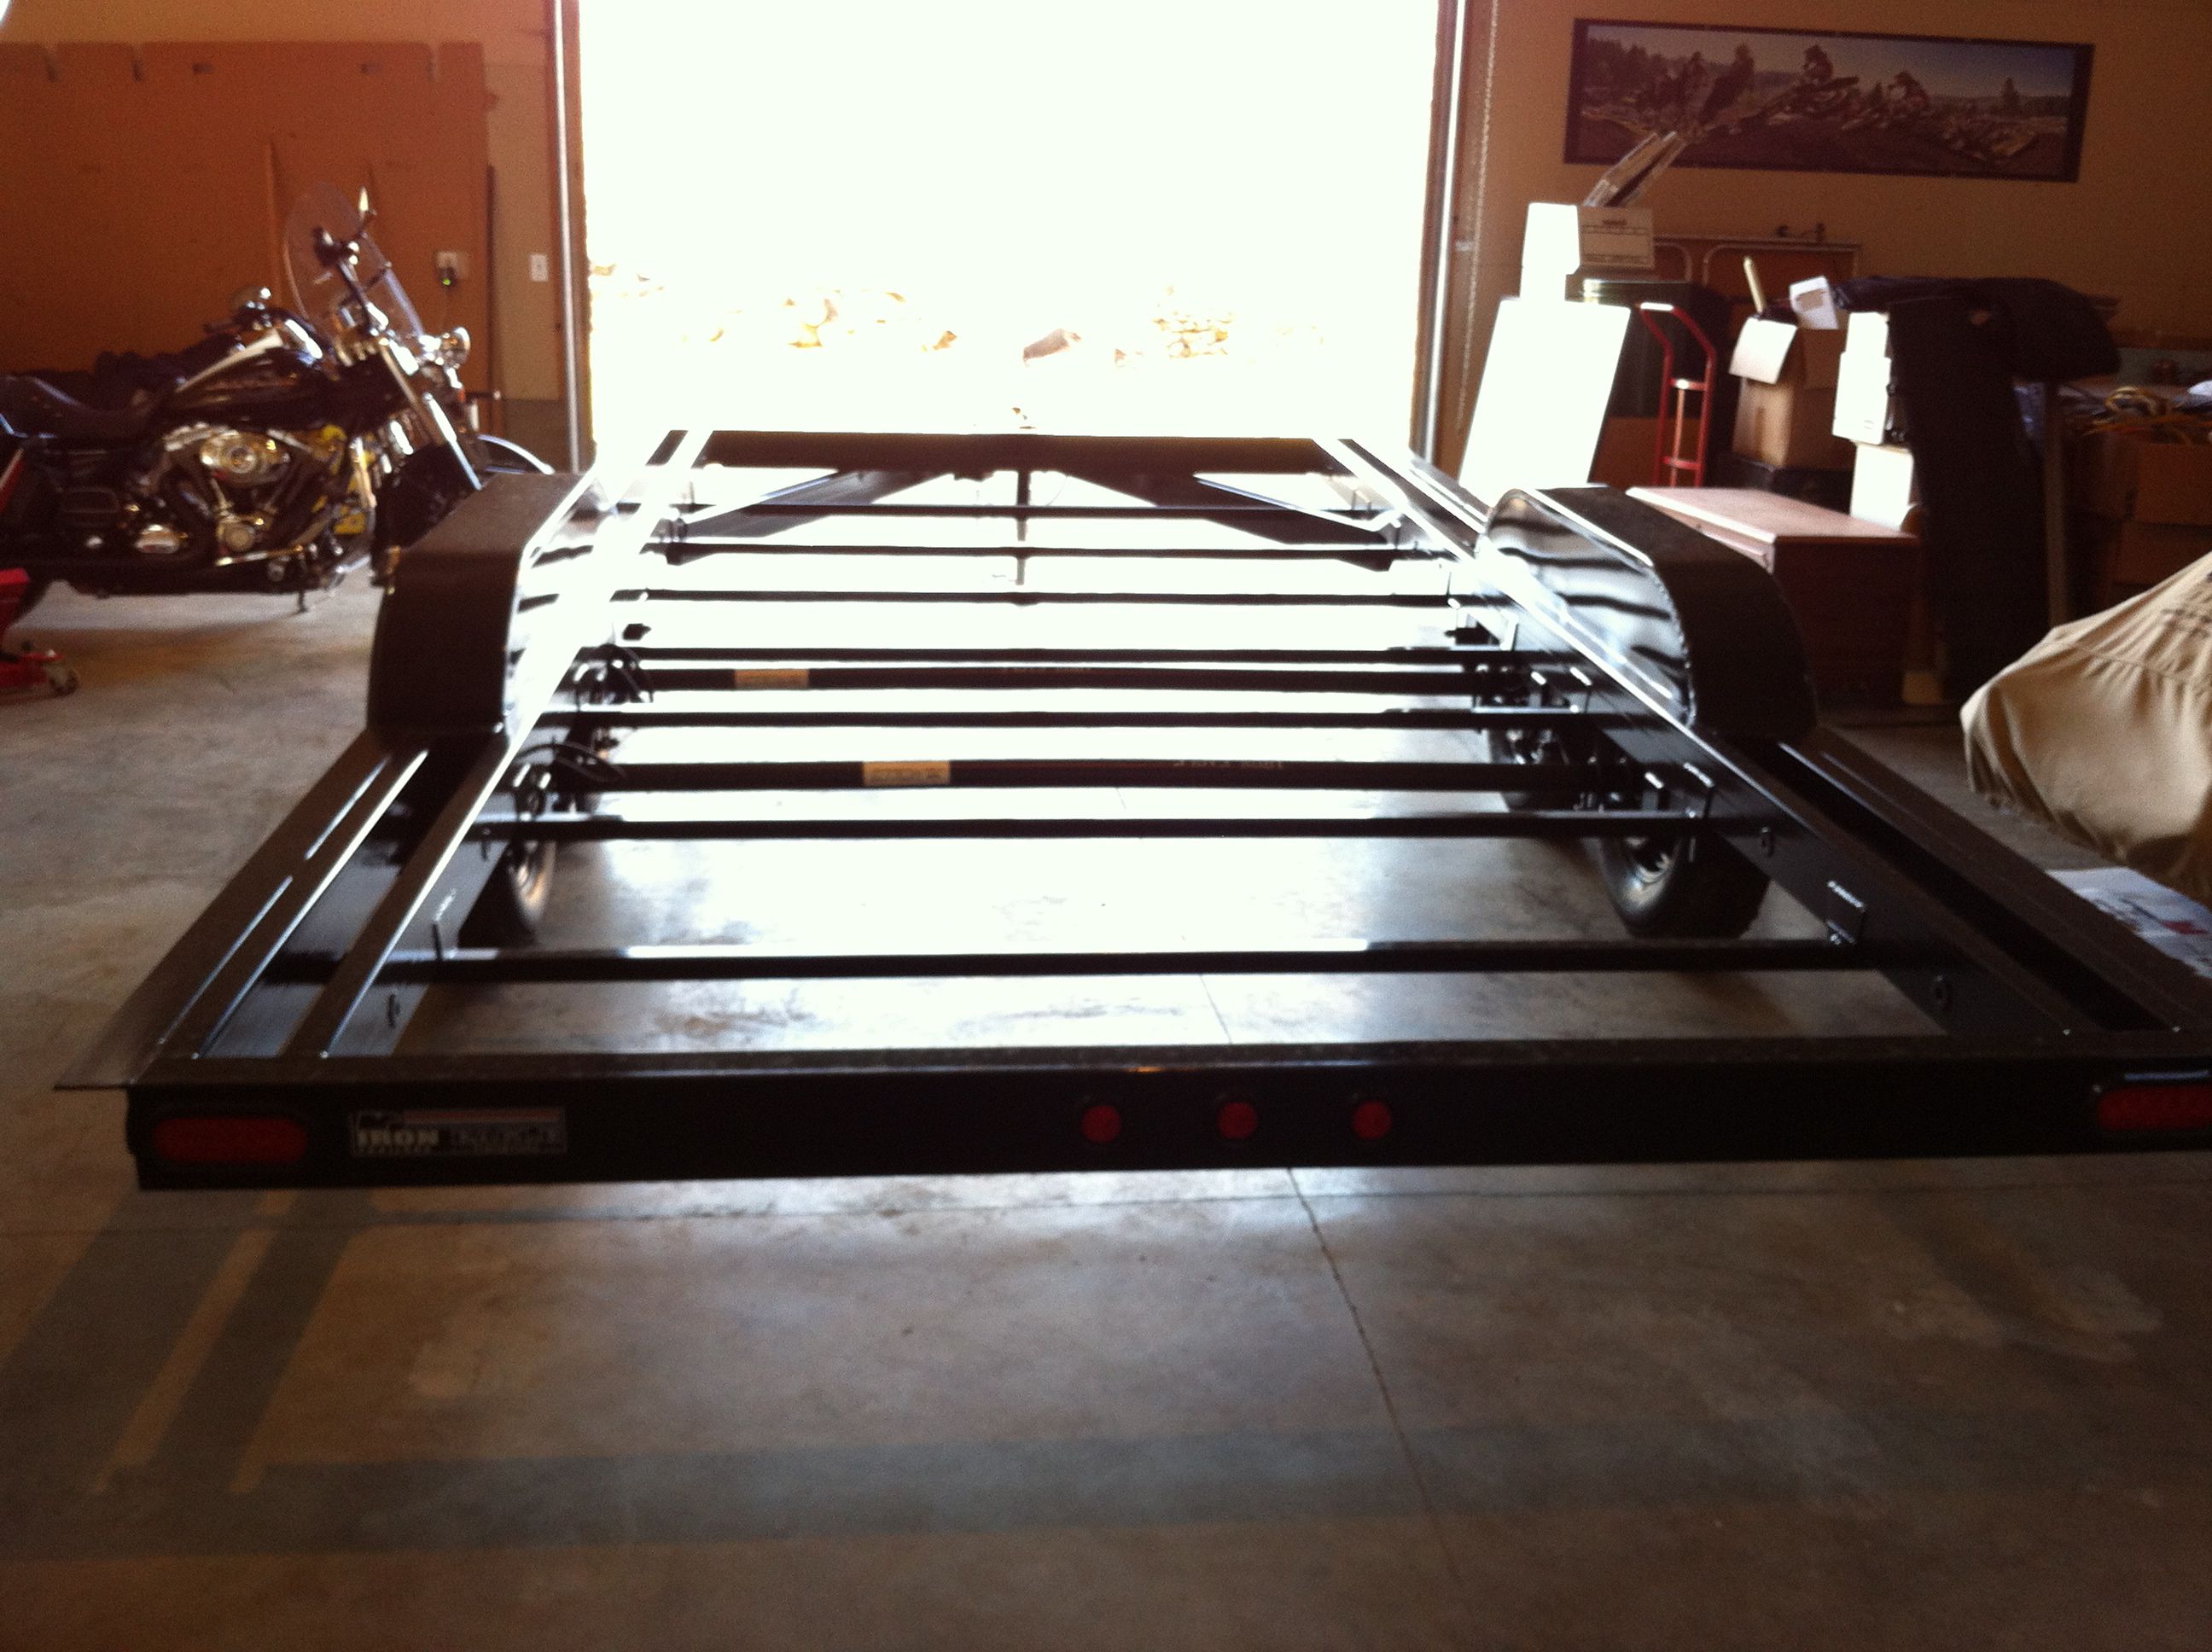
Rock solid. This shows the method PAD and Iron Eagle developed to add extensions along the side. There’s another method Iron Eagle has done that requires less steel if weight is a concern, but you need to frame your house differently; not a big deal to do, but I decided to go with what I was familiar with.
These are the specifications for my trailer:
- Width – distance between outside edges of wheel wells: 8’6″
- Width – distance between outside edges of extensions: 8’4″
- Length not including tongue: 16’6.5″
- Tongue length: ~4′
- Height: 24″ (18″ at hitch)
- Weight: 1185 lbs
- Tongue weight: 80 lbs
- (2) 3500 lb-rated axles = 7000 lbs GVWR (Gross Vehicle Weight Rating – the maximum total operating weight, which includes the weight of the trailer, the house, and anything inside the house)
Lessons learned
Here are a few other things I learned about trailers and towing:
1. Work directly with a trailer manufacturer, not a dealer. There are too many things that can go wrong if you have someone in the middle trying to explain what’s needed to the manufacturer, especially if neither of them are used to customizing for tiny houses. Even though Iron Eagle has dealerships all over the western US and Canada, Rob said that tiny housers should call their manufacturing headquarters in Fairview, Oregon: (503) 667-9358. (On a somewhat related note, be sure to ask your manufacturer what colors of trailer and wheels are available, if that matters to you. Though white wheels would have been fine, something made me ask if they came in black and they did!)
2. Know your hitch requirements. I didn’t fully appreciate the variation that occurs in tow components and hitches, which led to a crash course at the last minute. This might vary with other manufacturers, but this is what was needed for my trailer:
- Vehicle with towing package rated for both the total trailer weight and the tongue weight.
- 2-5/16″ hitch ball diameter with a 1″ shank.
- 2″ square receiver mounted on the tow vehicle, set so that the ball is 18″ off the ground.
- 7 pin round connector wiring harness for trailer lights and brakes.
- Brake controller installed in the tow vehicle.
3. Plan ahead if you’re renting a tow vehicle. Since it was just the unloaded trailer, I thought I could borrow a RAV4 or Tacoma truck from family members until I learned all about the specific hitch requirements. While I could have rented or purchased everything I needed to outfit either of these vehicles, I was running short on time and figured I would just rent a truck already set up. From things I’d seen on tiny house forums, it sounded like no big deal to rent one from U-Haul or other rental companies. Wrong. On the day before I was to pick up my trailer, I called over a dozen places in Portland. They all said that they’ve stopped renting trucks to pull trailers due to liability concerns. Supposedly some U-Haul places will still allow it, but the ones I called had 2″ balls welded on. When all seemed bleak, Dee got the name of a local rental place in Portland that Brittany at The Bayside Bungalow had used to move her tiny house. Fortunately that worked out perfectly. Moral of the story: get friendly with truck owners or leave lots of time to find a rental!
4. The trailer brake failsafe system. When you hook up your trailer, you connect a thin cable to the tow vehicle that is attached ultimately to a little battery on the inside of the tongue. Should there be a catastrophic event where the trailer becomes completely separated from the tow vehicle, the snapping of that cable sends a signal to the battery to immediately discharge all of its juice into the trailer brakes, slamming them on and stopping the trailer from running into anything (even unloaded, a half ton trailer moving at highway speed could do a lot of damage). I just think this is super cool. For some reason it makes me think of an octopus squirting out its ink.

The trailer brake failsafe system.
5. When picking up your trailer and towing it to its final destination, allow more time than you think!
Bringing it on home
So after renting the truck, getting trained on the trailer and doing all the final paperwork, I drove off the lot with the first tangible piece of my tiny house. Dee was along for the ride and caught me by surprise:
It was odd driving it down the Columbia River Gorge highway since the truck was so big I couldn’t feel anything behind or see the trailer out the back. I only knew it was there since it appeared in the little convex side mirrors all distorted and tiny. I kept thinking how different this was going to be once I towed my completed house for the first time.
We made it to my parents completely uneventfully. The only hiccup of the entire operation was backing it into the garage. This involved a very tight 90 degree turn into a narrow door without hitting my dad’s beloved car. I made a few attempts but have yet to develop my backing up skills. Because we were tight on time, Dee jumped in and saved the day.
Dee backing it up.
Right about at this point, the trailer had to make a 90 degree turn without the truck hitting the fence on its far side. And after the turn, the trailer had to be perfectly lined up to fit through the narrow garage door.
At last. The beginnings of Naj Haus.
Later, after returning the truck, I went back to really look at my future home, trying to picture what it would look like in the end. It’s kind of an awesome thing. I took dozens of photos and measurements to be able to complete my final construction drawings since I’ll be doing this remotely from California. It was a very strange feeling to leave it after all the time and effort to get it to its roost, but there’s a lot to prepare and I’m sure the time will fly.
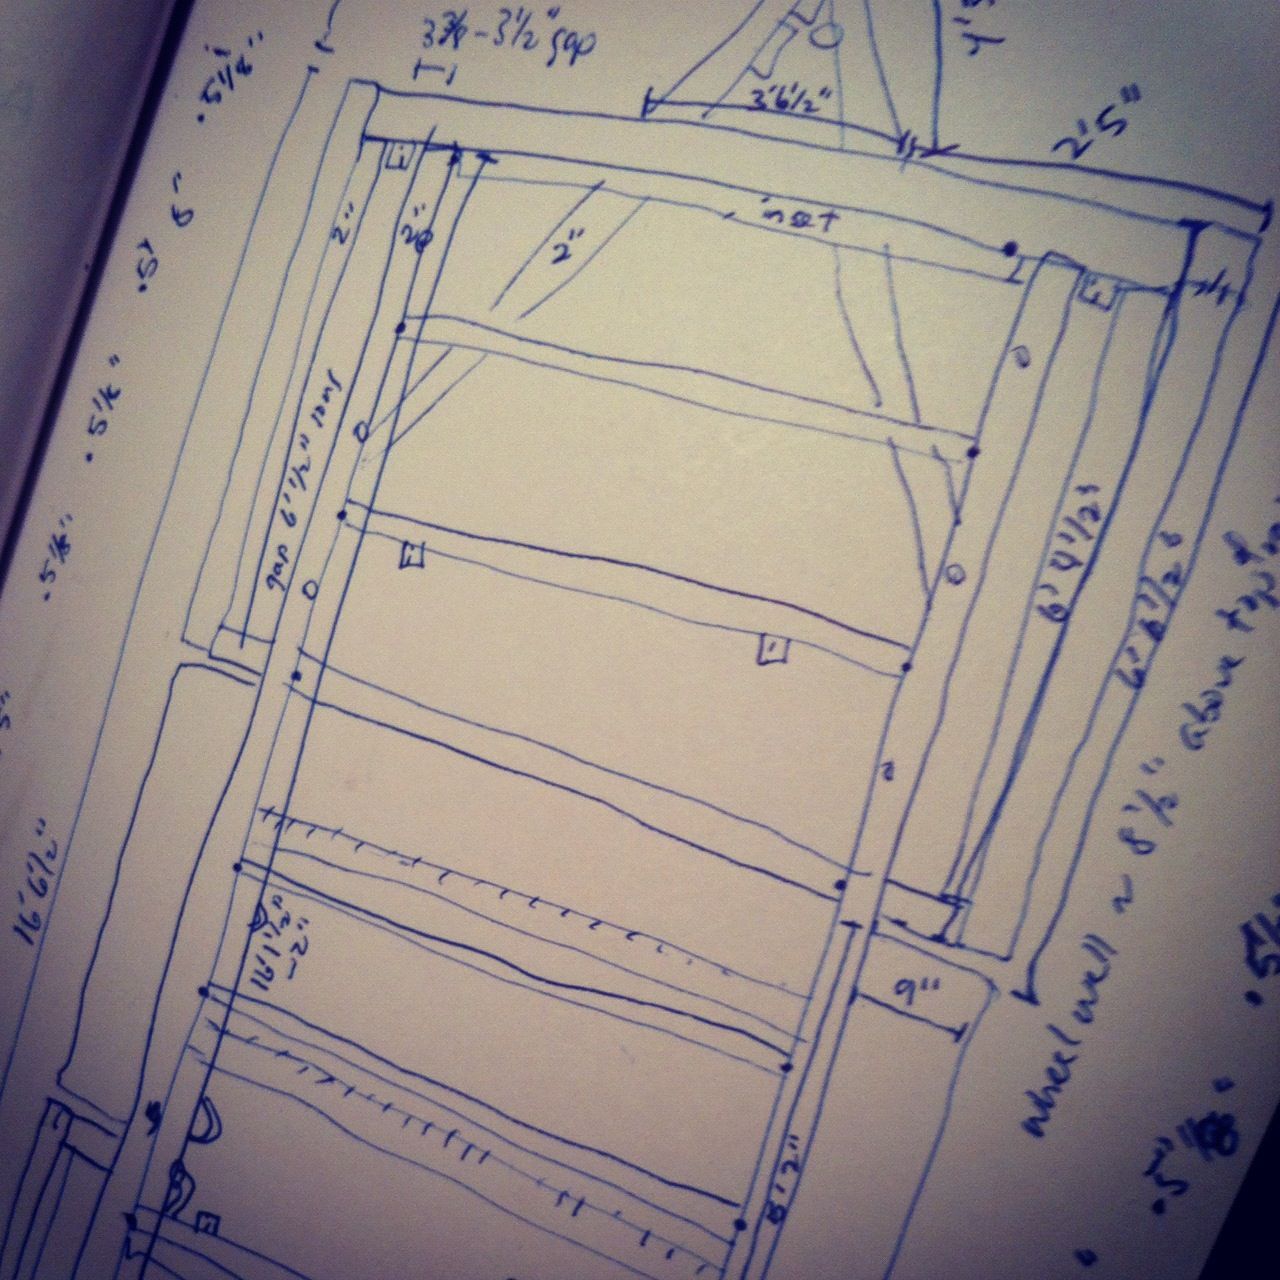
Fodder for the next few months.
I gave a big shout out to Rob and Dee when I ordered my trailer, but then they went above the call of duty and helped me more. Thank you both; I’m deeply grateful. And to my parents for being so accommodating, and for the support from all of my friends and family. I love that my fledgling tiny house is surrounded by all this good energy.

Big congratulations, Kate! Your foundation is solid and in place for the build. It must feel great.
Thanks, A. It feels really good. Wish I could start building now!
Hi Kate,
Great blog, and congrats on the trailer! I just went to the PAD workshop in February….
I really like your thoughts on your trailer design. I worked at Sycan a bunch of years ago (small world moment). Let me know if you can use extra hands on your build this summer. I’d love to help.
Annie J.
How funny you worked at Sycan! That’s great you did the PAD workshop; I hear it went really in-depth. And thanks for the offer to help – I am still working out when I will start and at what points I’ll need extra hands but that’s really great to know!
Greatest tiny house trailer blog post of all time
Thanks, Cameron!
Welcome to the community! So great to have you and what a great blogging start! (-Drew, Tiny r(E)volution)
Thank you, Drew! You’re a great inspiration – I’ve been following your blog and progress. Thanks for all you do for the community. 🙂
Hi Kate!
I just read that tumbleweed is designing trailers also: http://tinyhousetalk.com/tumbleweed-trailers
The primary feature I noticed that stands apart from the tumbleweed design and yours above, are lowering the internal ribs for maximizing the trailer depth (greater insulation and construction space above). The tumbleweed trailers provide vertical “threaded anchor rods” to attach the framing at the flange surface of the trailer where as the PAD/Iron-eagle design offers predrilled and reenforced horizontal anchor bolts below the surface of the trailer flange. Since the height of the house is limited by DOT regulations it seems that the PAD/Iron-eagle design provides extra vertical space. I would also guess that the rib design of the tumbleweed trailers would allow the metal to conduct cold, around the insulation, and directly to the subfloor. Both designs are effective, safe, and likely the best trailers for tiny houses available. I just find it interesting to compare and contrast the strengths of the designs. 🙂 What do you think? Cheers! 🙂
Hi Logan!
Yes, I went through the same thinking and decided that I preferred the PAD/Iron Eagle design. I liked that the subfloor frame was set within the trailer bed and bolted horizontally. It seems like that will keep it more secure on the road – inset versus like a cake on top of plate that could slide off. I don’t imagine this is actually a concern in the Tumbleweed design if you have enough bolts, but you do lose the extra height unless you attach the subfloor directly to the trailer cross ribs. In addition to the 10 horizontal bolt holes (5 on each side), I will also be attaching the walls vertically via tension ties to the angle iron welded to the side rails of the trailer.
Like you, I am also concerned about the thermal bridging where the metal of the trailer meets the floor (on any trailer plan). I am planning on following Derin William’s (http://www.shelterwisellc.com) example of building the subfloor frame about 1/2″ smaller than where it will drop into the lowered trailer bed, putting closed cell rigid foam board in between and then bolting the whole package together via the horizontal bolts and spacers. This way there is a thermal break on the sides, front and back where the trailer frame meets the floor frame. I am also considering positioning my floor joists so they don’t line up over the metal cross ribs, so that there is a thermal break there. On the PAD/Iron Eagle trailer design, the cross ribs are made of a smaller width of steel to save weight and aren’t a necessary part of supporting the floor joists if you use joist hangers.
I’m debating whether to use galvanized metal undercarriage vs. treated plywood due to the vapor issue, and how to provide an thermal break between where the cross ribs meet the undercarriage.
Interested in hearing from others on this! ~ Kate
PAD – Portland Alternative Dwellings (http://www.padtinyhouses.com)
Iron Eagle Trailers (Oregon, http://www.trailerinfo.com)
Pingback: It All Starts With A Trailer | amble greene Tiny House
Thanks for all the info – I’m just starting my tiny house adventure in the Gorge too, and you answered a lot of my questions about getting the right trailer. Just the first step of many…very excited.
Hi Joan! Just resurfacing after a crazy last couple of weeks of building and returning to CA. I’m so glad to hear there is another tiny houser (to be) in the Gorge! I’ll send you an email about the next time I’ll be up if you want to get together.
Great post Kate! I’m looking into purchasing a 16′ trailer and have talked a little with Rob already. From the trailers I have seen from Iron Eagle, it looks like your axles are a little more toward the center? Rob said they would center the axles 20″ behind trailer center (96″-20″=76″). Wheel wells are 66″ long. Which leaves about 3 1/2 feet (76″-33″=43″) behind the wheel well if that makes sense. Yours looks more like 4 feet or more? How did you figure out their placement? Thanks!
Hi Laura – good eye! It has to do with the design of your house and the weight distribution. My house had the loft/kitchen/bathroom over the front (tongue) half and so Rob suggested moving the axles more toward the front. He initially talked about moving them another 6″ or so closer but that would have meant I couldn’t have the door width I wanted (had already had to give up on the french doors idea) and so we compromised, which he said would still be safe to tow. I would just explain your design, if you haven’t, and work with him to find the best solution. He knows his stuff 🙂
Other advice I would offer is you might want to consider 10k lb GVWR if you aren’t. I’m still pretty sure I’ll come in under 7k lbs, but it’s a constant concern and it would be nice to make design decisions without having to worry about it. And be clear with Rob on the exact length of the final trailer. As I said in the post, Rob asked me if I was fine with that fact that IE’s 16′ trailers typically clock in at 16.5′ and at the time I was naively excited about that. In the long run I’ll appreciate those extra few inches, but it has made construction much more difficult (not consistent with standard lumber dimensions, needing to add extra studs, etc.), so give it some thought. Finally, if you are having IE predrill horizontal holes in the side rails to bolt your floor into (which I recommend), talk with them about how the washers are welded on. It’s great to have them for extra strength around the holes, but some of mine were applied a tiny bit off-center which meant that my bolts wouldn’t go through and I had to wrestle with trying to drill through the inner edges of the heavy washers to expand the hole size.
Other than that small detail, I’ve been incredibly happy with my trailer and how it was designed specifically for a tiny house. Iron Eagle is an awesome resource for those in the NW.
Good luck with everything!
Thanks for your response, Kate! I was mostly curious about the axle placement because I have a shed roof design and wanted to have french doors but think I’m going to have to compromise this time as well. I have been considering building on skids which would make the design and weight distribution easier but I haven’t figured out if I would need to get permits, etc. to build and then what it would take to move it. My door is planned to be behind the wheel wells on the back end of the trailer to enter into the great room. I thought it might look a little weird if it was right on the corner plus I want to ensure I have adequate shear strength there as well so I want more space to place it closer to the wheel well. My loft, bath and closet are over the tongue end and galley kitchen over the wheel wells so most weight will be toward the tongue. It seems likely that I will be able to shift the axles forward a bit from the PAD design.
I did ask about the length since from my carpentry experience, I know I want it exactly 16′ due to material dimensions. I know that a few extra inches can create a lot more work which I want to avoid. I have considered the 10k GVWR but think I am going to go with the 7k based on conversations I have had with people and the 16′ homes on 7k trailers I have seen. Just yet another design challenge opportunity! I am also probably going to add on the jack option because it seems cost effective.
Thanks for the washer weld tip. I wonder if you would have to have them welded on or if you could use separate ones when you attach the bolts? I noticed that you had 10 holes drilled, 1 on each side of each joist bay and that other designs have only 6. Was that your suggestion as well?
Good to be thinking about shear stress – sounds like you’re doing detailed research, very important. Am glad you feel comfortable about the 7k axles…makes me feel better about mine!
I decided against the welded on jack option. It probably is fine but when I was ordering I had just read Logan’s post about having to adjust the placement of their jacks to make their door work properly (if I recall correctly) and it seemed like having the flexibility to adjust them relative to the varying ground conditions might be helpful (though you could always add another jack if needed in a particular situation). I don’t know how critical it is to have them welded on. Does seem more reassuring but I think once the weight of the house is on the detachable jacks, they don’t budge…at least on my house currently.
It might be good to add your own washers. I’d see what Rob thinks. Regarding the number of holes, I did tell him that number. It was based on my floor joist design – putting a bolt between each of my 24″ OC joists except where the wheel wells were. So that worked out to 2 pair at the tail end and 3 pair at the tongue end. It may be overkill – at the time I wasn’t sure how much to trust the bolts. I’m now more comfortable with what they can do and ended up putting fewer vertical bolts through the bottom plates of the walls than I had originally planned. All depends on your own comfort level. Look into earthquake retrofitting – I was surprised how much can depend on a 5/8″ bolt/rod. Made me feel better!
Further thoughts on the number of bolts: much depends on your trailer and house design. Because I added the side extensions to my trailer, the weight of the house is actually not on the floor itself, which sits down between the side rails. So really I probably could have gotten away with as little as two pairs of bolts in retrospect. You could also use fewer if your floor is supported on heavier cross ribs (mine is floating just above lighter weight ones). If your walls are on or partly on your floor, you would likely want more bolts. Hope this helps. 🙂
I am doing my research! I am currently house sitting at Sweet Pea while Lina is at Yestermorrow so I am taking advantage of the spatial layout and design considerations.
I had not thought about the ability to adjust non welded on jacks to various ground conditions. Might be a good idea or at least something to talk to Rob about. If welded on, I wonder if their exact placement then really matters as far as holding the weight? I would think so. It would be convenient to have them placed near the ends to be out of the way but then the middle would not be supported. I didn’t see anything on Logan’s blog about jack placement in reference to door, maybe Tammy wrote about it?
I talked to a tiny house builder about the number of floor joist bolts and he said that a pair in each joist bay is more than enough so I will probably go with the ones they typically do. I am not building my walls directly on my floor box as I am planning to build on a flange as well so that should be fine. But better for you to overbuild than underbuild, especially the foundation! Did you have Rob drill holes into the flange for your walls or is that something you did? I feel like that would have to wait until the wall framing is up and you have the exact location of the HTT tension ties.
Thanks again for your helpful thoughts! I have started blogging as well and hope to share what I learn from my build with others. It’s http://lauraklement.blogspot.com/ if you want to follow along.
lol. Not sure why the merinowoolsocks thing came up. I did a bit of internet marketing a few years ago and I guess my computer still remembers my login info. 🙂
I would talk to Rob about jack placement – probably a lot will depend on how the weight ends up being distributed in the final build, but maybe it’s fine to have set jack points. Maybe Logan or Dee told me about the door issue – can’t remember. It wasn’t a problem with the way the house was constructed but with some sloping ground I believe.
You don’t want to pre-drill holes for the vertical bolts since you’ll be covering them up with the subfloor and sill plates and it would be a pain to drill up from below. Plus you might end up adjusting where you place them (I did). You can drill them yourself with just a regular drill and a monster bit and a lot of muscle power. The big trick is to get at least two bits and use a couple drops of machine oil to lubricate them. I used the same bit to drill out my horizontal washer issue and then after I had done a couple vertical holes, it was completely dull. I didn’t realize that was why it wasn’t going through. ‘Bout had an aneurysm trying to get it through, frustrated beyond belief. FINALLY thought to try a new bit and the oil and it went through like butter, leaving me rather sheepish.
Thanks for passing on your blog – will check it out!
Awesome! Thank you so much for your help 🙂
Hi Kate, I just received an email from Logan about why they decided not to weld on the jacks. He said “for simplicity and flexibility.” The varying ground conditions required shifting the jacks to enable the french doors to operate correctly. So it’s more like keeping the squareness of the construction square via the jacks if that makes sense. Dee said she opted to not weld them on due to cost but that Derin and Abel like having them welded on.
Sounds like either way would work and it comes down to what makes you feel most comfortable.
Pingback: Waiting on my trailer | Working Class Houses
Hi Kate, I’ve never commented on here before but I really wanted to let you know how incredibly helpful this blog post has been for me. I picked up my 20′ Iron Eagle trailer earlier this month and am getting ready to start the floor, and this post and the “Floor construction: what lurks beneath” post have been open pretty much permanently on my browser for the past–oh–month and a half.
Thank you so much for all your excellent, well-written information!!!
Thanks, Anna – very nice to hear and glad it’s been useful. Keep in mind that my experiment with putting housewrap inside my floor box is just that – an experiment. It made sense to me from what I understand of building science and my particular set-up (simple, no plumbing) but it may or may not be necessary or effective. Good luck with everything – it’s an exciting journey you’re launching. Cheers to a great 2015!
Ballpark figure, what was the price.on your trailer? I’m sure there’s a lot ti consider but I Iike everything about yours. I’m trying to get an idea in my mind on my trailer price since I’m sure it will be one of my largests expenses.
Hi Stephanie – mine was about $3100. If you know what you’re doing, you can buy used trailers and get them modified for a tiny house, but I know that can sometimes end up costing just as much. To my mind, since it is the foundation of your house, it’s worth investing in a new one. Good luck with figuring it all out!
I found your blog on the morning I am going to pick up my PAD series trailer from Iron Eagle in Portland. I feel really connected to this moment in your life as I am experiencing it myself today. We even have the same name! The biggest difference is I have to drive all the way up from Cali! Should be a fun little 9 1/2 hour day…
I wanted to say that I am really jealous that you already took “The Eagle has Landed” as your blog title because that’s awesome. I will have to think of something else clever.
But more importantly that I had forgotten to call about tow requirements and was frantically searching the internet this morning when by complete accident I ran across your blog, clicked it because the title of the trailer post was brilliant, and then discovered that you had exactly the information I needed.
I am following your blog and will definitely be using it as one of my references throughout the building process!
Thanks Kate!
Oh, so glad it was helpful! I remember well my own panic the day before trying to figure it all out. Wishing you safe travels and a smooth and enlightening build!
Hey Kate, I’m considering buying a trailer from Iron Eagle. I was wondering if you think it’s worth paying extra for the galvanized bottom pan. You used marine-grade 1/4″ plywood for your undercarriage, was the galvanized bottom pan not an option when you purchased your trailer?
Also, can you tell me where you purchased your marine grade plywood?
Thanks!
Hi Rob – sorry for the delay, I’ve been away. You’re right in that the galvanized pan was not an option when I bought my trailer. I could have added it myself but at the time I was planning on putting in plumbing and I had some reservations that if there was ever a leak into the floor, it wouldn’t be able to drain/dry out (not sure the oil paint-coated ply would work any better but I felt like it might have a chance to “breathe” a little better – probably not!). This is probably not a high risk if you are careful and there are advantages to the metal if you might have rodent or insect problems where you are, as well as better protection from rocks kicking up if you plan to take it on the road a lot. I don’t have a strong recommendation for you unfortunately! I got the 1/4″ marine grade ply from Mr. Plywood in Portland. Good luck!